CV Joint Repair: A Practical Step-by-Step Guide
Learn to diagnose torn CV boots, assess joint wear, and safely repair or replace CV joints. This comprehensive how-to covers tools, steps, safety, budgeting, and troubleshooting from Home Repair Guide.

Goal: Diagnose a torn CV boot, assess joint wear, and perform a boot replacement or joint service using a clear, step-by-step approach. You’ll identify symptoms, gather the right tools and parts, and decide whether a DIY repair or professional service is the safest option for your vehicle and skill level.
What a CV joint is and how it fails
A constant-velocity (CV) joint is a crucial part of front-wheel- or all-wheel-drive vehicles, allowing smooth transfer of engine power to the wheels even as the suspension moves. The joint is housed in a metal housing with inner and outer components that rotate on rolling elements. The joint is sealed by a rubber CV boot that keeps grease in and contaminants out. A torn boot is the most common failure mode and is the first sign that the CV system may be compromised. When the boot tears, grease leaks out, dirt and moisture enter, and the joint can wear rapidly. If left unaddressed, this wear leads to grinding, clicking, and eventual joint failure.
According to Home Repair Guide, understanding CV joint anatomy and boot wear is essential for safe, effective DIY repair. This article uses plain‑language explanations and practical steps that homeowners and hobbyists can follow, with clear safety guidelines and a focus on durable outcomes. The phrase repair cv joint appears throughout to emphasize the task you’re undertaking and to help search engines surface this guide to readers seeking practical boot and joint fixes.
Symptoms that indicate a CV boot or joint issue
Common warning signs include a visibly torn boot, grease splatter on the inside of the wheel or underside of the hood, and unusual noises during turns. A loud click when turning can indicate worn or damaged bearings inside the joint, while vibration or shuddering under load may point to excessive joint play. If the boot is torn and grease is leaking, contaminants enter the joint and accelerate wear. Another symptom is stiffness when accelerating or steering, often felt as resistance or harsh response in tight maneuvers. Early detection improves repair options and helps prevent more expensive axle replacements.
Home Repair Guide also highlights that training and preparation matter. Before you dive into a repair, confirm that the symptom set matches a CV joint problem rather than a wheel bearing or suspension issue. Cross-test with safe driving patterns in a controlled environment to gather more data before disassembly.
The role of the CV boot and why tears matter
The CV boot’s job is to seal in the grease and exclude dirt, moisture, and road debris. When the boot tears, the joint loses lubrication and becomes contaminated, leading to accelerated wear of the race, balls, and cage inside the joint. Once the grease is gone or the contaminants accumulate, the joint can seize or develop excessive play. A failed CV joint doesn’t just cause noise; it can compromise steering control in extreme situations, especially if the joint fails suddenly while driving. Replacing the boot without inspecting the joint may only provide a temporary fix if the joint is already worn.
Home Repair Guide emphasizes that boot replacement is typically the first line of defense, but you must assess joint wear before you decide on a full replacement. If the joint shows metal debris, pitting, or excessive play, boot replacement alone won’t restore reliability. In such cases, axle or joint replacement is likely the safer, longer‑term solution.
DIY vs professional repair: deciding what makes sense
Some vehicles allow boot replacement with minimal disassembly, and a DIY repair can be satisfying and cost‑effective for advanced hobbyists. However, many CV joints are integrated with the axle and require careful alignment, precise torque specs, and lubrication re‑porting. If you’re not confident with drivetrain disassembly, or if the axle must be removed from a transmission, professional service may save time and reduce risk. Consider your comfort with heavy lifting, the availability of a proper torque wrench, and access to a safe work space. When in doubt, consulting a shop for a diagnostic can prevent irreversible damage and unexpected downtime.
As Home Repair Guide notes, the goal is a reliable repair that lasts, not a rush job that leads to repeat failures. Evaluate the vehicle’s age, mileage, and the likelihood of other worn components before choosing DIY vs pro service. This approach helps you avoid unnecessary costs and ensures you’re making a decision grounded in practical, real‑world constraints.
Safety basics before you start
Working on a CV joint involves heavy lifting and exposure to hot components, sharp edges, and rotating parts. Always work on a stable, level surface and use jack stands rather than relying on a lone jack. Wear safety glasses, gloves with good grip, and closed‑toe footwear. Disconnect the battery if you’ll be near electrical components, and ensure the vehicle cannot roll by applying the parking brake and chocking the wheels. Keep a fire extinguisher within reach and have a clean, organized workspace to avoid accidents. Finally, follow your vehicle’s service manual for specific torque specs and procedures; never improvise fasteners or reassemble with incorrect torque.
Diagnostic steps you can perform before disassembly
Begin with a visual inspection of the CV boot for tears, cracks, or grease leakage. Move to a gentle wheel turn to listen for clicking or grinding noises, which point to joint wear. If you can safely access the boot, wipe away excess grease to inspect the joint for play by manually moving the axle shaft—excessive lateral movement indicates wear. If you find a torn boot and dirty grease, plan for boot replacement and joint inspection immediately. Finally, confirm there are no other drivetrain issues that could masquerade as CV joint symptoms, such as wheel bearings or steering components.
Common repair approaches and their trade-offs
Boot replacement with a new boot kit is common, especially if the joint is otherwise in good condition. This approach preserves the axle and can be cost‑effective if wear is minimal and the boot tear is isolated. If the joint shows significant wear—visible pitting, missing grease, or excessive play—replacing the entire axle or a remanufactured CV joint is often the more durable choice. In some cases, you may be able to press out and replace only the inner/outer race, but this requires specialized tools. Consider the vehicle’s age, alignment implications, and the availability of compatible parts when deciding which route to take.
Budgeting and planning: parts, tools, and contingencies
When budgeting for a CV joint repair, plan for parts, fluids, and potential professional labor if needed. Boot kits, grease, and clamps are relatively affordable, but axle replacement or professional diagnostics can add to the total cost. Always include a contingency for potential hidden damage uncovered during disassembly. If you own multiple vehicles, consider whether you have the time and space to complete a repair yourself or if a shop would be more efficient. Remember that a high‑quality boot kit and correct grease are vital for long‑lasting performance, so avoid ultra‑cheap components that could fail prematurely.
Maintaining your CV joints after repair
After a successful repair, keep an eye on the boot for new signs of wear or tears and check for grease leaks periodically. Regularly inspect the area for road debris and damage after long trips or off‑road use. A routine maintenance habit, like a quick visual check every few months, helps catch issues before they become serious. If you notice abnormal noises again or new leaks, re‑evaluate the joint condition and consider a professional assessment to prevent further damage.
Troubleshooting common issues after repair
If you still hear clicking or experience vibration after installation, double‑check boot placement and clamp tightness. Incorrect boot positioning can cause rubbing and accelerated wear. Ensure the axle is properly seated in the transmission and that all fasteners are torqued to the manufacturer’s specification. If noises persist, re‑inspect the joint and consider re‑lubrication or replacement of worn components. Remember to perform a cautious test drive in a safe area to confirm drivability.
When to stop and call a pro
If you encounter significant joint play, grinding sounds with no obvious boot damage, or if you must remove the axle from the transmission to service the joint, it’s prudent to seek professional help. An expert technician can diagnose hidden wear, check for related drivetrain issues, and ensure correct alignment and torque specifications. In many cases, a pro can complete the job in a single visit, reducing downtime and minimizing the risk of unintended damage from DIY mistakes.
Tools & Materials
- Floor jack(Rated for your vehicle weight; place on a flat surface)
- Jack stands(Use at least two stands for stability)
- Lug wrench and socket set(Metric sizes; check your lug nuts' size)
- Torque wrench(Follow vehicle service manual specifications)
- CV boot kit (inner/outer boot, clamps, grease)(Choose a kit compatible with your axle)
- Snap ring pliers(For securing the joint if applicable)
- Pry bars and mallet(Use carefully to avoid damaging components)
- Clean rags and solvent(Remove old grease and debris)
- Grease for CV joints(High-temperature CV grease)
- Gloves and safety glasses(Personal protective equipment)
- Replacement axle or CV joint (if necessary)(Only if wear is confirmed)
- Wheel chocks(Place in front and back of wheels)
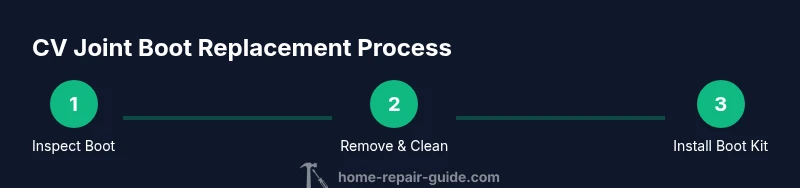
Steps
Estimated time: 2-4 hours
- 1
Park and secure the vehicle
Park on a flat surface, engage the parking brake, and place wheel chocks to prevent movement. This initial safety step sets the stage for all subsequent work and minimizes the risk of the car rolling while you work.
Tip: Double‑check the parking brake is fully engaged before raising the vehicle. - 2
Loosen lug nuts before lifting
Loosen the lug nuts slightly while the car remains on the ground. This prevents the wheel from turning when you later remove the lug nuts with the wheel off.
Tip: Only loosen while the wheel is still contacting the ground to avoid spinning the tire. - 3
Lift vehicle and support with stands
Use a floor jack to lift the car and place jack stands under solid suspension points. Ensure the vehicle is stable and never work under a car supported only by a floor jack.
Tip: Test the stability by gently pushing the car from the side before removing the wheel. - 4
Remove the wheel and shield
Remove the lug nuts completely and take off the wheel. If your vehicle has a splash shield, detach the shield to access the CV joint area.
Tip: Keep fasteners in a labeled tray to avoid losing them. - 5
Detach the axle from the hub
Remove the axle nut and disconnect the halfshaft from the wheel hub. Use penetrating oil if stubborn fasteners resist removal, and support the hub to avoid strain on the brake components.
Tip: Do not force the axle out; if the joint binds, check for retaining clips or a collar. - 6
Remove the CV boot and inspect
Carefully cut away or unclip the torn boot, then inspect the joint for wear, pitting, or missing grease. Wipe clean to reveal the metal surfaces and look for debris that might indicate contamination.
Tip: Look for metal shavings or unusual scoring within the race as signs of advanced wear. - 7
Clean, repack, and apply new grease
Clean all joint surfaces, repack with fresh CV grease, and apply a liberal amount of lubrication to all moving parts. Reinstall a new boot kit with proper clamps and ensure a clean seal.
Tip: Use the grease specified for CV joints; improper grease can reduce performance. - 8
Reassemble the joint and axle
Reinstall the boot, secure clamps, and reinsert the axle into the transmission. Make sure all fasteners are torqued to the manufacturer’s specification and that the joint sits fully seated in the hub.
Tip: Avoid pinching the boot during reassembly; check alignment as you slide the axle back. - 9
Torque fasteners and reinstall wheel
Torque the axle nut and wheel fasteners to spec, reinstall the shield if removed, and reinstall the wheel with the lug nuts in a star pattern. Lower the car only after all fasteners are secure.
Tip: Use a torque wrench for accuracy; overtightening can damage components. - 10
Test drive and final inspection
Lower the vehicle, perform a cautious test drive in a safe area, and listen for clunks or clicks. After the test drive, recheck all fasteners and look for any signs of leaks or abnormal grease around the CV area.
Tip: If you hear new noises, stop and recheck the boot positioning and joint seating.
FAQ
What is a CV joint and where is it located?
A CV joint is a constant-velocity joint at each end of the drive shaft that transfers power to the wheels while allowing for suspension movement. It’s connected to the axle and usually protected by a rubber boot. Tears in the boot can lead to joint wear if not addressed promptly.
A CV joint is on the drive shaft near the wheel; it transfers power while the suspension moves. Boot tears can lead to rapid wear if not fixed.
Can I repair a CV joint without removing the axle?
In many cases, you can replace the boot and re‑grease the joint without fully removing the axle, but some vehicles require axle removal for proper boot replacement or joint inspection. Refer to your service manual for specifics.
Often you can replace the boot without removing the axle, but not always. Check your manual for details.
What are common signs that the CV joint is worn?
Common signs include clicking when turning, vibration under acceleration, grease on the inside of the wheel, and visible boot damage. If you hear grinding or feel a clunking sensation, get a professional assessment.
Look for clicking when turning, vibration, grease on the wheel area, or visible boot damage.
Is boot replacement enough to fix a bad CV joint?
Boot replacement alone may not fix a worn joint. If the joint shows significant wear or play, replacing the axle or the joint assembly is often necessary to ensure reliability.
Boot replacement alone might not fix a worn joint; replacement may be required.
How long does a CV joint repair typically take?
Repair duration varies by vehicle, skill level, and whether the axle must be removed. A simple boot replacement can take a couple of hours; more involved repairs may take longer at a shop.
Duration depends on vehicle and whether the axle needs removal; expect a few hours for boot replacement and more time for full joint replacement.
What should I budget for a CV joint repair?
Budget considerations include parts (boot kit or joint/axle), lubricants, and potential labor. Avoid ultra‑cheap parts and factor in possible unexpected wear discovered during service.
Plan for parts, lubricants, and possible labor; avoid the cheapest components if durability matters.
Can I drive a car with a failed CV joint?
Driving with a severely worn or failed CV joint can cause loss of control or an in‑drive failure. If you notice alarming noises or grease leakage, avoid driving and seek professional help.
Don’t drive long with a failing CV joint; seek help to avoid losing control.
What tools are essential for a CV joint boot replacement?
You’ll need a floor jack, jack stands, socket set, torque wrench, CV boot kit, and basic hand tools. Additional specialized pliers may be required for some clamps.
Essential tools include jacks, stands, sockets, a torque wrench, boot kit, and pliers.
Watch Video
Key Takeaways
- Identify boot tear early to prevent joint wear.
- Decide between boot replacement and full joint/axle replacement based on wear.
- Prioritize safety: use stands, PPE, and correct torque specs.
- Replace with quality parts to ensure durability.
- Test drive carefully and re‑check all fasteners after repair.