Ball Joint Repair: A Step-by-Step Auto Suspension Guide
Learn to inspect, remove, and replace a worn ball joint with a safe, step-by-step approach. This Home Repair Guide tutorial covers tools, safety, torque specs, and practical guidance for DIYers and pros alike.

Ball joint repair is replacing a worn suspension joint to restore steering control and ride quality. This guide shows when to replace, how to disassemble and install a new joint, and safety steps for DIY or pro involvement. According to Home Repair Guide, start by confirming compatibility and torque specs from the vehicle manufacturer, then follow a structured, safe workflow.
What ball joints do and why repair matters
Ball joints connect the control arms to the steering knuckles, allowing smooth pivoting of the front wheels. They combine a ball and socket with a stud that fits into the suspension linkage. Over time, ball joints wear from road shocks, moisture, and stress from steering. When worn, they cause play in the steering, clunking noises, and uneven tire wear. Ball joint repair is essential to maintain alignment, handling, and safety. According to Home Repair Guide, addressing worn ball joints early prevents further damage to the suspension and steering rack.
Safety first: tools, PPE, and hazards
Before you begin ball joint repair, put safety first. Wear eye protection, gloves, and sturdy footwear. Secure the vehicle on a level surface and use a reliable jack stand support; never rely on a hydraulic jack alone. Keep a clean, organized workspace and have a fire extinguisher or first aid kit accessible. When working around the braking system and steering components, depressurize the system and avoid contact with pressurized lines. The goal is to reduce risk and protect you and others while performing ball joint repair.
Diagnosing a failed ball joint: symptoms and checks
Common signs of a worn ball joint include steering play, a clunk when going over bumps, and uneven tire wear. You may notice a squeak or grinding noise when turning, or the wheel feels loose in the knuckle. To diagnose, perform a controlled test: with the vehicle on stands, grasp the wheel at 9 and 3 o'clock and check for vertical and lateral movement. If movement exceeds a small tolerance, a ball joint replacement is likely needed. For accurate assessment, consult a repair guide and your vehicle's service manual, as recommended by Home Repair Guide.
Preparing your workspace and plan
Plan your ball joint repair with a clear checklist. Gather the correct replacement joint by year, make, and model, and verify compatibility with the steering knuckle and control arm. Read maintenance notes from the manufacturer and keep torque specs handy. Organize fasteners in labeled trays, and set up a trash bag or container for worn components. Establish a sequence for disassembly that minimizes risk to other components and reduces reassembly errors. A good plan speeds up ball joint repair while improving safety and results.
Disassembly: removing the old ball joint
Disassembly starts with removing the wheel, brake caliper, and rotor to access the suspension. Use penetrating oil on stubborn fasteners and gently pry the ball joint away from the knuckle using a ball joint separator or a suitable tool. Keep track of which fasteners came from where, and note the orientation of components for correct reassembly. If the joint is pressed into the control arm, you may need a ball joint press or professional service. Follow the vehicle-specific sequence for ball joint replacement and avoid forcing parts beyond their limits.
Replacement options: OEM vs aftermarket, selecting the right joint
You’ll encounter OEM and aftermarket ball joints with varying designs. Consider compatibility with your control arm, CV axle clearance, and the expected load. Higher-mileage or performance vehicles may benefit from heavy-duty joints or greaseable designs. Read warranty terms and confirm whether a full kit or a single joint is appropriate. For most DIY repairs, choose a reliable aftermarket option that matches the original geometry and manufactured specs. Always cross-check the replacement with the vehicle’s service data.
Reassembly and alignment considerations
Reassembly requires precise torque on all fasteners and correct seating of the joint in the knuckle. Reinstall control arms, calipers, and any linked components, then reinstall the wheel. Remove the jack stands and lower the vehicle slowly, taking care to keep the steering straight. After a ball joint replacement, a professional alignment is often needed to restore proper geometry and tire wear patterns. If you have alignment equipment, you can perform a basic check, but verify with a shop if in doubt.
Testing and final checks after replacement
With everything reassembled, perform a careful road test in a safe area. Listen for abnormal noises, test steering response, and check for vibrations at speed. Check the tire pressure and inspect the area around the joint for signs of leakage or binding. If any issue remains, revisit steps for proper seating or consider professional inspection. Keeping a log of maintenance helps you monitor wear and plan future ball joint repairs.
Common mistakes and pro tips
Mistakes to avoid include skipping the vehicle's service manual torque specs, ignoring alignment needs, and failing to support the vehicle properly during work. Pro tips: photograph each step, label fasteners, and work with the correct tools for ball joints. Use penetrating oil and avoid forcing joints beyond their limits. If you’re unsure about pressed joints, seek professional help to prevent suspension damage and safety hazards.
Tools & Materials
- Floor jack(Solid lifting point under the vehicle frame)
- Wheel chocks(Place in front of and behind the wheels to prevent rolling)
- Jack stands(Use rated stands after lifting; never rely on jack alone)
- Lug wrench(To remove lug nuts and keep wheel from rotating)
- Metric socket set(Common sizes: 17mm, 19mm; check your vehicle spec)
- Breaker bar(Helps loosen stubborn bolts)
- Ball joint separator or pickle fork(Required to separate joint from knuckle)
- Torque wrench(To reach manufacturer torque specs)
- Replacement ball joints (kit or individual)(Match vehicle make/model and joint type)
- Ball joint press (if required)(Some applications need a press)
- Shop towels and degreaser(Clean surfaces and tools)
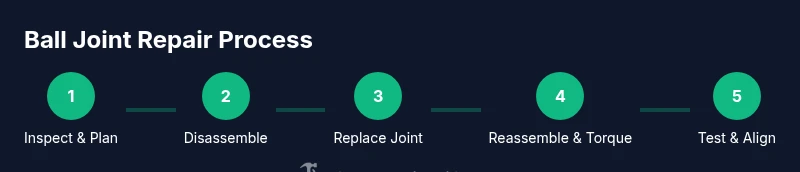
Steps
Estimated time: 2-6 hours
- 1
Secure the vehicle
Position the vehicle on a level surface and engage the parking brake. Place wheel chocks, then lift the car with a floor jack at a safe point. Set the vehicle on jack stands before touching any suspension components.
Tip: Always verify stability on the stands before proceeding. - 2
Remove wheel
Loosen lug nuts while the wheel is on the ground, lift, and remove the wheel to expose the suspension. Inspect the wheel for any obvious damage during removal. Keep the wheel nearby for easy reinstallation.
Tip: Use a torque-limiting pattern when reinstalling lug nuts. - 3
Access the joint
Remove any components obstructing the joint, such as the brake caliper and rotor if needed. Apply penetrating oil to stubborn fasteners and work them free with the appropriate socket. Verify the joint’s location and orientation before disassembly.
Tip: Label fasteners and take photos to aid reassembly. - 4
Detach the old joint
Loosen the fasteners holding the ball joint to the control arm and knuckle. Use the ball joint separator or press to separate the joint from the knuckle. If the joint is pressed in, you may need a ball joint press and professional assistance.
Tip: Don’t force parts beyond their limits; easing with heat can damage components. - 5
Prepare new joint
Inspect the new joint for defects and confirm the correct type (greaseable vs. sealed, upper vs. lower). If applicable, grease the joint before installation according to the manufacturer’s instructions. Check the orientation versus the old joint.
Tip: Keep new joints clean and dry prior to installation. - 6
Install new joint
Fit the new joint into the control arm or knuckle as required, align the mounting holes, and place fasteners. If a press or special tool is required, use it to ensure full seating. Start with hand-tightened fasteners, then proceed to final torque.
Tip: Always torque to the OEM specification in a crisscross pattern when applicable. - 7
Reconnect and torque
Reattach any previously removed components, including the caliper and rotor. Tighten all nuts and bolts to the vehicle’s torque specs, using a torque wrench for accuracy. Double-check fasteners for snugness and absence of gaps.
Tip: Re-check torque after the initial test drive as hardware can settle. - 8
Reassemble and lower
Reinstall the wheel, snug the lug nuts, and lower the vehicle from the stands. Torque the lug nuts to the manufacturer spec with the wheel on the ground. Remove the jack stands and verify that the wheel spins freely without rubbing.
Tip: Make sure the steering is centered before final lowering. - 9
Test drive and confirm
Take a cautious test drive on a quiet stretch to verify handling and braking. Listen for unusual noises and monitor for vibrations. If the steering feels off or there are new sounds, stop and recheck the installation and alignment.
Tip: If any abnormal feel persists, schedule a professional alignment check.
FAQ
Do I need to replace both ball joints at the same time?
If one joint shows wear, inspect the opposite joint for similar play; replacing both on the same axle is often recommended to maintain even wear and handling.
If one joint shows wear, inspect the other as well; replacing both on the same axle is commonly advised to keep steering balanced.
Can I reuse the control arm with a new ball joint?
Many ball joints press into standard control arms, but if the arm is damaged or worn, replacing the arm may be necessary. Follow manufacturer guidance.
You can usually reuse the control arm if it's in good condition and the new joint fits; otherwise replace the arm.
Is ball joint repair DIY-friendly for beginners?
Ball joint work is moderate to advanced; it requires proper tools and safety. If you lack a press or accurate torque specs, consider professional service.
It’s doable for DIYers with the right tools, but don’t rush; if in doubt, hire a pro.
What are signs of a failing ball joint?
Symptoms include clunking noises, steering looseness, and uneven tire wear. A visual check may reveal a torn boot or excessive play when the wheel is moved.
Watch for clunking, wandering steering, or uneven tire wear—these point to a failing ball joint.
Will replacing a ball joint affect wheel alignment?
Yes, a ball joint replacement can affect alignment; a post-repair alignment is usually required to restore proper geometry and tire wear patterns.
Yes, you’ll likely need an alignment after replacement.
Are OEM and aftermarket ball joints interchangeable?
Aftermarket joints can be compatible, but verify fit, geometry, and load ratings with the vehicle data. OEM joints often match exact factory specs.
Aftermarket joints can work if they match the factory specs; check compatibility first.
Watch Video
Key Takeaways
- Inspect wear early to prevent suspension damage
- Use the right tools and torque specs
- Align after replacement for proper tire wear
- Document each step to simplify reassembly
- Consult a professional if you’re unsure about pressed joints