How to Repair and Disenchant in Minecraft
Master repairing and disenchanting in Minecraft with clear steps, essential tools, and XP-cost tips to keep weapons, armor, and tools durable and efficient.

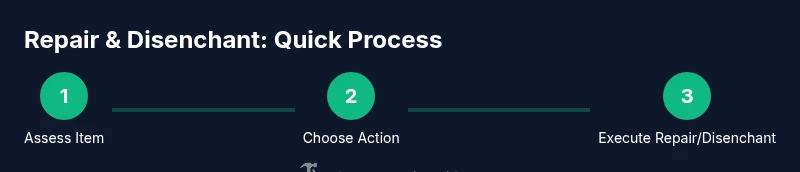
Learn how to repair and disenchant in Minecraft by using an anvil to restore durability and merge enchantments, and a grindstone to remove enchantments. This guide covers when to repair or disenchant, the tools you need (anvil, grindstone, XP), and practical step-by-step examples for weapons, armor, and tools.
How do you use repair and disenchant in minecraft
In Minecraft, repairing and disenchanting are essential skills for keeping gear effective. This detailed guide explains the mechanics and provides practical workflows you can apply in your worlds. According to Home Repair Guide, applying a methodical repair workflow—plan, execute, review—works equally well in real houses and in-game tool management. The core idea is to manage durability and enchantments with the right tools, track XP costs, and avoid wasting resources. By understanding when to disenchant versus when to repair, you can extend the life of weapons, armor, and work tools without breaking your progression or your XP budget. The goal here is to give you a clear, actionable path that you can follow step by step, with explanations for the why behind each action.
The core tools: Anvil and Grindstone
The two primary devices you will rely on are the Anvil and the Grindstone. Anvils let you repair items, merge enchantments, and repair with other items, while Grindstones remove all enchantments and can reset an item to its unenchanted state. XP costs apply to both processes, and costs rise with higher-tier items and more enchantments. Treat these tools like the critical levers in a home workshop: the right choice at the right time saves you resources and time. Home Repair Guide’s workflow philosophy emphasizes planning, safety (in-game safety, i.e., avoiding wasted XP), and deliberate decisions about which enchantments to keep, transfer, or remove.
Why disenchant? When to remove enchantments
Disenchanting is a strategic move when an enchantment is not valuable to your current playstyle or when you want to replace it with a different enchantment. A Grindstone clears all enchantments from a weapon, tool, or piece of armor, returning the item to an unenchanted state and removing that layer of complexity. This can be preferable to repairing an item with a costly enchantment that you seldom use. It also lets you start fresh with new enchantments from an enchantment table or an anvil combo. Before disenchanting, consider whether the resulting unenchanted base item will still meet your needs and whether you can re-enchant efficiently later.
Repair mechanics and XP costs
Repairing in Minecraft uses anvil costs that depend on the item’s current durability and any enchantments attached. Repair through anvil merges two items of the same type, or uses the material you place in the second slot to restore durability. Each operation consumes XP levels or requires “cost” in XP to perform. The XP cost grows as you repeatedly repair or combine items, so prudent planning helps avoid escalating costs. Think of XP as your in-game budget; you’ll want to budget for repairs across your play session rather than paying a large fee at the end. This section highlights how to balance durability with enchantments to maximize efficiency and minimize XP drain.
Step-by-step example: repairing a weapon and managing enchantments
A practical example helps you see the workflow in action. Suppose you have a sword with a few useful enchantments but reduced durability. Start by evaluating whether any enchantments are essential for your current playthrough. If a critical enchantment is present, consider whether you can preserve it by disenchanting the current sword and applying the enchantment to a stronger base item later via an anvil or an enchanted book. If the enchantments are not worth keeping, you can disenchant to clear them and then repair with a compatible material to restore durability. The exact XP cost depends on the enchantments involved and the durability loss.
Step-by-step example: repairing armor and prioritizing enchants
Armor durability is equally important. If your chestplate or helmet has a strong enchantment that you want to preserve, you may repair and merge it with a stronger base piece while keeping the enchantment. If the enchantments are not crucial, disenchanting may be preferable to free up XP and allow you to re-enchant later. Use the Grindstone to strip away enchantments you don’t want and the Anvil to repair by combining with a similar piece or with a material. This approach helps you maintain protection while extending your gear’s lifespan.
Step-by-step example: repairing tools and swords efficiently
Tools and swords often take a beating in day-to-day exploration and combat. Use the Anvil to combine a damaged tool with a fresh one of the same type to restore durability, while transferring any valuable enchantment. If an enchantment is not worth keeping, disenchanting via the Grindstone can help you repurpose the piece. Always compare the XP cost and the resulting durability before finalizing the repair. The aim is to reach a durable, enchanted setup that serves your needs without draining XP reserves.
Common mistakes and how to avoid them
Common mistakes include over-relying on expensive enchantments, ignoring XP costs, and failing to back up your gear by repairing with simpler items first. To avoid wasted XP, plan repairs and disenchantments in advance: identify which items will be used most, which enchantments remain valuable, and how to migrate enchantments to new items when needed. Keeping a small stock of repairable items can prevent expensive repairs during late-game exploration.
Edition differences and constraints
Java Edition and Bedrock Edition share many mechanics, but there are subtle differences in how enchantments, anvils, and grindstones behave. If you’re playing on Bedrock, some combinations and cost calculations can differ slightly from Java. Always test your setup on a small sample item before committing to a long repair plan. This consistency helps avoid surprises during a raid or long mining sessions.
Advanced strategies: reforging and enchantment planning
If you want to maximize performance, plan enchantments with long-term goals in mind. Enchanted books can be stored for later use, and you can re-forge items using anvils with specific enchantments you know you’ll cast again. Keep a spreadsheet or memory of which enchantments work best with your play style, and use grindstones to clear outdated enchantments when needed. This approach helps you build highly customized gear tailored to your preferred combat or survival strategy.
Real-world scenarios and planning ahead
In longer play sessions, you can plan a repair schedule that minimizes XP costs: repair high-use items early, disenchant unwanted enchantments, and save materials for the most-used gear. Think through scenarios like long expeditions, boss fights, or farming trips where durability and enchantment choices have the greatest impact. A thoughtful plan helps you maximize the life of each item while staying within your XP budget.
Troubleshooting: what to do when XP runs low
If you run low on XP, consider disenchanting less-critical items to free up XP for essential repairs. Alternatively, repair durability using lesser-cost methods, such as applying smaller repairs first before moving to bigger repairs. If you can, obtain XP through typical in-game activities like mining, farming, or trading, and then return to repairs with a renewed XP pool. A proactive approach prevents delays during crucial moments.
Authority sources (for further reading)
For readers seeking deeper context about game mechanics and enchantment behavior, consult third-party resources and educational material that explain similar planning and maintenance concepts in structured environments. This page keeps the focus on practical in-game workflows while providing a foundation for adopting a methodical repair approach.
Tools & Materials
- Anvil(Used to repair items, merge enchantments, and manage durability costs)
- Grindstone(Used to disenchant items and remove all enchantments, clearing the enchantment state)
- Experience levels (XP)(XP is spent to repair and combine items; plan XP usage to minimize waste)
- Material for repairs (e.g., iron ingots, diamonds, or other repairable items)(Sometimes you can repair by merging with a similar item or using materials)
Steps
Estimated time: Estimated total time: 20-40 minutes
- 1
Gather essential tools and resources
Ensure you have an anvil, a grindstone, and enough XP to perform basic repairs. Check current durability and any enchantments on the item to determine the best starting approach. This upfront check helps prevent wasted XP later.
Tip: Keep a spare, unenchanted item nearby to use as a repair donor without risking your valued gear. - 2
Identify item to repair and assess enchantments
Examine the item’s durability and list all active enchantments. Decide if any enchantments are valuable enough to preserve on a different item or should be removed entirely via disenchanting.
Tip: If an enchantment is strong but costly to keep, consider transferring it to another item later to maximize usefulness. - 3
Decide between disenchanting or repairing first
If enchantments are not valuable, disenchant first to clear the enchantments with a Grindstone, then repair with an Anvil if needed. If enchantments are valuable, plan to repair and preserve them through careful combining.
Tip: Disenchanting first can reduce XP costs for later repairs by simplifying the item’s enchantment profile. - 4
Disenchant with Grindstone (if applicable)
Place the item in the Grindstone to remove all enchantments. Confirm that the item becomes unenchanted or retains a minimal base state, depending on the game version. This step clears the enchantment clutter before a new plan.
Tip: Always verify you’re discarding only unnecessary enchantments to avoid losing something you still value. - 5
Repair using the Anvil
Place the damaged item in the left slot and a donor item or materials in the right slot to restore durability. Monitor the XP cost and stop when you hit a reasonable threshold to preserve XP for future repairs.
Tip: Prioritize repairing high-use gear first to maximize daily effectiveness and resource efficiency. - 6
Transfer or re-enchant selectively
If you want to keep a specific enchantment, use an anvil to transfer it to the repaired item or to a new base item. Keep a balance between durability and enchantment quality.
Tip: Transferring enchantments in small steps can help manage XP costs more predictably. - 7
Compare final stats and durability
Assess whether the repaired item meets your needs and whether any enchantments should be reapplied later. Ensure durability is at an acceptable level for ongoing use.
Tip: If durability is still low, consider additional repairs later in a planned session rather than immediately after a fight. - 8
Document your changes and plan ahead
Keep a mental or written note of which items have which enchantments and what repairs were done. Use this plan to guide future repairs and enchantments.
Tip: A simple inventory log helps you avoid repeating repairs or misplacing enchantments. - 9
Practice safe enchantment strategy
Avoid relying on a single high-cost enchantment. Build a diverse enchantment strategy to cover multiple combat scenarios and tasks.
Tip: Diversify enchantments to avoid over-committing to one play style or operation.
FAQ
What is disenchanting in Minecraft?
Disenchanting removes all enchantments from an item using a grindstone, returning the item to its unenchanted state. This helps you reallocate enchantments or repair more cost-effectively.
Disenchanting removes all enchantments from an item using a grindstone and leaves you with an unenchanted version of that item.
When should I repair versus disenchant?
Repair when durability is the main concern and enchantments are valuable to retain on the same item. Disenchant when enchantments are no longer useful or you want to reallocate enchantments later.
Repair when durability is the priority and enchantments matter; disenchant when you want to clear enchantments or reallocate them later.
Do XP costs vary by item?
Yes. XP costs depend on item type, current durability, and the enchantments involved. Heavier repairs and powerful enchantments raise costs, so plan accordingly.
XP costs depend on the item, its enchantments, and durability; bigger repairs cost more XP.
Can I recover enchantments after disenchanting?
Enchanted items lose their enchantments when disenchanting with a grindstone. You can reapply enchantments later using an enchantment table or an anvil with enchanted books.
Disenchanting removes enchantments; you can reapply them later using enchantment methods.
Are these mechanics the same in Java and Bedrock editions?
The general approach is similar across editions, but some costs and interactions can differ slightly. Always test repairs on your current edition to confirm exact XP costs.
The basics are similar, but costs and interactions can differ between Java and Bedrock; test in your edition.
Watch Video
Key Takeaways
- Repair with purpose: use anvils to restore durability and protect valuable enchantments.
- Disenchant strategically: remove unwanted enchantments with a grindstone to reset your options.
- Manage XP as a resource: plan repairs and enchantments to minimize cost over time.
- Compare item states: durability, enchantments, and future plan determine the best action.
- Prepare for future sessions: log changes to streamline ongoing maintenance.