Can You Repair Armor in Minecraft? A Step-by-Step Guide
Learn how to repair armor in Minecraft, exploring anvils, grindstones, and Mending. This educational how-to covers durability, costs, and practical workflows for sustainable armor maintenance.

Yes. You can repair armor in Minecraft by using an anvil to combine damaged pieces with the same type of armor or repair materials, or by leveraging Mending to gain durability from XP. This guide explains each method, when to use them, and how to minimize material costs. Follow these steps to keep your kit battle-ready.
Can you repair armor in minecraft?
If you're exploring whether you can repair armor in minecraft, you're in the right place. According to Home Repair Guide, understanding repair concepts in a game world mirrors practical maintenance principles you use in real life. Armor durability diminishes with use, and repairs extend the lifespan of your protection. This section answers the core question in plain terms and sets expectations for the rest of the article, so you know what a successful repair looks like and when not to waste materials. The exact phrase can you repair armor in minecraft appears here to anchor the topic and help search engines understand the focus of this guide.
How durability works in armor
Armor items in Minecraft have a finite durability that decreases as you take damage. Each wear-and-tear event reduces a piece’s remaining durability, making it less effective in combat. Durability values are item-specific and displayed in your inventory as a durability bar. Repairs restore durability, either by combining items in an anvil with matching materials, or by leveraging enchantments like Mending that recover durability as you gain experience. Understanding this mechanism helps you plan repairs, minimize XP costs, and balance material use with overall protection.
Repair methods overview
There are several pathways to restore armor durability, each with its own trade-offs. The main methods are repairing with an anvil using the same armor type or repair materials, using a grindstone to remove enchantments and reset repair costs, and enabling Mending so that your armor heals as you gain experience. A thoughtful repair strategy combines these methods to maximize durability for the least resource expenditure. This section outlines when each method shines and the practical considerations a player should track.
Anvil repairs: rules, costs, and steps
Anvil repairs involve placing damaged armor in the anvil's input slots along with the appropriate repair material or another identical armor item. The repair cost is expressed in experience levels and increases with each subsequent repair in the same item’s work family. Anvils enable precise repairs and can combine enchantments, but costs can escalate quickly if you overuse them. Plan repairs in batches to keep XP costs reasonable and to avoid wasting valuable materials. This section walks you through a typical anvil repair workflow with safety tips to minimize XP drain.
Grindstone and combining items: when to use
Grindstones remove all enchantments from two items to produce a non-enchanted, combined item, and they also reset an item’s repair cost. This can be useful if an enchantment you don’t want is inflating the repair price. When dealing with durability, grinding can help you strip away unwanted enchantments to simplify repairs or to repurpose materials. Remember that grindstones remove enchantments and may reduce the usefulness of your armor in combat until you re-enchant.
Mending enchantment: how it works and strategies
Mending uses experience points gathered from activities like mining and killing mobs to repair equipped items automatically. When Mending is on a piece of armor, any XP gained is partially redirected to repair that armor instead of going to your experience level pool. This can greatly extend the life of your armor, but it relies on a steady stream of XP and may not be ideal in every situation. Weigh the benefits of Mending against the costs of traditional repairs to decide the best approach for your playstyle.
Materials and XP: efficient repair planning
Repairing armor efficiently involves predicting how often you’ll need to repair, collecting the right repair materials, and managing XP. Always carry the repair material that matches your armor’s material (iron ingots for iron armor, diamonds for diamond armor, etc.). Plan XP farming activities to align with repair needs or to enable Mending for frequent wear. A simple maintenance plan reduces long-term resource drain and keeps your armor resilient in survival situations.
Practical repair workflows in survival mode
In survival mode, a pragmatic repair workflow balances durability, XP costs, and material availability. Start by assessing your armor’s current durability, then choose the repair method that minimizes XP and resource waste. For frequent wear, Mending can be a reliable ally if you operate a steady XP source. If you anticipate a long expedition or dungeon run, performing a well-timed anvil repair and then testing in combat helps ensure you’re fully protected. A consistent routine pays off in better defense and fewer failed adventures.
When to replace armor vs repair and long-term tips
Sometimes replacement is the smarter option, especially when armor is close to breaking or heavily enchanted armor would require disproportionate repair costs. Compare the material cost of a repair via anvil versus crafting or obtaining a new piece. Long-term tips include storing backup armor, keeping repair materials organized, and scheduling regular maintenance sessions. By thinking ahead, you can keep your character protected while conserving resources for other upgrades.
Tools & Materials
- Anvil(Essential tool; anticipate XP costs and potential multiple repairs per item)
- Repair materials (same type as armor)(Iron ingots for iron armor, diamonds for diamond armor, etc.)
- Grindstone(Optional for removing enchantments or resetting repair costs)
- Experience points (XP) / XP farm(Needed for Mending and to cover anvil repair costs over time)
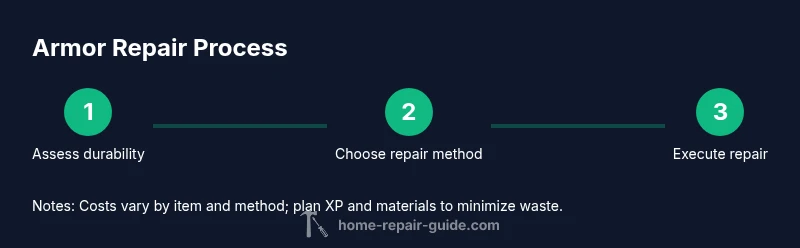
Steps
Estimated time: 20-40 minutes
- 1
Gather damaged armor and repair materials
Collect all worn armor pieces you intend to repair and the corresponding repair materials (the same type as the armor). Check each item’s durability in your inventory to determine priority and estimate the number of repairs required.
Tip: Always verify durability values in the inventory to avoid unnecessary repairs. - 2
Choose your repair method
Decide whether you’ll use an anvil with the appropriate repair material, perform a grindstone-based simplification, or rely on Mending to heal over time. Each method has different XP costs and long-term effects on enchantments.
Tip: If enchantments are valuable, consider using Mending or grinding to remove unwanted enchantments first. - 3
Prepare the repair setup
Place the damaged armor piece in the anvil's left input and the repair material or the identical armor piece in the right input. Ensure you have enough XP levels or an XP source to cover the cost.
Tip: Plan repairs in batches to avoid escalating XP costs with repeated single-item repairs. - 4
Execute the repair in the anvil
Confirm the repair when the cost indicator shows an acceptable XP level. If the repair cost is too high, back out and consider repairing a second item or using a different method.
Tip: Avoid splurging on a single repair; spread costs across multiple items when possible. - 5
Apply Mending strategically
If you rely on Mending, keep XP sources active and equip gear with Mending. Collect XP through mining, farming, or mob killing to restore durability automatically.
Tip: Balance Mending with the risk of over-enchanting or breaking early on expensive armor pieces. - 6
Test the armor in combat
After repairs, test your armor's durability in a controlled fight, checking both protection and the cost of repairs. Ensure no enchantments were unintentionally removed.
Tip: Inspect the durability bar and re-check enchantments if needed. - 7
Maintain armor routinely
Keep a regular maintenance routine, repairing wear before it reaches critical levels and keeping a stock of repair materials for upcoming adventures.
Tip: Schedule short maintenance sessions to prevent large XP costs later.
FAQ
Can I repair enchanted armor?
Yes. Enchanted armor can be repaired via anvil or by combining identical items, but the repair cost increases with each repair. If an enchantment is unwanted, consider using a grindstone to remove it, then repair as needed.
Yes. You can repair enchanted armor with an anvil, but repairs cost XP and can remove or move enchantments if you choose the grindstone option.
Is Mending worth it for all armor pieces?
Mending is powerful for armor you wear often, but it depends on having a steady XP source. If you rarely gain XP or rely on enchantments with long lifespans, you might supplement with traditional repairs.
Mending is great for daily wear armor if you have a good XP source, but not always essential for armor you seldom use.
What costs more: repairing or replacing armor?
Costs vary by armor type and material. Repairs via anvil involve XP levels and repair material costs, while replacing requires crafting or finding a new piece. Compare both options before spending resources.
Repairing with anvil costs XP and materials; replacing may be cheaper if the repair cost is too high.
Can I repair armor without XP?
Yes, you can remove enchantments with a grindstone and combine items, but intact durability improvements often require XP or a repair material-based method in an anvil.
Repair can be done with grindstones to modify enchantments; full durability improvements usually need XP or anvil repairs.
How do I plan repairs efficiently for long trips?
Begin with inventory durability checks, carry the appropriate repair material, and have a clear repair workflow. Use Mending where possible and schedule maintenance sessions to avoid resource spikes.
Check durability, bring the right materials, and follow a fixed repair workflow to stay efficient on long trips.
What should I do if the repair cost is high on the anvil?
Back out and either repair fewer items, switch to Mending, or use a grindstone to strip enchantments before repairing. This helps control XP expenditure.
If the anvil cost spikes, consider Mending or using a grindstone to adjust enchantments and costs.
Watch Video
Key Takeaways
- Repair armor in Minecraft using anvils, grindstones, or Mending.
- Track durability and XP costs to minimize waste.
- Use Mending strategically to extend armor life.
- Plan repairs in batches for efficiency and resource management.
- Decide between repair and replacement based on material costs and enchantments.