Repair the Toilet: A DIY Step-by-Step Guide
Learn how to repair the toilet with a practical, homeowner-friendly guide. Diagnostic steps, parts, safety tips, and a full step-by-step process to stop leaks and restore reliable flushing.

By the end of this guide, you'll know how to repair the toilet by diagnosing running or leaking symptoms, selecting the correct replacement parts (flapper, fill valve, or seals), and following a safe, step-by-step process to restore reliable flushing and prevent future leaks. You’ll also learn when a professional is needed and how to test for leaks after repair.
Understanding toilet anatomy
Before you begin any repair the toilet, it helps to know the main parts and how they work together. The tank houses the fill valve, flush valve, and the flapper. When you press the handle, the flush valve opens, releasing water into the bowl. The flapper seals the tank until the next flush. The fill valve refills the tank after flushing, and a refill tube directs water to the bowl to maintain a proper seal. Understanding these components makes it easier to diagnose why a toilet runs, leaks, or won’t flush properly. According to Home Repair Guide, most common issues stem from worn seals, misadjusted floats, or a degraded flapper, so start with those parts when you repair the toilet. This knowledge base helps you decide which parts to replace first and how to verify a complete fix, not just a temporary halt to symptoms.
Common problems and what they mean
To repair the toilet effectively, you need to translate symptoms into likely causes. A toilet that runs continuously often points to a worn flapper or a float that’s set too high. A slow or weak flush may indicate buildup, a clogged conduit, or a failing flush valve. A leak around the base usually means the wax ring needs replacement or the connections require tightening. If water pools in the tank, the fill valve or the float could be out of adjustment. In this section, we’ll map each symptom to practical fixes, explain how to test for leaks, and outline the parts you’ll likely replace first. Home Repair Guide’s analysis shows that targeted fixes save time and minimize unnecessary parts purchases.
Safety first: shut-off valves and water source
Safety comes first when repairing the toilet. Locate and close the shut-off valve behind the toilet before touching any parts. Flush the tank to empty it, then use towels to catch any remaining water. If the shut-off valve is old or hard to turn, label its position and consider upgrading to a modern ball valve to improve reliability. Always work in a well-lit area and keep a bucket handy for spills. This avoids surprises and reduces the risk of overflows while you inspect components and prepare replacement parts.
Tools and replacement parts you'll need
Having the right tools makes repair the toilet faster and safer. Common items include an adjustable wrench, screwdriver set, pliers, a bucket, towels or rags, and replacement parts such as a flapper kit, a fill valve kit, a wax ring, and replacement seals. If you have a particularly corroded nut or bolt, penetrating oil can help. You’ll also want a toilet auger for clogs that resist snaking through, and a level to ensure the toilet sits flat after reinstall. Keep spare washers and a small amount of plumber’s putty in case you need to reseal fittings.
Step-by-step diagnostic plan
A systematic approach reduces guesswork. Start by turning off the water, draining the tank, and removing the tank lid. Check the flapper for wear or warping and test the flush valve by lifting the flapper manually. Inspect the fill valve and float to ensure the water level is correct (roughly one inch below the top of the overflow tube). Listen for continuous running water and observe whether the tank refills correctly after flushing. If the refill tube is discharging into the overflow pipe, adjust its position. These checks help you decide whether to replace a flapper, adjust the float, or install a new fill valve.
Replacing the flapper and valve components
If the flapper is warped or brittle, it will leak water into the overflow tube and cause a constant trickle. Turn off water, drain tank, remove the old flapper, and install a compatible replacement kit. Check the flush valve gasket for wear and replace it if necessary. When installing a new fill valve, follow the manufacturer’s instructions to ensure the correct height and proper seating. A snug, leak-free seal around the flush valve and fill valve is essential for long-term reliability.
Replacing the fill valve (if necessary)
A failing fill valve often causes slow or incomplete tank refills. Remove the old valve, clean the mounting nut, and install the new fill valve according to the kit instructions. Adjust the float so the water shuts off at the correct level. Test by flushing several times to confirm the fill rate and ensure no leaks persist at the shut-off valve or connections. If the toilet continues to run after a flush, verify that the fill valve is seated properly and that the overflow tube is not displaced.
Testing, seals, and final checks
After parts are replaced, reassemble the tank, turn the water back on, and fill to the proper level. Test multiple flushes to confirm that the flush valve seals, the fill valve shuts off correctly, and there are no leaks around the base or inlet connections. Check for condensation or dampness after a few hours of operation. If leaks recur, revisit gasket seats, reseat the tank bolts, and ensure the wax ring sits evenly. For a durable repair, monitor for a full day and re-check after 24 hours.
Common mistakes to avoid
Rushing through replacements can lead to misaligned parts or hidden leaks. Avoid overtightening nuts, which can crack plastic components or threads. Don’t reuse a worn wax ring, and never overtighten mounting bolts, which can crack the porcelain. When testing, don’t assume a silent tank means success—observe for intermittent leaks at the base and show of water around fittings over time. Making these mistakes can undermine a repair and require rework.
Tools & Materials
- Adjustable wrench(Crescent-style, 8–12 inches for room to maneuver)
- Flathead screwdriver(For prying if needed and securing clamps)
- Phillips screwdriver(For screw heads on toilets or tanks)
- Pliers(Needle-nose preferred for tight spaces)
- Bucket(Catch water during draining)
- Towels or rags(Protect floors and soak up spills)
- Replacement flapper kit(Match to toilet model; typically universal)
- Replacement fill valve kit(Adjustable height and compatible with tank size)
- Wax ring (square or donut)(Replace if you remove the toilet)
- Toilet auger (optional)(Clogs that resist snaking)
- Penetrating oil (optional)(Loosen corroded nuts safely)
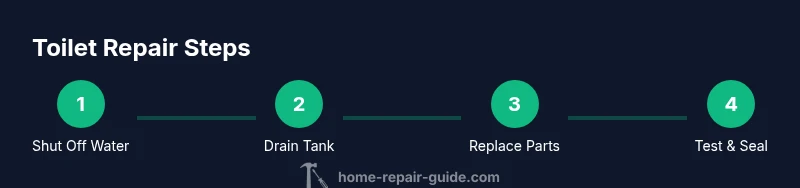
Steps
Estimated time: 60-90 minutes
- 1
Shut off water and drain the tank
Locate the shut-off valve behind the toilet, turn it clockwise to stop water flow, flush to drain the tank, and sponge remaining water. This prevents spills while you inspect parts.
Tip: Have towels ready and work calmly to avoid splashes. - 2
Inspect the flapper and flush valve
Remove the tank lid, press the flapper to test the seal, and look for cracks or warping. If the flapper doesn’t seal well, replace it with a compatible kit.
Tip: A loose chain can also prevent a proper seal; adjust length if needed. - 3
Check and adjust the fill valve and float
Examine the fill valve for proper seating and ensure the float stops the fill at the correct level. Adjust height as required and verify the overflow tube isn’t displaced.
Tip: If the float is pinned, replace the valve entirely for reliability. - 4
Replace the flush mechanism if worn
Install a new flap and, if necessary, a new flush valve seal. Ensure the gasket sits evenly and the nut is snug without forcing.
Tip: Test the flush by lifting the flapper manually before reassembling. - 5
Replace the fill valve if necessary
If refilling is slow or inconsistent, install a new fill valve kit with correct height. Attach the refill tube correctly to the overflow pipe.
Tip: Double-check the tube’s length to prevent overflows. - 6
Reassemble, turn on water, and test
Reconnect water supply, let the tank fill, and run several test flushes. Look for leaks at the base and around fittings.
Tip: Run at least three full flushes to confirm durability. - 7
Final checks and cleanup
Wipe surfaces, ensure no leaks persist, and confirm the toilet sits level. If wobbling, slightly adjust bolts to tighten without cracking porcelain.
Tip: Keep a small level on hand during setup for accuracy.
FAQ
Why does my toilet run constantly, and can I fix it myself?
A constant run is most often caused by a worn flapper or incorrect water level. You can typically fix this by replacing the flapper or adjusting the fill valve height. If the problem persists, inspect the flush valve seal and connections.
Most running toilets come from a worn flapper or improper water level. Replacing the flapper or adjusting the fill valve usually stops the run.
Do I need to remove the toilet to repair it?
Most common repairs (flapper, fill valve, seals) do not require removing the toilet. Only replace the wax ring if you need to reset the entire toilet and reseat it on the flange.
Usually you don’t have to remove the toilet. You’ll replace parts in the tank, and only remove the toilet if you need to reseat it with a new wax ring.
What safety steps should I take before starting?
Always shut off the water, drain the tank, and use towels to catch spills. If a valve is old or stiff, consider upgrading. Wear gloves if cleaning mineral deposits.
Turn off the water, drain the tank, and have towels ready. Use gloves if cleaning deposits.
Which tools are essential for a toilet repair DIY?
An adjustable wrench, screwdrivers, pliers, a bucket, towels, and a replacement flapper and fill valve kit are typically enough for most repairs.
You’ll need common hand tools plus replacement kits for the flapper or fill valve.
How long should a typical toilet repair take?
Most DIY toilet repairs take about 60-90 minutes, depending on parts availability and the complexity of the issue.
Usually about an hour to an hour and a half, depending on parts and setup.
Watch Video
Key Takeaways
- Identify the root cause before replacing parts
- Shut off water and drain tank to prevent spills
- Replace worn flapper or fill valve to stop running toilets
- Test thoroughly after reassembly to confirm a durable repair
- Avoid common mistakes like overtightening bolts