Flange Repair Kit Toilet: A Practical How-To Guide
Learn how to use a flange repair kit toilet to stop leaks and restore toilet stability. This guide covers choosing the right kit, safety, preparation, installation steps, troubleshooting, and maintenance for long-lasting results.

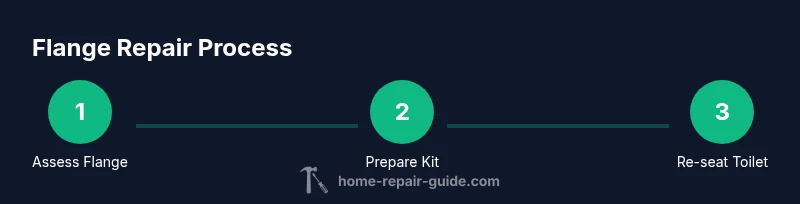
You will be able to stop leaks and restore toilet function by using a flange repair kit toilet. The process involves shutting off water, removing the toilet, inspecting and cleaning the flange, installing the repair kit, resealing the base, reinstalling the toilet, and testing for leaks. This guide covers parts, steps, safety, and common mistakes to avoid.
What a toilet flange is and why a repair kit matters
A toilet flange is the ring that connects the toilet to the drain pipe and sits flush with the bathroom floor. Over time, a flange can crack, corrode, or become loose, allowing leaks or wobble that threaten flooring and waste lines. A flange repair kit toilet provides targeted components—such as a repair flange, new bolts, gaskets, and sometimes a wax ring—that restore a solid seal and alignment without a full flange replacement. According to Home Repair Guide, understanding the flange's role helps homeowners decide when a repair kit is sufficient and when to call a professional. If you notice slow leaks around the base, a rocking toilet, or foul odors near the toilet, start by evaluating the flange condition. This guide centers on safe, practical fixes you can perform with common tools and a standard repair kit, enabling you to tackle the job with confidence and minimize disruption in your bathroom.
Beyond fixing leaks, using a flange repair kit toilet can prevent water damage to subflooring and reduce the risk of sewer gas escaping into living spaces. The repair process is typically straightforward when the flange is intact but worn or misaligned. If the flange is cracked or heavily corroded, you may need to replace the flange or install a retrofit kit. The aim is a clean, level seating surface so the toilet bolts align correctly and the wax ring seats without pinching. Remember to work slowly and keep the workspace organized; a tidy setup reduces the chance of misplacing parts or overlooking a leak path.
Components of a flange repair kit toilet and what they do
A typical flange repair kit toilet includes several key components designed to restore the proper seal and alignment between the toilet and drain. Common parts are a repair flange that fits over or around the existing flange, a new wax ring or rubber ring, closet bolts and nuts, screws for securing the repair flange to the floor, and occasionally a flange extender or flange repair ring for tall or recessed floors. Some kits also provide gaskets or sealants to improve the base seal and reduce the chance of future leaks. Understanding what each part does helps you assemble the kit correctly and avoid common mistakes such as incorrect bolt placement or misalignment. When you select a kit, verify compatibility with your toilet size (usually 3-inch or 4-inch drains) and the type of flange you have (PVC, metal, or a combo). The right kit simplifies installation and reduces the risk of leaks after reattachment.
In addition to the core components, review any included manufacturer instructions and check for hardware quality. Stainless steel bolts resist corrosion better than plated alternatives, which matters in wet environments. If your flange has visible cracks, sections missing, or is seated too low, plan for additional steps such as grinding flush or using a flange extender. A well-chosen kit will provide secure, long-lasting results that protect your subflooring and reduce recurring repair costs. For best results, gather all parts before starting and lay them out in an organized workspace so you can access what you need without hurried searching.
Assessing flange condition and deciding on repair vs replacement
Assessment begins with a visual inspection and a quick functional test. Look for cracks in the flange itself, rust or corrosion around the mounting area, or signs of movement when you step on the toilet. If the toilet rocks easily, the flange may be damaged or set too low; this can indicate a need for a repair kit with extender options or even a full flange replacement. A careful check of bolt holes is essential: if the holes are stripped or damaged, you may not achieve a proper seal with a standard repair kit. You should also verify the waste line alignment, as a badly pitched or misaligned drain can create the illusion of a seal problem even when the flange is intact.
If the flange is structurally sound and properly aligned, a flange repair kit can be sufficient to restore a reliable seal. However, if you detect persistent leaks after resealing, or if the substrate (e.g., wood or plywood) is water-damaged, plan for professional assessment. In some cases, a damaged subfloor or cracked drain line requires excavation and replacement, which is beyond the scope of a DIY repair kit. The goal is to prevent future leaks and ensure the toilet remains stable, so take your time during assessment and document any issues before disassembly.
Safety considerations include turning off the water supply, draining the bowl, and wearing protective eyewear. These steps reduce splash and exposure to sewer gases. Maintaining a clean, dry workspace helps you track parts and reduces the risk of losing small components. As you plan your repair, keep the Home Repair Guide approach in mind: prioritize practical, durable fixes that protect your home from moisture intrusion and help maintain a healthy bathroom environment.
Planning and preparation before you start
Preparation is the quiet hero of any successful flange repair. Start by turning off the water at the shut-off valve and flushing the toilet to remove as much water as possible. Place absorbent towels or a small bucket to catch any remaining liquid during disassembly. Gather all tools and the flange repair kit toilet before you begin. Clear the area around the toilet; remove floor mats and decorations to prevent slips and ensure you have ample room to maneuver. Inspect the bathroom floor around the toilet for any signs of water damage; if you detect soft spots or staining, address this subfloor issue separately, as it can affect the repair’s longevity.
Next, measure the drain opening and confirm whether you need a 3-inch or 4-inch flange. This step ensures you choose the correct kit and avoid replacing parts that won’t fit. Read the kit's instructions thoroughly, because some models require specific installation angles or additional sealants. If you have a wooden subfloor, consider moisture barriers or a sealant to protect the wood after reinstalling the toilet. Before lifting the toilet, take photos of the current setup from multiple angles; these images will serve as a reference if you need to reassemble the toilet and verify proper alignment later. Finally, ensure you have a secure helper if the toilet is heavy—accidents happen fast when lifting a full porcelain fixture.
Step-by-step overview of installation (high-level guidance)
This section provides a concise roadmap for installing a flange repair kit toilet without duplicating the detailed, step-by-step instructions found in the dedicated STEP-BY-STEP block. Begin by carefully removing the toilet and cleaning the flange surface to expose a clean, dry base. Align the new repair flange with the existing bolt holes and secure it to the floor per the kit’s instructions. Install any required gaskets or wax ring, ensuring the surface is level and the ring sits evenly. Reposition the toilet, align with the bolts, and carefully lower the fixture into place. Tighten the nuts gradually and evenly to avoid warping the porcelain. Finally, reconnect the water supply, flush, and inspect for smooth operation and any leaks around the base. If you notice persistent leaks, revisit gasket seating or consider alternative flange accessories described in the kit. This overview helps you prepare for the hands-on steps that follow and emphasizes patience, precision, and clean work habits.
In practical terms, the most common pitfalls include misaligned bolts, an uneven seating surface, and over-tightening nuts that crack the toilet base. A calm, methodical approach reduces these risks and yields more reliable, long-lasting results. Manage expectations: while many DIY repairs succeed, some installations reveal underlying issues such as damaged subfloor or corroded drain lines that require professional intervention. By following the kit’s guidelines, you’ll gain confidence and improve your chances of a leak-free restoration.
Post-installation testing and common issues
Testing the installation is essential to confirm a durable seal. Begin by turning the water back on and allowing the tank to refill. Flush several times and check for leaks around the base, the wax ring, and the bolts. If you observe a leak, power down and inspect the flange seating, gasket alignment, and bolt tension. Minor leaks at first may indicate the wax ring hasn’t seated completely; give it a moment and re-tighten bolts gradually in a cross-pattern to ensure even pressure. If water continues to seep, disassemble carefully and reevaluate gasket placement, flange alignment, and the possibility of cracks or warped flooring beneath the fixture. A wobble can indicate improper bolt tightening or a misaligned flange; recheck the positioning and reseat if needed. Always document any changes you make for future maintenance and be mindful of potential hidden cracks in the flange or drain.
Common issues include a lingering foul odor, recurring leaks after reseating, and cracks in the floor around the toilet base. In many cases, these symptoms point to an underlying problem beyond the flange itself, such as a compromised subfloor or drainage path. Address those issues promptly to prevent future damage. After testing, replace any tools you used in the cleanup, reinstall floor mats, and keep a maintenance schedule to monitor the area for signs of moisture. This disciplined approach helps ensure your repair lasts and reduces the likelihood of future call-backs.
Maintenance tips and when to call a professional
To extend the life of a flange repair, perform proactive maintenance: inspect the toilet area annually for signs of moisture or movement, reseal joints as needed, and replace worn bolts that show corrosion. Keep a small inventory of replacement parts for quick future repairs and avoid aggressive tightening, which can crack the porcelain or damage the flange. If the flange or surrounding subfloor shows visible damage, or if leaks persist after a repair kit installation, contact a licensed plumber. A professional assessment can determine whether a full flange replacement or subfloor repair is necessary. Homeowners should also be mindful of water pressure and supply line integrity, as excessive pressure can stress joints and lead to leaks in the future. Following these maintenance practices helps you catch problems early and protect your bathroom from costly water damage. The Home Repair Guide team emphasizes safety and thorough checks to ensure the long-term reliability of toilet installations.
Aftercare and test: verifying leak-free seal
Once the repair is complete, perform a final check to confirm a leak-free seal. Re-check the floor around the toilet after several days of use, especially after heavy bathroom activity. If you notice discoloration, soft spots, or dampness, re-evaluate the flange seal and surrounding floor. Consider applying a light bead of silicone caulk around the base to further protect against moisture intrusion, provided the kit instructions permit. Document the date of service and keep records of any parts replaced for future reference. By staying vigilant and following the repair kit’s guidelines, you reduce the probability of recurring issues and extend the life of your bathroom fixture.
Tools & Materials
- Toilet flange repair kit toilet(Choose a kit compatible with 3-inch or 4-inch drain pipes; includes flange repair ring, wax or rubber seal, bolts, and screws)
- Adjustable wrench(For securing bolts and nuts)
- Screwdriver set(Flathead and Phillips as needed)
- Putty knife(Helpful for scraping old wax and debris)
- Plumber's putty or silicone sealant(Sealing around base as needed)
- Measuring tape(Check flange diameter and bolt pattern)
- Towel and bucket(Contain water and keep area clean)
- Level or straightedge(Helpful to ensure a level seating surface)
- Safety glasses and gloves(Personal protection during disassembly and installation)
Steps
Estimated time: 45-90 minutes
- 1
Shut off water and drain
Locate the shut-off valve near the toilet and turn it clockwise to stop water flow. Flush the toilet to empty the tank and bowl, then use towels to soak any remaining water. This prepares a dry work area and minimizes splashes.
Tip: Have a bucket ready for residual water and a helper for lifting the toilet later. - 2
Remove the toilet
Disconnect the water supply line, unbolt the floor bolts, and gently rock the toilet to break the seal. Lift straight up and place the toilet on its side on towels or a protective mat.
Tip: Keep track of washers and nuts; drop them into a safe container to avoid losing parts. - 3
Inspect and clean flange
Examine the flange for cracks, corrosion, or missing sections. Clean the flange surface and remove old wax or gasket material so the new seal sits flat.
Tip: Take a quick photo of the flange orientation before removal. - 4
Install flange repair kit toilet
Place the repair flange according to the kit’s instructions, align bolt holes, and secure it to the floor. Install a new gasket or wax ring as required by the kit, ensuring a clean, even surface.
Tip: Do not over-tighten bolts; snug secure is better than tight and cracked restorations. - 5
Re-seat toilet and secure
Lower the toilet onto the bolts, align with the holes, and press evenly to seat the wax ring. Tighten nuts in a crisscross pattern to avoid tilting. Reconnect the supply line.
Tip: Check that the toilet is level before final tightening. - 6
Test and seal
Turn the water supply back on, fill the tank, and flush several times to check for leaks. If leaks are present, reseat or replace seals as needed. Finish with a light bead of silicone at the base if kit permits.
Tip: Run a few cycles to confirm stability and absence of leaks.
FAQ
What is a flange repair kit toilet?
A flange repair kit toilet provides parts to fix or replace a damaged toilet flange, restoring a watertight seal and proper alignment between the toilet and drain. It typically includes a repair flange, bolts, gaskets, and a wax or rubber seal.
A flange repair kit toilet fixes a damaged toilet flange and restores a watertight seal, usually with a repair flange, bolts, and seal.
When should I use a flange repair kit?
Use a flange repair kit when the flange is cracked, corroded, or misaligned but the surrounding subfloor is sound. If the flange is severely damaged or the subfloor is compromised, you may need a full replacement.
Use a kit when the flange is damaged but the floor is solid; severe damage may require replacement.
Can I do this repair myself?
Yes, many homeowners can perform flange repairs with a kit, basic hand tools, and careful attention to safety. Complex issues like a damaged subfloor or drain line may require a licensed plumber.
Yes, you can DIY if you follow the kit instructions and stay safe; call a pro if the floor is damaged.
What are common flange problems?
Common issues include cracks in the flange, corrosion, a loose or misaligned flange, or a gasket failure. These problems can cause persistent leaks or toilet instability if not addressed.
Common problems are cracks, corrosion, or misalignment that cause leaks or wobble.
How long does a flange repair last?
Longevity depends on correct installation and the condition of the surrounding subfloor. A properly installed kit can last several years, but ongoing moisture or structural issues may reduce its lifespan.
If installed correctly and the floor is solid, expect several years of reliable performance.
Should I replace the toilet if flange damage is extensive?
If the flange is severely damaged or the subfloor is compromised, replacing the flange or the toilet may be necessary. A professional assessment can help determine the best course.
Severe flange damage or floor issues may require replacement; a pro can confirm.
Watch Video
Key Takeaways
- Identify flange health before buying a kit
- Choose the right kit size for 3
- ,
- Securely re-seat the toilet to prevent leaks
- Test thoroughly and document maintenance