Toilet Plumbing Repair: A Step-by-Step Home Guide
A practical, step-by-step guide to toilet plumbing repair for homeowners and renters. Learn to diagnose leaks, fix running toilets, replace worn parts, and prevent clogs with safe, affordable DIY methods.

With this guide, you will complete toilet plumbing repair by diagnosing common issues, selecting the right parts, and following safe, step-by-step repairs. You'll fix running toilets, leaks, and clogs, test the repair, and prevent future problems with durable, budget-friendly DIY fixes. Gather basic tools and shut off the water supply before you start.
Common toilet problems you can fix
Toilet plumbing repair often begins with identifying symptoms. A running toilet wastes water and raises bills, while a clogged bowl or slow flush signals failures in the flush valve, fill valve, or trapway. Phantom flushes—where the tank refills on its own—usually point to a worn flapper or a faulty fill valve. Observing when water moves, listening for hissing sounds, and testing the flush repeatedly helps pinpoint the issue. Most homes can address these common problems with a modest repair kit and basic hand tools, saving time and money through practical DIY fixes. Understanding toilet plumbing repair fundamentals also helps prevent minor issues from becoming major leaks.
Key components to inspect include the flapper, fill valve, flush valve, wax ring, and gaskets. Start with the simplest fix—like replacing a worn flapper—before moving to more involved tasks such as reseating the toilet. For renters, check your lease and always shut off the water supply before touching fittings. By following proven steps, repairs are typically quick, affordable, and durable.
Safety and prep for toilet plumbing repair
Before you begin any toilet repair, turn off the water supply at the shut-off valve near the floor behind the toilet. This simple step prevents floods and reduces wastewater exposure. Open the tank lid to release pressure and drain remaining water into the bowl. Wear gloves and eye protection if possible, and place towels or a bucket to catch drips. Always verify the water is off by flushing once or twice after disconnecting the supply. If the shut-off valve leaks or is hard to turn, contact a professional before proceeding. A planned, safe approach reduces the risk of messes and injuries while you work.
Tools and parts you’ll need for toilet plumbing repair
A minimal toolkit handles most fixes: an adjustable wrench, pliers, a flathead and Phillips screwdriver, a new flapper, a replacement fill valve, a new flush valve seal, plumber's grease, and a sponge. Have a wax ring on hand if you plan to remove the toilet for a full reseal. A bucket and towels keep the floor dry, while a phone or camera helps record disassembly for reassembly. When choosing parts, match the model number on the tank or check manufacturer guidelines. If unsure, bring old parts to the hardware store for a precise match.
Having the right parts and tools makes toilet plumbing repair more predictable and less rushed.
Understanding the toilet anatomy helps with a precise repair
Toilet systems separate the tank and bowl, yet operate as a synchronized unit. The fill valve controls water entering the tank after a flush, while the flush valve and flapper release water into the bowl. A worn flapper or degraded seal around the rim can cause a running toilet or ghost fills. The wax ring seals the connection between the toilet and the drain; a damaged ring can lead to sewer gas leaks and water pooling. Recognizing these parts during inspection lets you plan targeted repairs rather than a full replacement. A solid understanding of anatomy reduces guesswork and speeds up the fix.
Common fixes and parts replacements for durable results
For a running toilet, start with the flapper and fill valve—the most frequent culprits. If the tank doesn’t fill correctly, replace the fill valve and adjust the float. A clogged toilet often requires a closet auger or toilet auger; avoid chemical drain cleaners, which can damage porcelain and pipes. If water leaks at the base, the wax ring may need replacement, which requires unbolting the toilet and reseating it. Each fix has its own replacement cycle, so consider keeping spare parts in your toolkit for quick maintenance. Regular checkups help you catch wear before a full system failure occurs.
Maintenance and prevention after toilet plumbing repair
Post-repair maintenance keeps problems from recurring. Regularly inspect seals, adjust float levels, and test the toilet by flushing several times after the repair. Clean the area around the base to monitor for gradual leaks and use a moisture alarm if you want extra protection. Schedule periodic checks—every 6 to 12 months depending on usage—to catch early signs of wear. Document parts replaced to aid warranties and future repairs, and keep spare components on hand for quick, cost-effective fixes.
Tools & Materials
- Adjustable wrench(8-12 inch range; fits most toilet nuts)
- Pliers(Needle-nose for small fittings)
- Screwdrivers (flathead and Phillips)(For tank screws and bolts)
- Bucket(Catch water during repair)
- Old towels or rags(Protect floor and catch drips)
- Replacement parts kit (flapper, fill valve, and gasket)(Match model compatibility)
- Wax ring(Needed if removing the toilet)
- Putty knife(Helpful for wax ring removal)
Steps
Estimated time: 30-60 minutes
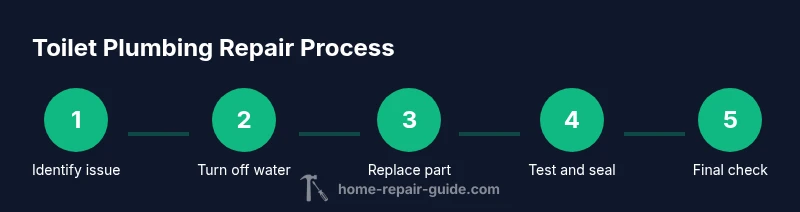
- 1
Identify the problem and confirm symptoms
Observe when the issue occurs and note signs such as a running tank, ghost flushing, or a weak flush. Compare symptoms with common failure points like the flapper or fill valve. This helps you pick the right parts and avoid unnecessary replacements.
Tip: Document symptoms with photos or notes before disassembly. - 2
Turn off the water supply and drain the tank
Shut off the shut-off valve behind the toilet and flush to drain as much water as possible. Wipe remaining water from the tank and bowl to keep the workspace clean. This step prevents spills and helps you work safely.
Tip: If the valve is stiff, don’t force it; replace it if necessary. - 3
Remove the tank lid and inspect components
Carefully remove the tank lid and visually inspect the flapper, fill valve, and overflow tube. Look for cracks, corrosion, or wear. You may identify the failing part without removing the entire toilet.
Tip: Take a quick photo of every connection before loosening anything. - 4
Replace worn parts as needed
Install a new flapper or fill valve as indicated by your inspection. Ensure seals are clean and aligned, and avoid overtightening connections. Test fit before securing to avoid leaks.
Tip: Handle plastic parts gently to avoid cracks. - 5
Reassemble and tighten connections
Reconnect all tank components securely, reattach the tank lid, and recheck the plumbing connections under the flange. Ensure there are no cross-threaded bolts and that the tank sits level on the bowl.
Tip: Hand-tighten first, then snug with tools—excess force can crack fittings. - 6
Test the repair with a controlled flush
Turn the water back on and flush several times to verify a proper seal and correct water level. Watch for leaks at the base, tank bolts, and supply line. If leaks are found, reseat the parts or tighten slightly.
Tip: Allow time for the fill valve to reach the proper level before flushing again. - 7
Final checks and cleanup
Wipe any residual moisture, check the wax ring condition if you removed the toilet, and reinstall flooring or baseboard as needed. Record part replacements for warranty purposes and future maintenance.
Tip: Keep a small inventory of common parts for quick future repairs.
FAQ
What parts commonly fail in a toilet and how do I know which to replace?
Most running toilets involve the flapper or fill valve. A leaky flush valve or gasket can also cause issues. Start with the simplest part and replace only what is worn after confirming symptoms.
Most running toilets come from the flapper or fill valve. Start by inspecting and replacing the worn part, then test.
Is it safe for a beginner to attempt toilet plumbing repair?
Yes, many fixes are beginner-friendly when you follow safety steps like turning off water and draining the tank. Avoid forcing parts and seek help for complex issues.
Yes, beginners can handle most fixes if they follow safety steps and avoid forcing parts.
Can I fix a running toilet without replacing parts?
Sometimes a simple adjustment of the float or a minor cleaning can stop a running toilet. If the problem persists, replacement parts are often needed.
Sometimes a quick adjustment fixes it; otherwise, parts replacement is usually required.
What should I do if water leaks from the base after resealing?
If leaks appear, reseat the toilet and recheck the wax ring installation. Ensure the floor surface is level and bolts are snug but not overtightened.
If there’s a base leak, reseat the toilet and check the wax ring closely.
How long does toilet repair usually take?
Most repair tasks take about 30 to 60 minutes for common fixes, depending on access and whether the wax ring is replaced.
Most repairs take about 30 to 60 minutes.
Watch Video
Key Takeaways
- Identify the root cause before parts replacement.
- Shut off water and drain the tank before work.
- Match parts to your toilet model for compatibility.
- Test the repair thoroughly after installation.
- Keep spare parts for quick future fixes.