Toilet Plumbing Repair: Step-by-Step Guide
Learn to diagnose, repair, and prevent common toilet problems with a clear, step-by-step approach. This Home Repair Guide tutorial covers tools, parts, safety, and cost considerations for DIY plumbing repair toilet tasks.

This guide helps you diagnose and repair common toilet problems such as running, weak flushes, leaks, or clogs using a safe, step-by-step approach. Gather essential tools and parts like a flapper, fill valve, wax ring, and a shut-off valve. Follow this practical, do-it-yourself process to restore function and prevent future leaks.
What a toilet repair involves
A plumbing repair toilet task centers on identifying why a toilet behaves abnormally and replacing worn parts or seals that cause leaks, loss of flush power, or constant running. Common culprits include a worn flapper, a faulty fill valve, a degraded flush valve seal, a cracked wax ring, or a loose toilet base. By understanding the toilet anatomy—the tank, flush mechanism, bowl, and waste line—you can target the right component. Home Repair Guide emphasizes a methodical approach: verify symptoms, isolate the issue, replace the faulty part, and test the result. This reduces water waste and protects your home from water damage. In many cases, a DIY repair is safe and cost-effective when you follow a careful plan and use proper tools. The goal is to restore reliability while minimizing disruption to your daily routine.
Safety and planning before you start
Safety comes first in any plumbing repair toilet project. Turn off the water supply at the shut-off valve behind the toilet and flush to drain the tank. Wear gloves and eye protection, and keep a bucket and towels handy to catch residual water. Check the supply line for corrosion and ensure the floor around the toilet stays dry to avoid slips. If you notice a strong sewage smell, persistent leaks, or cracks in the porcelain, pause and call a licensed plumber. According to Home Repair Guide, a careful plan reduces risk and helps you complete the repair efficiently.
Tools and materials you’ll need
A well-prepared toolkit makes a big difference. You’ll want an adjustable wrench, a set of screwdrivers, channel-lock pliers, a putty knife or wax ring scraper, rubber gloves, towels, and a bucket. Replacement parts typically include a new wax ring, a compatible fill valve, a flush valve seal or flapper, a new supply line, and repair washers. Have a spare toilet bolt kit on hand in case the bolts strip during removal. Keep a photo of the original connections so you can reassemble correctly. Home Repair Guide notes that having the right parts on hand speeds up the job and reduces trips to the hardware store.
Common toilet problems and quick fixes
Running toilet symptoms usually point to a faulty flapper or fill valve. If the toilet refills continuously, check the fill valve adjustment and float level. A wobbly or rocking toilet often signals a loose floor flange or worn wax ring; reseating the toilet and replacing the wax ring typically stops the leak. A weak flush or partial drain may involve a clogged rim or siphon jet, or a degraded flush valve seal. Before purchasing parts, confirm the model of your toilet and the diameter of the wax ring. This section helps you distinguish between simple fixes and more involved replacements that require partial disassembly of the toilet.
Replacing major components: wax ring, fill valve, and flapper
Replacing a wax ring is a common but involved repair. Start by turning off water, draining the tank, and disconnecting the water supply. Remove the toilet by unscrewing the mounting bolts, lift gently, and inspect the flange and wax ring. Clean the flange, install a new wax ring, and set the toilet back in place with even pressure. If the fill valve or flapper shows wear, remove the old part and install a compatible replacement, then adjust the float and chain as needed. Carefully reconnect the supply line and reseal around the base.
Step-by-step overview of a typical wax ring replacement
This section provides a concise workflow for wax ring replacement. Shut off the water and drain, detach the supply line, and remove the toilet. Inspect the flange and clean residue. Place a new wax ring on the flange, then carefully reinstall the toilet, ensuring even seating. Tighten bolts evenly and reconnect the supply line. Turn the water back on and test for leaks. If you detect water at the base, reseat the toilet and re-tighten bolts in a crisscross pattern.
Post-repair checks and adjustments
After reassembly, slowly turn on the supply and listen for leaks. Check the base, supply line connection, and tank bolts for any moisture. Test a full flush, observe the fill rate, and adjust the float height to ensure a full, efficient refill without overflow. If leaks persist around the wax ring, reseat the toilet with even pressure and re-check the flange. Keeping notes of parts replaced helps with future maintenance and troubleshooting.
When to call a professional and cost considerations
If you encounter a cracked tank, a damaged flange, or a stubborn leak behind the toilet wall, it is wise to call a licensed plumber. Emergencies like sewer gas exposure or rapid water damage require expert attention. DIY repairs can save money when done safely, but avoid compromising structural integrity. Home Repair Guide suggests budgeting for parts and potential labor by planning for a small contingency fund and comparing local rates before proceeding.
Tools & Materials
- Adjustable wrench(8-12 inch range is ideal)
- Screwdrivers (Phillips and flathead)(Set includes assorted sizes)
- Channel-lock pliers(Useful for tough nuts and hoses)
- Putty knife or wax ring scraper(For removing old wax ring residue)
- New toilet wax ring(Choose the correct size for your toilet flange)
- Replacement fill valve(Compatible with your tank)
- Replacement flapper valve(Works with your flush mechanism)
- Replacement flush valve seal(Stops leaks at the flush valve)
- New supply line(3/8 in compression to 1/2 in male connector)
- Rubber gloves(Protect hands and keep things clean)
- Towels or rags(Contain spills around the work area)
- Bucket(Catch water during disassembly)
- Safety glasses(Protect eyes from debris)
- Plumber's tape(Optional for threaded connections)
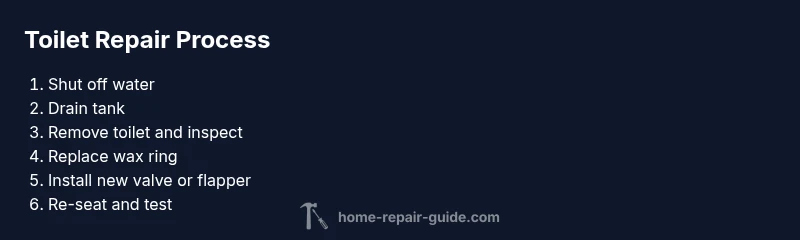
Steps
Estimated time: 60-120 minutes
- 1
Shut off water and drain
Turn off the shut-off valve behind the toilet and flush to drain the tank. Use a sponge or towel to soak up remaining water. This prevents spills and protects your floor during disassembly.
Tip: If the valve is stiff, apply a gentle wiggle while turning, never force it. - 2
Inspect tank components
Lift the tank lid and inspect the flapper, fill valve, and flush valve. Look for cracks, mineral buildup, or wear. Take a photo for reference before removing parts.
Tip: Check for a warped flapper seat; replacing the flapper is often enough for a running toilet. - 3
Remove the toilet if replacing the wax ring
Shut off water, drain, disconnect supply line, and undo mounting bolts. Lift the toilet straight up to expose the flange and old wax ring. Clean the flange surface thoroughly before placing a new wax ring.
Tip: Ask a helper to steady the toilet; lifting is easier with two people. - 4
Install new wax ring and adjust flange
Center the new wax ring on the flange or on the bottom of the toilet depending on your preference. Reposition the toilet carefully, aligning bolts with floor anchors, and press evenly to seal.
Tip: Avoid twisting the toilet; even pressure ensures a proper seal. - 5
Replace fill valve and flapper as needed
Install new fill valve if the old one leaks or doesn’t shut off. Attach the new flapper to the flush valve and connect the chain with proper slack for a full flush.
Tip: Set the float height per manufacturer guidance for a correct fill level. - 6
Re-seat and reconnect
Carefully set the toilet back onto the flange, tighten the bolts evenly, and reconnect the supply line. Turn on water slowly and check for leaks at all connections.
Tip: Crisscross tightening prevents wobble and base leaks. - 7
Test performance
Flush several times to verify a complete seal and proper refill. Observe the tank for any running water or slow leaks after the first few cycles.
Tip: If you hear air or see water at the base after testing, reseat and re-tighten.
FAQ
What is the first step if a toilet keeps running?
The first step is to shut off the water at the shut-off valve and inspect the flapper and fill valve for wear or misadjustment.
First, shut off the water and check the flapper and fill valve for wear or misadjustment.
Can I replace a wax ring without removing the toilet?
In most cases you need to remove the toilet to access the flange and wax ring; partial fixes are unlikely to seal properly.
Usually you need to remove the toilet to access the wax ring and flange for a proper seal.
What tools are essential for toilet repair?
An adjustable wrench, screwdrivers, pliers, a wax ring, and a replacement fill valve or flapper are standard essentials.
Essential tools include a wrench, screwdrivers, pliers, a wax ring, and a replacement valve or flapper.
Is DIY toilet repair safe for a homeowner?
Yes, when you follow safety steps, shut off water, and use the right parts. If you encounter cracks or gas smells, call a professional.
Yes, DIY is safe if you follow safety steps and have the right parts. If you smell gas or see cracks, call a pro.
How long does a typical toilet repair take?
Most repairs take 30 minutes to 2 hours depending on the issue and whether you need to remove the toilet.
Most repairs take from half an hour to two hours depending on the problem.
When should I replace the entire toilet instead of parts?
If the porcelain is cracked beyond repair or the flange is severely damaged, replacement may be more cost-effective than multiple part repairs.
If the toilet is cracked or the flange is badly damaged, replacement may be the better option.
Watch Video
Key Takeaways
- Identify the failing toilet component before replacing parts
- Shut off water and drain first to prevent spills
- Replace wax ring only after the flange is clean and level
- Test for leaks after reassembly and adjust as needed
- Know when to call a pro to avoid costly damage