How to Repair a Clogged Toilet: A Practical Step-by-Step Guide
Learn how to repair a clogged toilet with a clear, practical approach. This Home Repair Guide tutorial covers plunging, augers, safety tips, and prevention to keep your bathroom running smoothly.

To repair a clogged toilet, start with a plunger to create a seal and pressure, then advance to a toilet auger if plunging alone doesn't clear the clog. Avoid chemical drain cleaners unless necessary, and inspect for overflows before continuing. If the toilet still won’t drain after 2-3 attempts, stop and call a plumber.
Why toilets clog and how to approach repair
Clogged toilets are a common plumbing headache, but most are fixable with common tools and careful technique. The Home Repair Guide team emphasizes understanding why a clog happens before you reach for a wrench. According to Home Repair Guide, the typical culprits are excessive toilet paper, flushable wipes that don’t break down, or a foreign object caught in the trapway. Recognizing the cause guides your next steps and reduces the risk of a flood.
Start safely: if water is rising toward the rim, never flush again and quickly lift the toilet tank lid to access the flush valve, or shut off the water supply at the valve behind the toilet. Place towels around the base to catch any splashes and protect the floor. If you can see standing water in the bowl, do not push more water into the drain; instead, prepare to plunge with a proper seal. The goal of the initial assessment is to determine whether this is a simple local clog or a blockage deeper in the drain line.
Next, prepare the space and materials you’ll use. Turn off the supply valve if needed, grab a clean bucket, rubber gloves, and your chosen tool. The tools you select depend on the blockage type: a flange-style toilet plunger is best for creating a tight seal on the rim, while a toilet auger can reach further into the trap to break up or hook the clog. Avoid chemical drain cleaners unless you have no alternative; they can damage the porcelain and pipes and create dangerous fumes in a closed bathroom. If you suspect a sewer line issue or the clog returns after multiple attempts, step back and consider calling a professional.
Tools and materials you’ll want on hand
Before you begin, assemble a small toolkit tailored for toilet repairs. Having everything ready minimizes spills and keeps the workflow smooth. The essential items include a flange cup plunger, a toilet auger (closet auger) designed for toilets, rubber gloves, a bucket, towels or rags, a flashlight for visibility, and a putty knife or old towel to protect the porcelain seal. If the blockage is stubborn, you may also need a plumber’s snake with a flexible cable extension and a wiggle-free hand to guide it through the trap.
Optional items worth considering: a disposable chemical cleaner can be kept as a last resort, a set of channel-lock pliers for loosening tight fittings, and a spare wax ring in case you need to remove and reseal the toilet. Always wear eye protection and avoid mixing chemicals with plungers or snakes. Keeping the area well lit and dry reduces mistakes and helps you monitor water flow as you work. Finally, have a phone nearby in case you need to contact a professional.
Step-by-step overview and planning
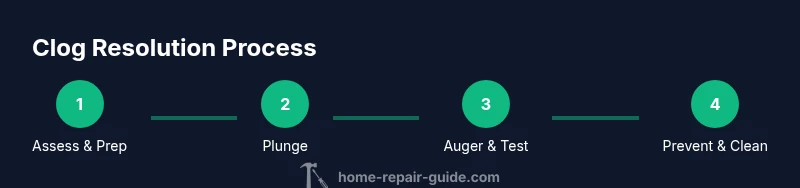
A successful repair follows a logical sequence: assess the situation, choose the right tool, apply the technique, and verify the result. Start by ensuring you have a reliable seal with the plunger and checking for signs of overflow. If the plunger clears the clog, proceed to test the flush before putting away tools. If plunging fails, switch to a toilet auger to reach deeper into the drain and mechanically break up or retrieve the obstruction. If you still see a slowdown after the auger, consider using a secondary method such as a wet/dry vacuum positioned at the drain, taking care to avoid splashes. Throughout the process, keep the area clean and dry to prevent slips and contamination. Finally, once the clog is cleared, flush several times to ensure the flow is consistent and no residual blockage remains. Remember, patience matters: rushing can damage seals or push the clog deeper, making the problem harder to fix.
Plunging vs. augering: choosing the right tool
The best first step is usually a plunger, which uses suction and pressure to move the blockage. A flange cup plunger creates a tight seal around the toilet opening, maximizing efficiency. If plunging does not dislodge the clog, an auger can reach beyond the trapway and hook onto or break the obstruction. When using an auger, advance slowly, rotate the handle to dislodge the blockage, and pull out any material carefully to prevent it from slipping back. Avoid metal grippers that could scratch the porcelain.佰
If the blockage is deep in the drain or you notice sewage backing up in other drains, stop and seek professional assistance. Do not force the auger or apply excessive force, as this can crack the porcelain or damage the drain inlet. After you clear the clog, run clean water for a minute and inspect for any leaks around the base or the wax ring. Finally, clean and disinfect your tools to prevent future contamination and store them for the next time.
Safety, troubleshooting, and alternatives
Safety is essential when dealing with toilet clogs. Always wear gloves and eye protection, and keep children and pets away from the work area. If the water level rises toward the rim, immediately stop and turn off the supply valve. Do not mix chemical drain cleaners with plungers or augers because the reactions can create dangerous fumes. If you experience repeated clogs, investigate potential systemic issues such as sewer line backups or inappropriate waste disposal in the bathroom. In these cases, a licensed plumber may need to inspect the main line and ensure proper venting.
Prevention and maintenance to avoid future clogs
After you clear the clog, adopt a preventive routine to reduce future incidents. Use plumbing-safe cleaners sparingly and avoid flushing items that aren’t toilet paper. Place a small basket in the bathroom to remind family members not to flush wipes, sanitary products, or too much paper at once. Consider a weekly flush-and-rinse to keep the bowl moving, especially in homes with older pipes. If you have a septic system, be mindful of water usage and use septic-safe cleaners. Regularly inspect the toilet for leaks around the base and replace worn wax rings as needed to maintain a good seal. By following these practices, you can significantly reduce the likelihood of future clogs and prolong the life of your toilet and drain lines.
Tools & Materials
- Flange cup toilet plunger(Ensure a tight seal around the drain opening)
- Toilet auger (closet auger)(Cable should be able to bend without kinking)
- Rubber gloves(Protect hands from wastewater)
- Bucket(Catch water and debris)
- Old towels or rags(Protect floor and absorb spills)
- Flashlight(Improve visibility in the trap and drain)
- Plastic putty knife or old towel(Protects porcelain seal during removal)
- Plumber’s snake or flexible auger(For stubborn clogs beyond the trap)
Steps
Estimated time: 45-60 minutes
- 1
Prepare area and inspect for overflow risk
Shut off the water supply if needed and clear the area. Put down towels and place a bucket nearby. Check the bowl height; if water is rising toward the rim, do not flush again and wait until you’re ready to plunge.
Tip: Keep a clear path to the shutoff valve and avoid standing directly in water. - 2
Position the plunger for a good seal
Place the flange of the plunger into the toilet hole, ensuring the head completely covers the drain opening. Create a tight seal with a firm, deliberate push. Prepare to apply controlled thrusts without breaking the seal.
Tip: A good seal is more important than brute force; start with slow, steady pressure. - 3
Plunge with controlled, rhythmic motions
Push down and pull up with even force for 15–20 seconds, then pause to observe if the water level drops. Repeat several cycles, rechecking the seal each time. If water remains, proceed to the auger.
Tip: Avoid rapid, snapping motions which can splash and create a bigger mess. - 4
Use a toilet auger to reach deeper
Insert the auger into the drain and rotate slowly while advancing. When resistance is met, twist and push gently to dislodge the clog. Retract the cable and pull out any material, flushing after to test.
Tip: Do not force the cable; if you meet heavy resistance, stop to avoid damaging the toilet. - 5
Test the flush and re-evaluate
Fill the bowl partially and flush. Watch for a smooth return of water and a clean exit of waste. If the flow is still weak, repeat the plunge and auger steps, or move to an alternative method if available.
Tip: Flush in small increments to avoid overflow and to isolate remaining blockages. - 6
Clean up and sanitize
Remove tools, clean up spills, and sanitize the area. Wash hands thoroughly and disinfect the toilet seat and surrounding surfaces. Store tools in a dry place for next time.
Tip: Rinse the plunger away from other fixtures to avoid spreading contamination. - 7
If unresolved, call a professional
If the clog persists after multiple attempts, a professional may be needed to inspect the main line or septic system. Do not repeatedly reuse chemical cleaners in a closed space.
Tip: Document what you’ve tried so the plumber can diagnose more quickly.
FAQ
What should I do first when my toilet is clogged?
Stop flushing to prevent overflow and try a plunger with a tight seal. If this fails, move to a toilet auger. Avoid chemical cleaners as a first approach.
First, stop flushing to prevent overflow and try a plunger. If that doesn’t work, move to a toilet auger. Avoid chemicals as the first fix.
Can I use chemical drain cleaners on a toilet?
Chemical drain cleaners can damage the porcelain and sewer lines and may emit harmful fumes in a closed bathroom. Use mechanical methods first and only as a last resort if recommended by a professional.
Chemical cleaners can harm your toilet and pipes; use plungers and augers first, and only use chemicals if a professional says it’s safe.
When should I call a plumber?
Call a plumber if plunging and augering fail after several attempts, if the clog recurs quickly, or if sewage backs up into other drains. A professional can assess sewer line issues.
Call a plumber if plunging and Auger don’t solve it after several tries, or if other drains are affected.
How can I prevent future toilet clogs?
Flush only toilet paper and human waste. Avoid flushing wipes, sanitary products, or paper towels. Consider regular maintenance and not overloading the toilet with toilet paper.
Flush only toilet paper and waste, avoid wipes, and perform light maintenance to prevent clogs.
Is there a difference between a plunge and a snaking technique?
Yes. A plunger applies suction and pressure and is best for shallow, simple clogs. A toilet auger (snake) can reach deeper into the drain for tougher blockages.
Plunge for simple clogs, use a toilet auger for deeper ones.
Watch Video
Key Takeaways
- Start with plunging to clear shallow blockages
- Switch to an auger for deeper clogs
- Test flow after each method to confirm clearance
- Avoid chemical cleaners when possible
- Call a professional if the clog persists