Repair Kit for Toilet Flange: Step-by-Step Guide
Learn how to choose and use a repair kit for toilet flange to stop leaks, stabilize the toilet, and restore a watertight seal. This step-by-step guide covers kit selection, installation, safety, and maintenance with clear, homeowner-friendly instructions.

By using a dedicated repair kit for toilet flange, you can stop leaks, stabilize a wobbly toilet, and restore a solid seal between the toilet and the drain line. This guide shows how to evaluate, choose, and install a kit safely, with step-by-step actions and safety reminders. You’ll need basic tools and a few common supplies to complete the fix.
Why a Toilet Flange Repair Kit Matters
According to Home Repair Guide, a failing toilet flange can lead to leaks, sewer gas entry, and expensive water damage. A repair kit for toilet flange provides a tested method to restore the connection between the toilet and the drain pipe, reestablishing alignment and a reliable seal. By addressing flange damage early, you prevent wobble, reduce the risk of leaks at the base, and extend the toilet’s lifespan. This approach is especially helpful when the flange has minor cracks, rotation, or misalignment but the subfloor remains sound. Using a kit keeps parts organized and ensures you have compatible hardware, a new gasket, and the ability to reseat the unit without improvising jerry-rig solutions. For DIY homeowners and renters, a kit lowers the chances of leaks and confusing interchanges between different brands. In short, a flange repair kit makes the repair straightforward, repeatable, and safer than ad-hoc fixes.
What a Repair Kit Includes
A typical repair kit for toilet flange includes a replacement flange (or flange repair insert), stainless or brass bolts, washers, a reinforced wax ring or gasket, and a set of tools designed for deburring and seating. Some kits also come with epoxy putty or a high-strength epoxy patch to secure cracked sections, plus silicone sealant for an extra layer of water resistance. The kit may be designed to fit standard 3- or 4-bolt toilets and accommodate different flange thickness. When selecting a kit, verify compatibility with your toilet model, the type of flange (PVC, ABS, or metal), and the existing drain line diameter. Having a complete kit on hand reduces trips to the hardware store and minimizes the risk of mismatched parts during installation.
How to Assess Your Toilet Flange Condition
Before buying or opening a kit, inspect the flange area with the toilet removed. Look for cracks, broken tabs, rust on metal flanges, or obvious wobble when you apply gentle force. If the flange sits flush with the subfloor and the bolts align cleanly, a repair kit is likely sufficient. If you notice major damage, floor rot, or unable to tighten bolts without further movement, plan for replacement rather than patchwork. Take photographs of the flange orientation, bolt pattern, and any damage to guide kit selection and ensure proper reassembly after the repair.
Choosing the Right Kit and Components
The right kit depends on flange material, bathroom setup, and your DIY comfort level. If you have a plastic PVC/ABS flange, choose corrosion-resistant hardware and a compatible wax ring height. For metal or cast-iron flanges, ensure your kit includes a flange insert designed for metal surfaces or a compatible adapter. Some kits bundle a wax ring with a built-in flange for easier installation, while others provide a standalone wax ring and a separate flange assembly. Check product instructions for weight limits, warranty, and compatibility with your toilet’s bolt pattern. When in doubt, select a universal kit with adjustable components and clear replacement guidelines.
Maintenance After Repair and Preventive Tips
After completing the repair, flush the toilet multiple times and inspect for leaks around the base and connections. If you notice moisture, stop and recheck bolt torque and gasket seating. Maintain a simple routine: inspect the base monthly, keep a spare wax ring and installation hardware on hand, and address any signs of floor rot or moisture promptly. Avoid flushing items that can damage the seal, and refrain from over-tightening bolts, which can crack the flange or crack the toilet’s base. A proactive approach helps prevent recurring leaks and extended damage.
Tools & Materials
- Repair kit for toilet flange(Ensure compatibility with your flange type (PVC, ABS, or metal) and bolt pattern)
- Adjustable wrench(For nuts and bolts around the closet flange)
- Screwdriver set (Phillips and flat-head)(Useful for removing or driving screws on some repair kits)
- Putty knife(Pry up the old wax ring and clean the flange area)
- Wax ring with flange (replacement)(Choose height compatibility with your toilet and flange)
- Replacement closet bolts and washers(New hardware helps ensure a secure seal)
- Silicone sealant (optional)(Additional water resistance at tricky joints)
- Epoxy putty or epoxy patch (optional)(Use only if repairing small flange cracks per kit instructions)
- Gloves(Protect hands; avoid contact with sewage-contaminated materials)
- Towels or a small bucket(Contain water during removal and reinstall)
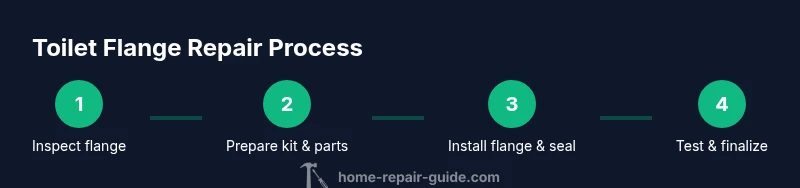
Steps
Estimated time: 60-90 minutes
- 1
Shut off water and prepare the area
Begin by turning off the shut-off valve behind the toilet and flushing to empty the tank and bowl. Place towels or a small bucket to catch any remaining water. This step reduces mess and keeps the workspace safer as you work on the flange.
Tip: Have a multi-bit screwdriver ready; you may encounter unusual screws on some kits. - 2
Disconnect water supply line and remove the toilet
Carefully disconnect the supply line at the shut-off valve and at the toilet inlet. Loosen the closet bolts at the base with your wrench, then gently lift the toilet straight up and set it aside on a towel-free area to avoid cratering the floor.
Tip: Slide a spare bolt or nut into the thread to prevent them from dropping into the drain opening. - 3
Inspect flange and remove the old wax ring
With the toilet removed, inspect the flange for cracks, missing segments, or rot in the subfloor. Use the putty knife to scrape away old wax and debris, ensuring a clean seating surface for the new kit and wax ring.
Tip: Take a photo of flange orientation and bolt pattern for reference during reassembly. - 4
Select the correct repair kit and lay out components
Review the kit contents and confirm compatibility with flange material and thickness. Lay out all parts on a clean towel or mat so you can easily reach each piece as you work. If your kit includes an insert or replacement flange, prepare the area for installation.
Tip: Match gasket thickness to the flange height to avoid base misalignment. - 5
Install flange repair — align and secure
Install the replacement flange or repair insert, aligning bolt holes with the existing pattern. Secure with the provided bolts and washers, tightening evenly in a crisscross pattern to avoid warping. Confirm the flange sits flush with the subfloor and remains stable when rocked gently.
Tip: Tighten bolts gradually in a diagonal sequence to ensure even seating. - 6
Seal the drain and reseat the toilet
Place the wax ring (or gasket) onto the flange, align the toilet with the bolts, and lower it straight down. Lightly press to compress the wax ring, then snug the nuts by hand before final tightening in a crisscross pattern. Recheck alignment to ensure the toilet base sits evenly on the seal.
Tip: Do not tilt the toilet as you lower it to prevent misalignment. - 7
Reconnect water line and run initial test
Reconnect the water supply line, turn the valve back on, and allow the tank to fill. Flush several times to check for leaks around the base and the supply connection. If you see moisture, power down, reseal, and retighten as needed.
Tip: Watch closely for slow leaks in the first 10–15 minutes after initial flush. - 8
Finish and cleanup
Wipe down the floor, reattach any shielding or trim, and store spare parts in a labeled container for future use. Take note of how long the repair seemed to hold and set a reminder for periodic inspection.
Tip: Keep a simple maintenance log for future reference.
FAQ
What is a toilet flange repair kit?
A toilet flange repair kit provides the components needed to reinforce or replace the flange and reseal the toilet to the drain line. It standardizes parts such as a flange, bolts, gaskets, and sometimes epoxy or sealant for a secure, watertight connection.
A repair kit includes the flange, bolts, gasket, and related parts you need to fix a worn or damaged flange and seal the toilet to the drain.
How do I know if my flange needs repair or replacement?
If the flange shows cracks, missing sections, or substantial movement, replacement is usually best. Minor wobble or a damaged gasket may be addressed with a repair insert or kit. A professional assessment helps confirm the right approach.
Look for cracks or loose fit. Small issues can be repaired with a kit, but big damage often needs replacement.
Can I use any wax ring with a repair kit?
Most kits include a compatible wax ring of appropriate height for standard toilets. If your kit uses a sealant or elastomer gasket instead of wax, follow the kit instructions for seating.
Many kits come with a wax ring; if yours uses a different seal, follow the provided directions.
Is it safe to DIY flange repair or should I hire a plumber?
Many flange repairs are DIY-friendly when you follow the kit instructions and practice safe handling. If you encounter large-scale subfloor damage, cast-iron piping, or persistent leaks, consider a licensed plumber.
For simple flange issues, DIY can work. For serious damage, call a plumber.
How long does a flange repair typically last?
Durability depends on proper installation, supply line condition, and floor integrity. With correct technique and materials, a properly installed repair kit can provide a lasting seal for several years.
If installed correctly and with solid subfloor, you can expect a long-lasting repair.
What if the flange is on a cast-iron pipe?
Cast-iron flanges require compatible repair inserts or adapters designed for metal surfaces. Verify kit compatibility and consider professional assessment if you’re uncertain.
Cast-iron requires a metal-compatible kit or adapter, and you may want expert help if unsure.
Watch Video
Key Takeaways
- Identify flange damage and compatibility before buying a kit
- Use a kit with matching flange material and bolt pattern
- Tighten bolts evenly to prevent warping and leaks
- Test thoroughly for leaks after restoration