Radiator Fluid Leak Repair: A Complete How-To Guide
Learn how to diagnose, seal, and repair radiator coolant leaks safely with practical steps, essential tools, and maintenance tips to prevent future leaks. Proper handling protects your engine and your family.

By following this guide you’ll locate leak points in your cooling system, safely apply temporary fixes, and plan a durable repair that prevents overheating. You’ll learn diagnostic steps, essential tools, and when to call a professional for radiator fluid leak repair. This approach helps protect engine health and your wallet.
What is radiator fluid leak and why it matters
Radiator fluid leak repair is often visible as puddles under the vehicle, a sweet odor near the engine bay, or steam and overheating warnings. The coolant (often a mix of water and antifreeze) circulates through the engine to maintain safe operating temperatures. When a leak develops, the cooling system loses pressure, which can lead to overheating, warped heads, and expensive damage. According to Home Repair Guide, analysis in 2026 notes that hose connections and the radiator cap are among the most common leak points. Understanding what can leak and where helps you target the repair plan effectively and safely. This section explains typical leak sources, how to recognize symptoms, and the importance of addressing leaks promptly to prevent further damage.
Safety first: risks and precautions
Cooling system work involves hot liquid, pressurized components, and toxic antifreeze. Never open the radiator cap while the engine is hot, and wear eye protection and gloves. Work in a well-ventilated area and keep children away from spilled coolant, which is toxic. If you suspect steam or pressure release, stop and allow the engine to cool completely. A small leak may seem minor, but it can escalate quickly under load or heat, so treat every sign seriously. For extra safety, disconnect the battery if you’re planning disassembly near electrical components, and keep a fire extinguisher nearby in odd event of a flare.
Diagnostic steps to locate a leak
Begin with a visual inspection of hoses, clamps, and the radiator. Look for obvious signs like crusty residue, dark damp spots, or crusting around fittings. Check the radiator cap and its seal; a worn cap can let coolant escape or boil-off air into the system. Inspect the water pump inlet and thermostat housing for dampness. If the leak isn’t obvious, use a UV dye and a darkened room or a coolant pressure tester to isolate the source without excessive disassembly. Document any signs you find and compare them against your vehicle’s service manual for target areas. Home Repair Guide Analysis, 2026 notes that hose connections and radiator caps are frequent culprits, so start there.
Temporary fixes and when they help
Temporary fixes can buy you time to reach a repair shop, but they are not a substitute for a proper fix. If you notice a small hose leak, a high-quality coolant-safe sealant marketed for radiator hoses can seal minor imperfections. Do not rely on temporary patches for large cracks or a slipping radiator hose clamp. If you use a stop-leak product, monitor coolant levels daily and plan a permanent repair as soon as possible. Always recheck for leaks after any temporary repair and keep the system at the correct level to avoid air pockets.
Permanent repair options and parts
Permanent fixes range from replacing a leaking hose or hose clamp to refurbishing the radiator itself. A cracked radiator or a failed core typically requires replacement, while a frayed hose or lost clamp can be resolved with straightforward parts. Replacement parts should match your vehicle’s cooling system specifications, including coolant type and pressure rating. If the pressure test reveals more extensive damage, consult a professional to prevent further damage. The Home Repair Guide Team would emphasize using genuine or high-quality aftermarket parts and following torque specs to avoid leaks at connections. It’s also wise to inspect the water pump, thermostat, and cap during the repair so you don’t miss secondary leak points. The goal is a durable seal, proper cooling flow, and a reliable system that won’t overheat again.
Maintenance to prevent future leaks
Prevention starts with regular coolant checks, using the right antifreeze concentration, and scheduled hose inspections. Replace aging hoses and worn clamps before they fail, and verify the radiator cap seals correctly. Schedule a coolant flush at manufacturer-recommended intervals, and always run the engine with the heater off during a warm-up trial to verify even flow. Keeping the cooling system clean helps you spot drips early and reduces corrosion inside the core. The Home Repair Guide Team recommends documenting maintenance dates and inspecting for signs of wear so you can address issues early rather than after a costly breakdown.
What to do next: when to call a professional and planning ahead
If you notice frequent coolant loss, steam, or overheating, stop driving and seek professional service promptly. Major leaks, persistent dampness, or signs of contamination in the coolant mean you should not delay. A qualified technician can perform a pressure test, inspect for internal leaks, and ensure the system is properly flushed and refilled. For routine maintenance, plan coolant replacement every few years (per your vehicle’s manual) and keep a record of fluid type and replacement dates. The Home Repair Guide Team emphasizes that while DIY fixes can handle minor leaks, professional assessment protects engine longevity and safety.
Quick reference: what every car owner should know about radiator leaks
- Leaks reduce cooling efficiency and can cause overheating if ignored.
- Common leak points include hoses, clamps, radiator cap, and the water pump housing.
- Safety first: cool engine, wear PPE, and never open a hot radiator cap.
- Use diagnostic steps to locate leaks before attempting fixes.
- Permanent repairs vary by source: hoses/clamps are simpler; cracks in the core require replacement.
- Regular maintenance helps prevent leaks; consider a coolant flush and hose inspections as part of your schedule.
- If in doubt, consult a professional to avoid costly engine damage.
Tools & Materials
- Catch pan(Place under the suspected area to collect draining coolant)
- Gloves(Chemical-resistant; protect skin from coolant)
- Safety goggles(Prevent splashes from reaching eyes)
- Rags or shop towels(Wipe surfaces and clean spills)
- Flashlight or work light(Inspect dark corners and hose connections)
- Socket/wrench set(Remove hose clamps or mounting hardware)
- Screwdrivers (flat and Phillips)(Access clamps and caps)
- Coolant (pre-mixed or concentrate with water)(Top up after leaks are repaired; use the same type as in system)
- Coolant funnel(Aid precise refilling and avoid spills)
- Radiator hose clamps (replacement)(Optional if existing clamps are worn)
- Replacement radiator hose (if needed)(Only if hose is cracked or swollen)
- Water pump or thermostat gasket (if needed)(Only if disassembly reveals wear)
- UV dye and UV flashlight (optional)(Helps locate slow leaks)
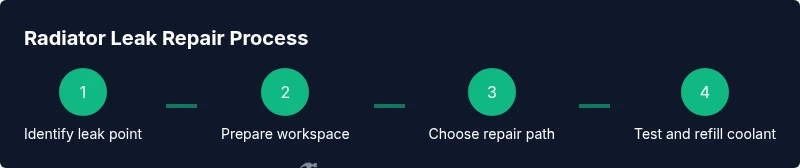
Steps
Estimated time: 2-4 hours
- 1
Prepare and secure the area
Park on a level surface and allow the engine to cool completely. Open the hood and locate the suspected leak area. Set a catch pan beneath the area and gather PPE to begin a careful inspection.
Tip: Always work with a cooled engine; hot coolant can burn and cause injury. - 2
Inspect obvious points for leaks
Check hoses, clamps, radiator cap, and the radiator exterior for dampness or crusty deposits. Tighten loose clamps if safe to do so; replace damaged hoses if signs of cracking or swelling appear.
Tip: Use a flashlight to reveal dark damp spots that aren’t obvious at first glance. - 3
Depressurize and test the system
If you have a manual pressure tester, apply the recommended pressure to the cooling system to identify the leak point. If not, perform a visual pressure test by observing for fresh dampness under cautious vacuum or cap handling conditions.
Tip: Do not exceed factory pressure ratings to avoid additional damage. - 4
Decide on a temporary vs. permanent fix
For minor hose leaks, a proper clamp tightening or replacement can stop the leak temporarily. For cracks in hoses or the core, plan for permanent replacements rather than a stop-gap solution.
Tip: Temporary fixes should only bridge the time to a proper repair; monitor coolant levels closely. - 5
Perform the permanent repair or plan the service
Replace leaky hoses or clamps as needed. If the radiator core is damaged or if there are internal leaks, arrange for radiator replacement or professional service. Ensure fittings are torqued to spec and coolant is flushed if required.
Tip: Keep a service log with parts used and dates for future maintenance. - 6
Refill, test, and road-test
Refill coolant to the correct level using a funnel; bleed air from the system if your vehicle requires it. Start the engine and watch for leaks, then run the heater to ensure proper coolant circulation. Take a short test drive to confirm stable temperatures.
Tip: Check for air pockets and recheck levels after the engine cools.
FAQ
What are the most common signs of a radiator fluid leak?
Common signs include puddles under the vehicle, a sweet coolant odor, fogging under the hood, and engine overheating indicators. These signs warrant a careful inspection to locate the leak source.
Look for puddles, a sweet smell, and overheating; those indicate a leak that needs checking.
Can I fix a radiator leak myself?
For small hose leaks or cap issues, a DIY fix may be possible with the right tools. Serious cracks or the radiator core usually require professional service to avoid engine damage.
DIY fixes work for small leaks, but bigger cracks should be handled by a pro.
Is it safe to drive with a leak?
Driving with a leak can risk overheating and severe engine damage. If you notice overheating or rapid coolant loss, stop and seek professional help.
Don’t drive long distances if you see overheating or coolant loss.
What basic tools do I need to inspect for leaks?
A flashlight, catch pan, rags, pliers or a wrench set, screwdrivers, and a pressure tester or dye kit can help you locate leaks effectively.
A flashlight, pan, and basic tools help locate leaks quickly.
How much does professional radiator leak repair typically cost?
Costs vary with the leak source and parts, from hose-and-clamp replacements to radiator core work. Expect a range based on parts and labor when planning repairs.
Costs depend on what's leaking and what parts are needed; a professional will give you a range after inspection.
How often should I flush the cooling system?
Flushing frequency depends on vehicle and coolant type, but many manufacturers recommend periodic flushing or when signs of contamination appear.
Follow your manual, and flush when you see signs of contamination or as recommended by the manufacturer.
Watch Video
Key Takeaways
- Identify common leak points early to prevent overheating.
- Use proper PPE and work on a cooled engine.
- Choose replacement parts that match your cooling system specifications.
- Test after repair to confirm leaks are gone.
- Regular cooling-system maintenance helps prevent future leaks.