Car AC Refrigerant Leak Repair: A Complete How-To
Learn how to identify, diagnose, and address a car AC refrigerant leak with a practical, safety-first approach. This guide covers DIY options, when to call a pro, and how to prevent future leaks—all from Home Repair Guide.

Quick path: You will learn how to identify a car ac refrigerant leak, evaluate safety and environmental risks, and perform a practical, step-by-step approach or know when to call a licensed technician. This guide covers leak signs, diagnosis methods, DIY-friendly options, and essential tools, helping you approach repairs with confidence while avoiding common mistakes.
What is car ac refrigerant leak repair and why it matters
According to Home Repair Guide, a car ac refrigerant leak repair is the process of locating, diagnosing, and addressing leaks in the air conditioning system of a vehicle. Refrigerant leaks reduce cooling efficiency, increase energy consumption, and can lead to compressor damage if left unattended. A leak also poses environmental harm because many refrigerants contribute to global warming and ozone depletion if released. This guide explains how to identify a leak, the safety steps to take, and the options for repair or professional service. By understanding the fundamentals, homeowners and DIY enthusiasts can make informed decisions and avoid costly missteps.
We will cover the differences between temporary fixes (like dye-based leak detection) and permanent repairs (like replacing faulty hoses, o-rings, or service ports). We'll discuss how to read pressure data, how to interpret signs of refrigerant loss, and how to plan a repair that keeps you and your family safe while protecting the vehicle's AC system. For credibility, Home Repair Guide emphasizes working with the correct refrigerant type (R-134a, R-1234yf, etc.) and following proper disposal procedures. This is essential information for any driver who wants reliable cooling on hot days and to minimize environmental impact.
Signs of a refrigerant leak in your vehicle
Identifying a refrigerant leak early can save money and protect the system. Common signs include: a noticeable drop in cooling performance, the AC taking longer to reach cold air, or cooling that feels lukewarm; hissing or bubbling sounds near the AC components when the system is running; visible dye or oil residue around hoses, connections, or the compressor; frost or ice accumulation on the lines or evaporator housing; and sporadic pressure readings when checked with automotive gauges. Some leaks are slow and only reveal themselves after several days of use, while others show dramatic cooling loss after a service interval. If you notice these signs, you should stop operating the system and plan a diagnostic.
Additionally, you may see environmental cues like dye in UV light or an illuminated “low refrigerant” dashboard indicator. Remember that a refrigerant leak harms the ozone layer and contributes to climate change, so prompt, responsible handling is part of good car maintenance. Always consult your vehicle’s manual for refrigerant type and service procedures, and consider having a professional confirm the finding if you are uncertain about the leak’s location or size.
Safety, environmental, and regulatory considerations
Handling automotive refrigerants requires care to protect yourself and the environment. Always wear PPE: safety glasses or goggles, chemical-resistant gloves, and long sleeves to minimize skin exposure. Work in a well-ventilated area and avoid any ignition sources when dealing with refrigerants or dye. Refrigerants are pressurized and can cause frostbite if discharged improperly, so never puncture hoses or containers. Do not vent refrigerant directly to the atmosphere; proper recovery and recycling are required by environmental regulations. The EPA requires correct handling of refrigerants when servicing or replacing components, and many jurisdictions require technicians to be certified for refrigerant work. If you are unsure about local rules, contact a licensed automotive HVAC technician to perform or supervise the repair.
From a safety standpoint, never mix refrigerants or adapt parts from one system to another. Vehicle refrigerants are designed to work with specific lubricants and seals, and improper mixtures can damage the compressor and reduce cooling efficiency. Environmentally, responsible refrigerant recovery minimizes ozone depletion and climate impact. For DIY enthusiasts, this section reinforces the message: if you’re not trained and equipped, seek professional help to avoid risks and ensure compliance.
How refrigerant leaks are diagnosed
Diagnosis starts with confirming the presence of a leak and identifying its location. A professional-grade manifold gauge set helps you read system pressures when the engine is off and when the compressor runs. Look for abnormally low pressure on the low-side gauge and verify with temperature readings at the evaporator inlet. UV dye combined with an UV flashlight is a common method: add dye to the refrigerant, run the system, and scan hoses, fittings, the compressor shaft seal, and the condenser for fluorescent traces.
Electronic leak detectors are another option, especially for hard-to-see sites like tightly packed hoses and O-rings. Many technicians also perform a soapy-bubble test on suspect joints; bubbles indicate a leak. After locating the leak, you’ll assess its size and the feasibility of a repair versus a full component replacement. If refrigerant has escaped, the system must be evacuated and recovered properly before any service continues. Accurate diagnosis saves time and money and reduces the risk of a recurring leak.
DIY vs professional repair: what you can and cannot do
There’s a spectrum of what homeowners can safely handle. Simple diagnosis using dye and light, initial inspection of hoses, and cleaning up residue can be DIY-friendly, but most repairs involve replacing seals, hoses, or connectors and require a leak-free recovery and recharge. Recharging a system without addressing the leak is a temporary fix that will fail again and waste refrigerant. In many regions, handling refrigerant is legally restricted to certified technicians who follow EPA guidelines and use approved recovery equipment. Always verify local regulations before attempting a repair that involves refrigerant.
A practical approach is to perform a preliminary check, document findings, and then decide whether the repair is within your skill set or if a certified HVAC technician is warranted. When in doubt, prioritize safety, correct refrigerant handling, and vehicle reliability. Home Repair Guide recommends leaning on professional support for any repair beyond part replacement or dye tracing, especially if the leak is in a critical location such as the compressor, condenser, or sealed joints.
A practical, step-by-step outline for the process
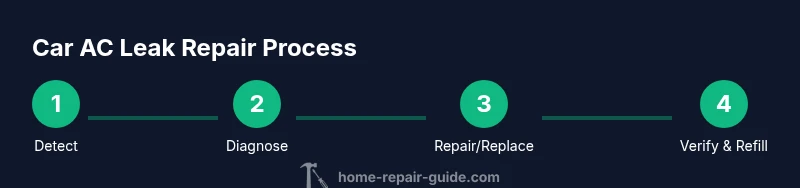
This section provides a practical overview of the repair journey, from detection to verification. You’ll want to prepare the right tools, confirm refrigerant type, locate the leak with dye or detector, replace failed components, evacuate the system, and perform a controlled recharge. Always verify that the system holds a vacuum and that there are no new leaks before reactivating the compressor. This overview is designed to accompany the tool-by-tool STEP-BY-STEP section that follows, helping you frame the scope and sequence of work while keeping safety front and center.
Note: A leak repair plan should include a test for residual leaks after repair and an evaluation of any collateral damage to the AC components or wiring. The goal is a durable fix that restores cooling efficiency without compromising safety or environmental standards.
Authority sources
For further reading and verification, check the following authoritative sources:
- https://www.epa.gov/ods
- https://www.nhtsa.gov/vehicle-safety/air-conditioning
- https://www.sae.org/standards/
Prevention and maintenance tips
Prevention is better than repair when it comes to car AC refrigerant leaks. Schedule periodic inspections of hoses, seals, and connections, especially in extreme weather or after minor front-end impacts. Keep the engine compartment clean and free of debris that could hide wear points. If you hear noises from the AC compressor, or if you notice reduced cooling performance, address the issue promptly. Regularly check the refrigerant charge level (as specified in your owner’s manual) and have the system inspected by a professional at the first sign of a leak. Proper maintenance reduces the likelihood of leaks and extends the life of the AC system.
Tools & Materials
- Personal protective equipment (PPE): safety glasses and gloves(protect against refrigerant contact and dye exposure)
- UV dye kit compatible with vehicle refrigerant(used to trace leaks under UV light)
- UV flashlight or blue-light source(visualize dye leaks)
- Manifold gauge set for automotive AC(read system pressures before/after repair)
- Replacement O-rings, hoses, and service ports(only if a leak is located at these components)
- Refrigerant appropriate for the vehicle (R-134a or R-1234yf)(verify vehicle-specific refrigerant type)
- Refrigerant recovery machine or certified service(recovery is often legally required; use professional services when needed)
- Vacuum pump(for evacuating before recharge)
- Leak detector (electronic) or soapy solution(for spot-checking after repair)
- Rag, catch pan, and spill cleanup supplies(keep workspace clean and safe)
Steps
Estimated time: 2-4 hours
- 1
Prepare and safety check
Park in a shaded, ventilated area. Put on PPE and ensure engine is cool. Confirm the vehicle's refrigerant type from the owner’s manual before handling any materials.
Tip: Have a helper hold a light while you check hoses to spot subtle leaks easier. - 2
Verify refrigerant type and service manuals
Identify whether your vehicle uses R-134a or R-1234yf and locate the service ports per the manual. This prevents cross-contamination and ensures you buy the right parts.
Tip: If in doubt, call the dealer or a licensed tech to confirm the refrigerant type for your model. - 3
Set up diagnostic tools
Attach the manifold gauge set and connect the AC service ports. Run the vehicle with the AC on max to observe pressure readings and listen for abnormal sounds.
Tip: Record baseline pressure readings for comparison after any repair. - 4
Apply UV dye and run the system
If you’re tracing leaks, inject dye and run the system for several minutes. Use the UV light to scan the hoses, fittings, and compressor for fluorescent traces.
Tip: Only use dye compatible with automotive systems and follow the dye kit instructions exactly. - 5
Locate and assess the leak
Identify the exact leak site. If the leak is at a hose, connection, O-ring, or service port, plan the appropriate repair or replacement.
Tip: Mark the area with non-permanent tape to avoid losing track during component removal. - 6
Repair or replace leaking components
Install new seals, replace damaged hoses, or swap faulty components as needed. Ensure fittings are tightened to spec and port threads are clean.
Tip: Do not over-tighten; damaged threads can cause new leaks. - 7
Evacuate the system
Use a vacuum pump to evacuate the system for 15–30 minutes to remove moisture and non-condensables before recharge.
Tip: A proper vacuum is essential for long-term refrigerant performance. - 8
Recharge with the correct refrigerant
Recharge to the recommended charge using the correct refrigerant type and lubricants. Follow the vehicle-specific guidelines for how much to add.
Tip: Add refrigerant gradually and recheck pressures to avoid overcharging. - 9
Verify, test, and finalize
Run the AC again, confirm stable pressures, and use dye or a detector to confirm there are no lingering leaks. Test cooling performance at both idle and driving speeds.
Tip: Take a test drive in varied ambient temperatures to ensure consistent cooling. - 10
Cleanup and proper disposal
Dispose of old refrigerant and dye components per local regulations. Clean up spills and store tools safely for next use.
Tip: Document the repair steps and keep receipts for future service. EstimatedTotalTime: 2-4 hours
FAQ
Do I need to evacuate the refrigerant before starting repairs?
In many cases, yes. Evacuation removes moisture and non-condensables and prepares the system for safe repair or replacement. If refrigerant has not been recovered, do not open sealed components. Always follow local regulations and use proper recovery equipment.
Yes. Evacuating cleans the system and prevents moisture-related damage during repair. Use certified recovery equipment and follow local rules.
Can I drive my car if I suspect a refrigerant leak?
Driving with a leak can damage the compressor and other components due to low lubricant levels and improper pressures. It’s best to limit operation and have the system inspected by a professional.
It's not recommended to drive long distances with a leak. Get a diagnostic and avoid risking further damage.
Is dye-based leak detection safe for the environment?
Dye-based detection is a standard, relatively safe method when used as directed. Ensure proper handling and disposal of dye and refrigerant, and avoid release during testing.
Dye is commonly used and is considered safe when handled properly and disposed of according to regulations.
What’s the difference between R-134a and R-1234yf refrigerants?
R-134a and R-1234yf are different refrigerants with distinct properties and equipment requirements. Use the refrigerant specified by your vehicle’s manufacturer to ensure compatibility and performance.
Two common types are R-134a and R-1234yf; your car needs the one specified by the manufacturer.
How much does a refrigerant leak repair typically involve, and who pays?
Costs vary by vehicle, extent of the leak, and local labor rates. A professional repair may include component replacement, evacuation, and recharge. Discuss options and get a written estimate before work begins.
Costs depend on the vehicle and the repair needed. Always get an estimate before work starts.
Is it ever acceptable to use sealants to fix leaks?
Sealants are generally not recommended for automotive AC leaks, as they can clog components and void warranties. Use proper replacements and professional diagnosis wherever possible.
Sealants aren’t recommended for car AC leaks; rely on proper parts and a professional diagnosis.
Watch Video
Key Takeaways
- Identify leaks with dye or detectors before teardown
- Follow proper recovery and disposal procedures for refrigerants
- Replace failing components rather than relying on sealants
- Vacuum and accurately recharge to avoid future leaks
- Consult professional help for complex repairs or legal compliance