a c repair vehicle: Step-by-Step Car AC Guide
Learn to diagnose, safely service, and perform a basic AC repair on your vehicle. This guide covers tools, safety, step-by-step tasks, and when to call a pro for car air conditioning issues.

Learn how to safely diagnose and perform a basic a c repair vehicle. This quick answer outlines essential tools, safety steps, and a clear, step-by-step approach to common car AC faults, plus guidance on when professional service is required. Whether you're a homeowner tackling a routine check or a DIYer facing a stubborn leak, this guide helps you decide quickly.
a c repair vehicle: Understanding Car AC Systems
A car’s air conditioning system is a compact, self-contained climate-control network. At its core, it moves refrigerant through a closed loop, absorbing heat from the cabin and releasing it outside. For homeowners and DIY enthusiasts, understanding the main components—compressor, condenser, evaporator, expansion device, hoses, and electrical controls—helps you diagnose issues more accurately. The phrase a c repair vehicle might appear in manuals and tutorials, but the core idea remains the same: a balanced system that keeps you cool when the engine beats heat. When you tackle a c repair vehicle, you’re taking on both mechanical and electrical challenges, so a methodical approach reduces risk and increases the chances of a durable fix. Keep in mind that this guide emphasizes safety, proper procedures, and the limits of DIY work.
Symptoms you might notice can signal a failing car AC
Weak airflow, inconsistent cooling, unpleasant odors, or unusual noises are often early warning signs. If the compressor clutch engages inconsistently or the system never reaches the desired temperature, there could be leaks, electrical faults, or blocked passages. In many cases, leaks are the root cause, draining the charge and reducing efficiency. Listen for grinding or rattling sounds from the compressor, which can indicate internal wear or binding. A thorough inspection of lines, seals, and the condenser fin condition can reveal the most likely culprits without unnecessary disassembly. Early detection saves money and time when performing a c repair vehicle.
Key components of the car AC system and how they fail
The compressor is the heart of the system, pumping refrigerant through the loop. The condenser dissipates heat as the gas becomes liquid, typically located in front of the radiator. The evaporator inside the dashboard cools the cabin air, while the expansion device or orifice tube controls refrigerant flow. Hoses and seals prevent leaks, and the electrical controls manage clutch engagement and temperature sensing. Failures can stem from leaks, worn seals, degraded refrigerant, or clogged passages. A basic understanding of these parts helps you decide whether a repair is a simple seal replacement or a full component swap. This knowledge is essential as you plan a c repair vehicle.
Safety first: essential precautions before you start
Always disconnect the vehicle’s battery before working near electrical components. Wear eye protection and gloves, and work in a well-ventilated area to avoid inhaling fumes from refrigerants or cleaners. If you suspect a refrigerant leak, avoid directly charging the system without proper recovery equipment and legal compliance. Refrigerant handling is regulated in many regions, so ensure you follow local laws and use approved recovery and recycling methods. Keep fire extinguishers and first aid supplies within reach, and never work alone when dealing with pressurized lines or electrical failures. Safety is the foundation of any a c repair vehicle project.
Diagnosing the problem: refrigerant, electrical, or mechanical
Start with the basics: check fuses and relays connected to the HVAC system, inspect the blower motor for proper air movement, and verify that the pressure readings are within normal ranges if you have a gauge set. If cooling is weak but the compressor is engaging, the issue could be insufficient refrigerant, a leak, or a clogged expansion device. Electrical faults—bad wiring, worn connectors, or a faulty climate control module—can masquerade as cooling problems. A systematic diagnosis, using a logical sequence (fuse checks, pressure checks, electrical tests), helps you decide whether to proceed with a repair or seek professional service. Remember, a c repair vehicle requires careful planning and methodical testing.
Preparing for the repair: workspace, tools, and documentation
Clear a dry, well-lit workspace with enough room to maneuver under the hood. Gather basic hand tools, a set of wrenches and sockets, screwdrivers, a flashlight, and protective gear. If you’ll work with refrigerants, obtain the proper recovery equipment and follow legal guidelines. Documentation, including the vehicle’s service manual and manufacturer specifications, helps you target the exact components and torque specs. Take photos before disassembly and label hoses and connectors to prevent mix-ups during reassembly. Preparing thoroughly reduces the chance of errors and makes the repair smoother for a c repair vehicle.
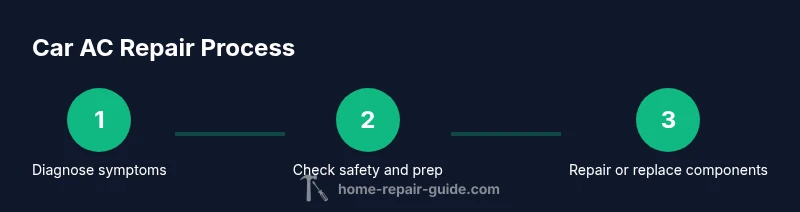
Step-by-step overview of a safe repair approach
This section provides a high-level roadmap of the repair process. Begin with safety checks and system assessment, then isolate the faulty section (compressor, hoses, or evaporator). Replace or repair components, reassemble, and evacuate or recharge if needed using proper equipment. Finally, verify system function with a controlled test drive and monitor cabin temperature. While this overview is not a substitute for the detailed steps that follow, it gives you a clear path for executing a c repair vehicle in a structured, safe manner.
Evacuation and recharge basics: when you must do it properly
If refrigerant has leaked or you replaced major components, evacuating the system ensures no air or moisture remains. Use approved recovery gear and follow local regulations for refrigerant handling. Recharge involves precise refrigerant charge and leak testing to avoid overcharging, which can be dangerous. In many jurisdictions, only certified technicians may perform refrigerant handling beyond basic service. Ensure you have the right equipment, follow the procedure exactly, and consider professional help for this critical step in a c repair vehicle if you lack the proper credentials.
Replacing components: compressor, hoses, or the evaporator
Replacing a faulty compressor or damaged hoses is often necessary when leaks or mechanical failure occur. The evaporator replacement is more involved due to its location, typically behind the dashboard, and may require more extensive disassembly. When selecting replacements, aim for OEM-equivalent parts and verify compatibility with your vehicle’s model and refrigerant type. Reassembly should be performed with proper torque in mind, sealed connections, and a careful check for live electrical circuit integrity. This phase demands patience and attention to safety guidelines to complete a c repair vehicle successfully.
Post-repair testing: verify, monitor, and finalize
After reassembly, perform a controlled test: run the system with the blower on high, observe for leaks, and check for consistent cooling. Monitor cabin temperature and listen for unusual noises or pressure fluctuations. If the refrigerant charge was adjusted, re-check for proper performance after a short drive. Document the test results and keep notes for future maintenance. Proper testing confirms that the repair was effective and reduces the chance of rework.
Common pitfalls and how to avoid them
Rushing through disassembly can damage components or mislabel connections. Skipping safety steps increases risk of injury. Not using proper recovery equipment when handling refrigerants is not only unsafe but often illegal. Avoid guessing about torque specs; always refer to the service manual. Finally, ignoring warning signs like unusual engine temperature or electrical faults can turn a small issue into a larger repair job. A careful, deliberate approach helps you perform a durable a c repair vehicle.
Tools & Materials
- Safety gear (eye protection and gloves)(ANSI-rated safety glasses; chemical resistant gloves)
- Socket set and wrenches(Assorted sizes for brackets and hoses)
- Screwdrivers (flathead and Phillips)(Various sizes for panels and connectors)
- Flashlight/work light(Bright, portable, with spare batteries)
- AC manifold gauge set(Useful for pressure checks if you have it)
- Refrigerant recovery/recharge equipment(Use in compliance with local laws)
- Replacement seals, o-rings, and fittings(Keep a variety of sizes on hand)
- Replacement components (compressor, hoses, evaporator as needed)(Only if diagnosing a faulty part)
- Torque wrench(To spec on critical fasteners)
- Owner's manual or service manual(Confirm torque specs and procedures)
Steps
Estimated time: 2-4 hours
- 1
Assess safety and symptoms
Begin by inspecting the vehicle in a safe area. Confirm battery is off, airbag system is not live, and the area is well ventilated. Note any symptoms like weak cooling, unusual smells, or noises. This initial check helps you decide whether a simple fix suffices or if more extensive repair is needed.
Tip: Document observed symptoms with photos before making changes. - 2
Disconnect power and gain access
Disconnect the negative battery terminal to prevent electrical shorts. Open appropriate service panels to access the AC components, ensuring you don’t damage trim or wiring. Gaining access early reduces surprises during component replacement.
Tip: Label connectors and hoses to simplify reassembly. - 3
Inspect hoses, seals, and visible components
Check for cracks, bulges, or oil stains around hoses and seals. Look for refrigerant leaks around the compressor, condenser, and lines. A visual inspection can reveal obvious faults and guide your repair plan without unnecessary disassembly.
Tip: Keep an eye on oil residue which can indicate a leak. - 4
Determine if refrigerant handling is needed
If the system is low or leaking, refrigerant handling may be required. Use recovery equipment and follow local regulations. Do not attempt to charge an system that shows signs of a leak without proper procedures.
Tip: If you are uncertain about refrigerant type or charge, pause and consult a pro. - 5
Replace the faulty component if needed
If a compressor or hose shows failure, replace with an equivalent part. Ensure the connections are clean, seals are fresh, and fasteners are torqued to spec. Reinstall any removed panels securely to prevent rattles.
Tip: Use OEM-equivalent parts to ensure compatibility. - 6
Evacuate and recharge (when applicable)
If you’ve recovered refrigerant or replaced major components, evacuate the system and recharge using the correct refrigerant type and amount. Follow the device's instructions and local regulations. Re-check for leaks after charging.
Tip: Do not overcharge; incorrect charge reduces cooling and may damage the system. - 7
Test the system in a controlled way
Reconnect the battery and run the engine with the AC set to max cold and fan high. Observe pressure readings if you have a gauge, and listen for abnormal noises. Verify that the cabin reaches the target temperature within a reasonable time.
Tip: Test drive with AC on to verify performance under normal driving conditions. - 8
Finalize and document
Secure all components, recheck for leaks, and tidy the work area. Save the service notes and take follow-up photos for future reference. This ensures you have a record if the issue recurs.
Tip: Keep a maintenance log for future reference.
FAQ
What are the most common symptoms of a failing car AC?
Common signs include weak airflow, inconsistent cooling, unusual odors, and noises from the compressor. These symptoms can indicate leaks, electrical faults, or mechanical wear.
Common signs are weak cooling, air that's not as cold as it should be, and odd noises from the AC compressor.
Can I recharge the car AC myself?
You can recharge only if you have the right recovery equipment and follow local regulations. In many places, refrigerant handling requires a licensed technician.
Recharging may be possible with proper equipment, but refrigerant handling is regulated in many areas.
When should I replace the compressor?
A compressor may need replacement if it makes grinding noises, overheats, or the system will not build pressure even after leaks are addressed.
If the compressor is making noise or won’t build pressure, replacement is often needed.
How long does a typical car AC repair take?
A straightforward fix can take several hours, while more complex repairs with leaks and recharge may take longer.
Most repairs take a few hours, depending on complexity and parts involved.
Is DIY car AC repair safe for beginners?
Car AC work involves pressurized refrigerants and electrical systems. Beginners should seek training or professional help for complex tasks.
Car AC work can be hazardous; consider professional help if you're new to it.
What maintenance can prevent future AC problems?
Regular cabin air filter changes, inspecting hoses, and ensuring unobstructed airflow reduce leaks and compressor strain.
Keep filters changed and hoses inspected to prevent future problems.
Watch Video
Key Takeaways
- Identify symptoms early to reduce costly repairs.
- Safety and proper tools are non-negotiable.
- Diagnose systematically before replacing parts.
- Follow local refrigerant regulations for environmental safety.
- Document steps for easier future maintenance.