Vehicle AC Repair Near Me: A Practical How-To
Learn how to diagnose common car AC issues and decide when to DIY or hire a nearby professional. Use this Home Repair Guide step-by-step tutorial to find reputable vehicle AC repair near you and keep your cooling system efficient.

You can diagnose common vehicle AC issues and decide whether to DIY or hire a nearby pro. Start by checking refrigerant status, belts, electrical connections, and the condensate drain. To find trusted help, search 'vehicle a c repair near me' to compare shops, read reviews, and request quotes before committing.
Understanding why car AC fails
Car air conditioning systems are intricate assemblies that require the right balance of refrigerant, lubrication, belts, electrical control, and effective heat exchange. Common failures include refrigerant leaks, a worn compressor, faulty clamps or hoses, and electrical sensor or relay problems. In many cases, gradual cooling decline is the result of a combination of small issues rather than a single fault. According to Home Repair Guide, a systematic diagnostic approach often reveals the root cause without unnecessary part replacements. By recognizing patterns—low cooling at idle, weak airflow, or odors—you can decide whether the problem is a quick fix or an issue that merits professional service.
Assessing refrigerant and the cooling path
The refrigerant’s pressure and flow are central to cooling effectiveness. If the air never feels cold or only cools intermittently, uneven cooling or a leak is likely. Visual inspection for oily residues around hoses or fittings can indicate a leak, while a UV dye—used only when approved by the vehicle maker—helps locate hidden leaks. Handle any refrigerant concerns with care; many regions require licensed technicians for refrigerant handling. For safety, never attempt to vent refrigerant to the atmosphere and avoid charging the system without proper tools and training. Home Repair Guide emphasizes using professional-grade gauges and following the vehicle’s service information to compare readings against spec.
Safety fundamentals for under-hood work
Under-hood repairs can involve high-voltage and rotating components. Always disconnect the battery before beginning work, wear safety glasses and gloves, and work in a well-ventilated area away from heat sources. When you pop the hood, secure it and keep curious fingers away from moving parts. If you must depressurize at any point, rely on certified procedures and avoid DIY refrigerant recovery. The goal is to reduce the risk of electrical shock, burns, or refrigerant exposure while you diagnose.
DIY vs professional: when to call a pro
DIY fixes are reasonable for simple tasks such as cleaning the cabin air filter, inspecting belts, and checking for obvious exterior leaks. More complex issues—especially anything involving refrigerant, the compressor clutch, or electronic control modules—should be handled by a licensed technician. If diagnosis indicates a suspected refrigerant leak, compressor failure, or a suspected electrical fault in the HVAC system, professional service is the safest and most reliable route. Home Repair Guide recommends erring on the side of caution for anything beyond basic inspection.
How to choose between a nearby DIY fix and a professional service
When selecting a shop near you, look for ASE-certified technicians, access to the OEM service information, and transparent warranties. Request a diagnostic report before authorizing work and compare quotes from a few reputable shops. Check if the shop offers a diagnostic-only option and whether they provide a written estimate for any repairs. For ongoing maintenance, ask about preventative services such as periodic leaks checks and refrigerant-free diagnosis routines. This approach helps you balance cost, time, and reliability.
Maintenance habits to extend your car AC life
Regular checks can prevent many common AC problems. Run the AC for several minutes every few weeks, even in off-seasons, to keep seals flexible. Change the cabin air filter as recommended by the vehicle manufacturer, and listen for unusual noises or foul odors during operation. Schedule periodic professional inspections—especially before hot seasons—so tiny issues don’t turn into major failures. A simple maintenance habit can keep your system efficient and prolong its life.
Authority sources for further reading
- For safety and environmental guidelines, refer to authoritative sources: https://www.nhtsa.gov/ and https://www.epa.gov/
- Additional guidance on energy-efficient vehicle components can be found at https://www.energy.gov/.
Tools & Materials
- Digital multimeter(Test electrical signals and sensor outputs; ensure you know how to interpret readings.)
- Set of wrenches and screwdrivers(Metric and standard sizes; used to remove panels and fasteners.)
- Safety gear (gloves and safety glasses)(Protect eyes and skin when working under the hood.)
- Penetrating oil and clean rags(Lubricate stuck fittings and clean areas before inspection.)
- Owner's manual or wiring diagram(Helps identify connectors and sensor locations for diagnostics.)
- UV leak detector kit (optional, approved by maker)(Helps locate refrigerant leaks if your region permits use.)
- Replacement parts compatible with your vehicle (as needed)(Belts, fuses, relays, or sensors may be required based on diagnosis.)
Steps
Estimated time: 2-4 hours
- 1
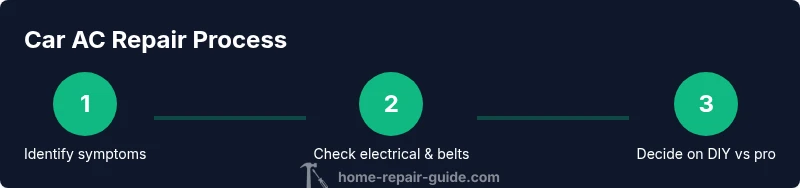
Inspect symptoms and safety
Power off the vehicle, engage the parking brake, and open the hood. Observe the symptoms carefully and note when they occur (idle, driving, or after heat exposure). This helps narrow down potential causes and prevents unnecessary work on a hot engine.
Tip: Document timing of symptoms and any accompanying dashboard alerts to share with a mechanic. - 2
Check for obvious leaks and worn belts
Look for oily residues around hoses, fittings, and the compressor. Inspect the drive belt for cracks or glazing and confirm the belt tension appears correct. Worn belts can reduce compressor operation and cooling.
Tip: Use a bright light and a mirror to inspect hard-to-see joints; replace worn belts promptly. - 3
Test electrical controls and sensors
With the power off, use a digital multimeter to check critical fuses, relays, and HVAC sensor wiring. Ensure connectors are secure and free of corrosion. Any irregular readings may indicate an electrical fault that affects cooling.
Tip: Refer to the vehicle’s wiring diagram and service manual to locate each sensor's pinout. - 4
Assess refrigerant pathway and leaks
If you have the appropriate gauge kit, review high and low pressure readings when the system is running. Do not attempt a full recharge unless you are trained and authorized; improper charging can damage the system and violate regulations.
Tip: Avoid opening fixed refrigerant lines while the engine is hot; coolant system pressure can cause injury. - 5
Decide on next steps
Based on your findings, decide whether a basic cleanup, component tightening, or fuse replacement is sufficient, or if professional refrigerant handling or compressor work is required. When in doubt, seek a professional diagnostic.
Tip: If refrigerant handling or component replacement is needed, schedule a shop visit—these tasks require proper equipment and training. - 6
Document findings and plan service
Record observations, readings, and any actions taken. Bring this information when visiting a repair shop or when requesting a mobile diagnostic service. Clear notes reduce back-and-forth and speed up the repair process.
Tip: Bring vehicle details (make, model, year, engine type) and any recent service history. - 7
Follow-up and maintenance plan
After a repair or diagnostic visit, follow the shop’s guidance for maintenance intervals and recheck dates. Schedule routine inspections to prevent future failures and keep the AC system running reliably.
Tip: Set a reminder for seasonal maintenance to catch issues early.
FAQ
What are the most common signs that car AC needs attention?
Common signs include warm air, weak airflow, unusual noises, and odor. These clues help narrow the issue to leaks, fan problems, or compressor faults. A professional diagnostic provides confirmation and safe repair options.
Common signs are warm air, weak airflow, noises, and odd smells. A proper diagnostic helps confirm the exact issue.
Can I recharge my car AC myself?
Recharging a car AC is generally not recommended for DIY. It requires correct equipment and knowledge to avoid overcharging or harming components. If you suspect low refrigerant, have a professional diagnose and safely recharge if needed.
Recharging is best left to a trained technician who can handle it safely and legally.
How long does it take to repair car AC?
Repair duration varies by issue. Simple inspections or belt changes might take a few hours, while refrigerant leaks or compressor work can require a full service visit and scheduling with a shop.
Repair time depends on the problem; some fixes are quick, others need a shop visit.
Is driving with a refrigerant leak dangerous?
A refrigerant leak can reduce cooling efficiency and harm the environment. If you notice a leak, stop driving if safe, and seek professional evaluation to protect yourself and the vehicle.
Yes, leaks are a concern—get a professional check sooner rather than later.
How can I find a reputable vehicle AC repair near me?
Look for ASE-certified technicians or reputable shops, read customer reviews, compare quotes, and ask about warranties. Verify that the shop can provide diagnostic services and OEM-level guidance.
Check reviews, certifications, and warranties, then compare quotes.
What maintenance helps prevent car AC problems?
Regular inspections, timely filter changes, and running the AC occasionally during off-peak seasons can prevent issues. Address odors, noises, or poor cooling early to avoid bigger repairs.
Regular checks and occasional use keep the system healthy.
Watch Video
Key Takeaways
- Identify symptoms and document timing.
- Differentiate DIY fixes from professional needs.
- Use proper PPE and safety practices.
- Ask for a clear diagnostic report before authorizing work.