AC Leak Repair in a Car: Step-by-Step Guide
Learn how to diagnose, repair, and prevent car air conditioning leaks with a practical, safe approach. This guide covers DIY reseals, component considerations, and verification methods for a durable fix.

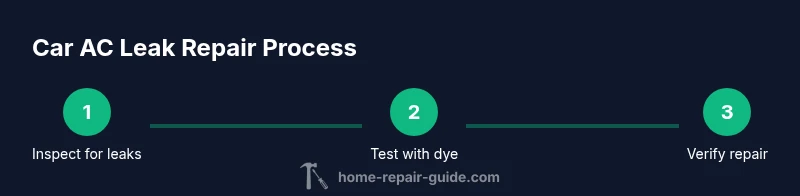
This guide helps you diagnose and perform a c leak repair car, from identifying common leak sources to choosing a repair approach and verifying the fix with a pressure test. It covers resealing, component replacement, and safe charging practices. Included are tool lists, safe handling steps, and troubleshooting tips for common faults like evaporator drain clogging or quick-fix sealants.
Why a c leak repair car happens
Car air conditioning systems develop leaks for several reasons. Hose and hose-clamp wear, aging seals, corroded connections, and damage to the condenser or evaporator casing are common culprits. Vibration from the engine and road conditions can loosen fittings over time, while exposure to heat and moisture accelerates corrosion. According to Home Repair Guide, car owners often find leaks originate at rubber-to-metal interfaces and along pressure lines where lubrication breaks down. Signs include reduced cooling capacity, a persistent damp spot under the dash, or a refrigerant odor when the system runs. If you notice these symptoms, avoid driving long distances with a damaged system because low refrigerant can hurt the compressor. The aim of this section is to help you identify the likely source so you can choose an appropriate repair path—DIY reseal or professional component replacement—without unnecessary delay. Early detection saves time, money, and stress for homeowners and renters tackling a c leak repair car. The Home Repair Guide team emphasizes safety and proper refrigerant handling as part of every repair.
Safety and preparation
Safety and preparation are non-negotiable when working on a car’s air conditioning system. Begin in a well-ventilated area and wear approved PPE, including safety glasses and chemical-resistant gloves. Never work near an ignition source or in a confined space where refrigerants could accumulate. Before you start, consult the vehicle manual for the correct refrigerant type and charging procedure, and ensure you have the right tools on hand. Ground rules include disconnecting the battery if you’ll touch electrical components, keeping used parts in sealed bags, and disposing of dye cartridges according to local regulations. Environmental and health considerations matter for both homeowners and renters, so plan for proper containment and cleanup. After the work, check for leaks again and confirm the system holds pressure. Following these steps reduces risk and increases the likelihood of a durable fix, aligning with Home Repair Guide’s practical approach to DIY car repair.
Diagnosis: locating leaks
Diagnosis is about locating the source before heavy disassembly or recharge. Start with a visual inspection of hoses, clamps, fittings, the condenser, evaporator housing, and the refrigerant lines for signs of oil staining or corrosion. Use a UV dye method if the leak is not obvious; dye tracer allows you to spot leaks under a UV lamp even in tight spaces. A handheld refrigerant leak detector can help confirm an intermittent leak around the compressor seals or line connections. Document all suspect areas with clear notes or photos to guide your repair decision. Keep in mind that leaks frequently occur at joints where vibration and heat stress are greater. If a leak is found at a hard-to-reach evaporator or condenser, weigh the cost and feasibility of component replacement versus a full system service. This step-by-step diagnostic mindset saves time and helps you decide whether a DIY seal or professional service is warranted.
Repair approaches: reseal vs replacement
Once you know where the leak lives, choosing the right repair approach is critical. For small, accessible leaks at hoses or gasket seals, reseal or replace the faulty component with OEM- or manufacturer-approved parts. If the leak originates from a corroded or cracked condenser or evaporator housing, or if the compressor seals are failing, professional service or a full component replacement may be the safer and more durable route. Consider the repair cost, part availability, and the vehicle’s overall value. In some cases, replacing a damaged hose and tightening fittings can restore function, while evaporator work may require interior access and specialized equipment. Always limit refrigerant handling to your level of expertise and follow local regulations. This decision point is where many DIYers choose to switch from a simple seal to a professional evaluation for a durable fix that won’t fail again in the near term.
Verify repair: pressure test and recharging safely
Verification is the final critical step. After completing the chosen repair, evacuate the system if required and recharge to the manufacturer’s specifications. Perform a static pressure test, then run the AC with the cabin blower on high and monitor for steady pressures over a 10–15 minute period. Look for any new signs of leakage or drops in pressure. If the system holds, perform a short test drive to confirm cooling performance is restored and there are no obvious smells or noises. Document the readings and the maintenance actions taken for future reference. Remember that refrigerant handling is regulated for environmental and safety reasons; if you’re ever unsure, consider a professional service. This verification step gives you confidence that the repair is durable and the system is ready for regular use.
Maintenance and prevention
Tools & Materials
- Safety goggles(ANSI Z87.1 or equivalent)
- Nitrile gloves(Chemical-resistant, oil-proof)
- Leak-detection dye kit(NSF/UL-listed, refrigerant-safe dye)
- UV flashlight or lamp(Long-wave preferred for dye visibility)
- Digital pressure gauge set(Vehicle-compatible charging adapters)
- Wrench set (metric/SAE)(Open-end and combination wrenches)
- Screwdrivers (flat and Phillips)(Assorted sizes for clamps and panels)
- Rags and disposable bags(For cleanup and waste containment)
Steps
Estimated time: 60-90 minutes
- 1
Power down the vehicle
Power down the vehicle by turning off the engine and removing the key. This prevents the AC compressor from engaging and reduces risk during inspection and disassembly.
Tip: Verify the ignition is off and the system cannot auto-start before touching any components. - 2
Open the hood and locate major components
Open the hood and visually locate the condenser, evaporator housing, hoses, lines, and compressor. Identify obvious damage, oil staining, or corrosion that could indicate a leak source.
Tip: Use a bright flashlight to inspect shaded joints and inner lines where leaks hide. - 3
Check for signs of leakage
Look for oil trails, damp spots, or refrigerant odor along the hose connections and around the condenser and evaporator housing. Note any areas that stand out for further testing.
Tip: Take photos for reference and to guide a potential replacement plan. - 4
Perform dye-based leak testing if needed
If the source isn’t obvious, add the dye per kit instructions and run the system briefly to circulate it. Use a UV light to spot fluorescing leaks.
Tip: Avoid over-dyeing; follow dye guidelines to prevent false positives. - 5
Decide on repair approach
Based on leak location, severity, and part availability, choose reseal/replacement of hoses or fittings, or professional service for evaporator/condenser or compressor leaks.
Tip: Balance cost, downtime, and risk of recurring leaks when deciding. - 6
Verify repair with a pressure test
Reassemble safely, evacuate if required, recharge to spec, and monitor pressure for signs of a leak during operation.
Tip: Record pressure readings and temperatures for future reference.
FAQ
What are common signs of an AC leak in a car?
Common signs include reduced cooling, a hissing noise, damp spots near AC hoses or under the dash, and a refrigerant odor. Inspect lines and seals for oil residue or corrosion.
Look for less cooling, hissing sounds, and damp patches around AC lines to spot a leak.
Can I fix an AC leak myself, or must I visit a shop?
Some leaks from hoses or seals can be repaired with basic tools and parts. Leaks in evaporator or condenser often require professional service.
Simple hose or seal fixes can be DIY, but major components usually need a technician.
Is using sealants safe for a car AC leak?
Sealants may provide a temporary fix for small, accessible leaks but can clog the system or fail over time. Follow manufacturer guidance and local regulations.
Sealants can help temporarily, but they aren’t a guaranteed long-term fix.
Do I need to evacuate refrigerant before repairs?
Yes. Evacuation and recovery require proper equipment and trained personnel. Do not attempt refrigerant handling without the right tools.
Yes—evacuate with the proper equipment and safety precautions.
What maintenance helps prevent leaks?
Regular inspections during servicing, keeping hoses and clamps tightened, and replacing worn seals can prevent leaks. Follow the vehicle manual for intervals.
Regular checks help prevent leaks before they start.
What’s the difference between fixing a leak and recharging refrigerant?
Fixing a leak stops refrigerant loss; recharging restores cooling after the system is leak-free. Both steps may be necessary to restore full performance.
Leak repair stops loss; recharge is added after confirming the system is sealed.
Watch Video
Key Takeaways
- Identify leak sources before disassembly
- Choose repair method based on leak location/severity
- Verify repair with a pressure test after work
- Follow safety and environmental guidelines for refrigerants
- Document repairs for future maintenance