A/C RV Repair: A Practical Step-by-Step Guide
Learn practical, safe steps to diagnose and repair RV air conditioners. Home Repair Guide provides a clear, tool-friendly approach with safety tips and a step-by-step plan.

Mastering a c rv repair begins with safety, clear diagnosis, and the right tools. This guide helps you diagnose common issues, assemble a repair kit, and follow a step-by-step process to restore cooling and comfort in your RV. You’ll learn where to check electrical connections, refrigerant basics, and when to call a pro.
Understanding a c rv repair: systems and terminology
A c rv repair refers to diagnosing and fixing the cooling system in RVs. RV A/C units blend roof-mounted blowers, ductwork, and a compact refrigeration circuit. A basic grasp of components — evaporator coil, condenser, compressor, blower, and controls — helps homeowners identify symptoms and describe issues to technicians. Regular maintenance reduces failure risk and extends service life. This section will define terms like static pressure, refrigerant charge, and airflow, so you can communicate clearly with repairs shops or online support. Practicing basic checks, such as listening for unusual noises or feeling warm air, builds confidence before you touch electrical panels or refrigerant lines.
Common RV A/C configurations and how they affect repair
RV A/C setups vary by brand and roof design. Some systems use a single roof unit with ducted distribution; others rely on rooftop units with separate heat pumps or heat exchangers. The configuration determines how you access service ports, how refrigerant travels through copper lines, and where condensate drains. Understanding whether your unit is a 13.5 vs 15,000 BTU system or a two-stage model helps you target parts and compatible components. When diagnosing, note the location of the stat, switch gear, and any external components like exterior fans or shrouds that could impede airflow.
Safety first: electrical and refrigerant precautions
Working on an RV A/C system involves electricity and refrigerant under pressure. Always disconnect power at the pedestal or battery disconnect, verify zero voltage with a multimeter, and wear eye protection. Refrigerant handling must follow local regulations; never vent refrigerant to the atmosphere. If you smell a strong ozone-like scent or notice oily residues around fittings, stop and consult a pro. Keep children and pets away from the work area and use insulated tools when touching wiring or metal components.
Diagnostics and inspection before you start
Begin with a visual inspection of wiring, fuses, relays, and the thermostat. Check the exterior unit for debris, bent fins, or a clogged condensate drain. Listen for abnormal noises from the compressor or blower and verify airflow from vents. Use a simple temperature difference test: compare return air temperature with supply air when the unit runs for several minutes. If the delta is small, you may have airflow or refrigerant issues rather than a faulty motor.
DIY workflow: planning, parts, and documentation
Create a repair plan that matches your skill and available time. List likely failure points (capacitors, contactors, clogged filters, or dirty coils) and gather replacement parts. Take photos or notes of each step to document work for future maintenance or warranty purposes. Before replacing any parts, measure with the multimeter and confirm power is off. After reassembly, run a test cycle and monitor for leaks, unusual noises, or performance drop.
Tools & Materials
- Multimeter(Digital or analog; ensure it can measure AC voltage and continuity)
- Insulated screwdrivers (Phillips and flathead)(Include #2 Phillips and 1/4 inch flathead at minimum)
- Wrench set (open-end/box)(Metric and standard sizes)
- Nut driver set(Assorted sizes for panels and fittings)
- Coil cleaning brush(Soft brush for fins; avoid bending fins)
- Rags or towels(For cleanup and catching drips)
- Safety goggles(Eye protection for debris and refrigerant work)
- Gloves (work/chemical resistant)(Protect hands during electrical checks and coil maintenance)
- Leak detector (optional)(Helps identify refrigerant leaks without disassembly)
Steps
Estimated time: 60-90 minutes
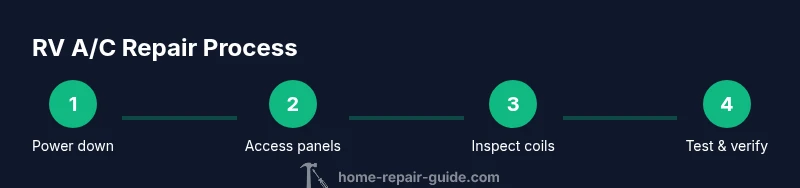
- 1
Power down and safety check
Shut off power at the RV pedestal or disconnect the chassis battery to prevent shock. Use a multimeter to confirm there is no live voltage on the control board and wiring harness. This prevents accidents as you inspect panels and electrical connections.
Tip: Always verify zero volts with a reliable meter before touching any wires. - 2
Access the roof unit and internal panels
Remove access panels or the exterior shroud to reach the rooftop unit and interior air handler. Keep screws organized using labeled containers or magnetic mats. Gently pry panels to avoid damaging seals or plastic clips.
Tip: Take a photo of each connectors layout before disconnecting anything. - 3
Inspect for obvious blockages and dirt
Check the condenser fins, air filters, and ducts for dust buildup or debris. A dirty coil reduces efficiency and cooling. Clean with a soft brush or low-pressure air; avoid bending fins.
Tip: Use a coil brush or fin comb to prevent damage. - 4
Check electrical components
Inspect the contactor, capacitors, and fuses. A faulty contactor or fried capacitor is a common cause of compressor failure. If you suspect a bad capacitor, discharge it safely before testing.
Tip: Never test capacitors live—discharge first with insulated screwdriver. - 5
Test operation and troubleshoot
Reconnect power and run a brief test cycle. Listen for abnormal noises, check vent airflow, and measure temperature drop across the evaporator. If cooling remains weak, you may have refrigerant or refrigerant circuit issues.
Tip: Document readings and sounds for reference if you consult a pro. - 6
Plan next steps and safety wrap-up
If the problem persists after basic checks, plan for parts replacement or professional service. Schedule a follow-up check before you seal panels, and ensure the area is clean and dry.
Tip: Flag any refrigerant handling tasks for a licensed tech.
FAQ
What are the common signs of a failing RV A/C?
Common signs include weak or no cooling, unusual noises, ice buildup on lines, and excessive cycling. These symptoms indicate airflow, electrical, or refrigerant issues that deserve inspection.
Common signs are weak cooling, strange noises, or ice buildup. They point to possible airflow, electrical, or refrigerant problems.
Can I recharge RV AC refrigerant myself?
Recharging refrigerant requires proper gauges, seals, and adherence to environmental regulations. If you’re not trained, it’s safer to hire a licensed tech.
Recharging refrigerant needs proper tools and training, so it’s safer to hire a licensed technician.
Is it safe to work on an RV A/C system?
Yes, with proper safety practices: disconnect power, wear eye protection, and follow refrigerant handling rules. Avoid working alone near high voltage components.
Yes, if you follow safety steps like powering down and wearing protection.
What tools are essential for RV A/C repairs?
A basic toolkit should include a multimeter, insulated screwdrivers, wrench set, needle-nose pliers, coil brush, and a refrigerant-safe leak detector.
Essential tools include a multimeter, insulated screwdrivers, and a coil brush.
When should I hire a professional?
If you detect refrigerant leaks, incomplete cooling after simple fixes, or high-voltage risks, contact a licensed RV A/C technician.
If leaks are detected or you’re unsure about electricity, call a professional.
How can I prevent future RV A/C problems?
Regularly replace air filters, clean coils, inspect seals, and perform routine checks before seasons of heavy use.
Keep filters clean and inspect the system before peak seasons to prevent problems.
Watch Video
Key Takeaways
- Identify the most likely failure points first.
- Prioritize safety and proper power-down procedures.
- Document steps to simplify future maintenance.
- Test thoroughly after any repair and monitor performance.