RV Air Conditioner Repair: A Practical Step-by-Step Guide
Learn to diagnose, troubleshoot, and repair RV air conditioner systems with safe, practical steps. This Home Repair Guide tutorial covers common failure points, tools, and maintenance to keep your camper cool in 2026.

Yes—many common RV air conditioner problems can be diagnosed and fixed by a DIY approach. This guide walks you through safety checks, basic testing, cleaning, and component replacements you can perform with common tools. For complex refrigerant work or major compressor faults, contact a qualified technician. According to Home Repair Guide, proper maintenance reduces future repairs.
How RV A/C Systems Work
RV air conditioner systems combine a rooftop unit with interior air handling and a thermostat for climate control. Most units operate on 120V AC when you’re plugged into shore power or powered by a generator. The compressor compresses refrigerant, which moves heat from the RV interior to the exterior coil. The condenser on the roof expels that heat, while the evaporator inside the vehicle cools the air you feel through the vents. A control board or thermostat modulates fan speed and compressor cycling. According to Home Repair Guide, understanding these parts helps you pinpoint failures without guessing, and it also informs decisions about maintenance versus replacement in 2026.
Common RV A/C Problems and What They Mean
Low cooling, warm air, or ice-cold coils can indicate different issues. Dirty condenser coils or a clogged air filter restrict airflow, reducing cooling efficiency. A malfunctioning blower motor or failed capacitor often causes no air at all or weak fan speed. Thermostat misreads can lead to cycling on and off. Refrigerant leaks are a more serious concern and require a professional with proper recovery equipment. In RV contexts, heat dissipation and vent design can compound these problems. Based on Home Repair Guide research, regular inspections at the start of each camping season help catch these issues before they ruin a trip.
Safety First: Prep, PPE, and Safe Handling
Always disconnect power before inspecting or working on an RV A/C unit. If the unit is mounted on the roof, use a sturdy ladder, fall protection, and non-slip footwear. Wear eye protection and gloves, and avoid leaning over the fan while it’s powered. Do not attempt refrigerant charging or recovery yourself unless you are EPA-certified; improper handling can cause injury and is illegal in many places. These precautions protect you and extend the life of the system.
Tools, Testing, and Electrical Basics
A basic DIY toolkit for RV A/C repair includes a multimeter, a non-contact voltage tester, screwdrivers (Phillips and flat-head), a nut driver, a coil brush or condenser cleaning brush, replacement filters, and, optionally, a spare capacitor or relay. Use the multimeter to verify voltage at the contactors and to check continuity on fan motors. A clean work area and a clear path to the roof unit help prevent accidental damage. Remember: if you’re uncomfortable working with AC mains or refrigerant lines, step back and call a pro.
Diagnosing Problems: Symptoms, Tests, and Decisions
Start with simple checks: is the unit receiving power? Is the thermostat signaling the compressor to run? If the fan isn’t spinning, inspect the blower motor and associated capacitors. Check the condenser coils for dirt and obstructions; clean them gently with a coil brush. Look for obvious refrigerant leaks around fittings and copper lines. If you suspect a refrigerant issue or a failed compressor, it’s safer and more cost-effective to contact a licensed HVAC technician. This is especially true for units on older RVs where efficiency has degraded.
Basic Repairs You Can Do (and When to Stop)
Cleaning coils, replacing dirty air filters, reseating loose electrical connections, and swapping a failed capacitor are common DIY repairs that restore function for many RV A/C units. Do not attempt to seal refrigerant leaks yourself; leak repair and recharging require certified equipment. If the control board or compressor needs replacement, compare the repair cost to replacing the entire roof unit. The decision should consider the unit’s age, efficiency, and expected remaining lifespan, as highlighted in Home Repair Guide’s 2026 guidance.
Maintenance for Longevity and Efficiency
Create a seasonal maintenance routine: inspect seals, clean the coils, replace the filter, and verify drainage. Keep the 120V supply dry and free of dust buildup around the unit. When parked for extended periods, cover the unit to reduce debris and sun exposure. Regular maintenance reduces both the frequency and cost of RV air conditioner repairs, and helps you stay cool on trips. The Home Repair Guide team emphasizes that proactive care is cheaper than reactive fixes.
When to Seek Professional Help
If you hear buzzing or grinding noises, notice refrigerant smells, see ice on components, or detect persistent warm air, stop DIY work and call a licensed technician. Refrigerant handling, leak detection, and compressor failures require specialized equipment and training. For many owners, a pro visit is the fastest route back to reliable cooling and warranty protection. The Home Repair Guide recommends prioritizing safety and value when deciding between DIY and professional service.
Tools & Materials
- Multimeter(Measure voltage, continuity, and resistance across components)
- Non-contact voltage tester(Safely verify live circuits before touching any wires)
- Screwdrivers (Phillips and flathead)(Access panels and adjust mounting screws)
- Nut drivers / wrenches(RV-specific fasteners and clamp fittings)
- Condenser coil cleaning brush(Clear dirt without bending fins)
- Replacement air filter(s)(Maintain airflow and efficiency)
- Replacement capacitor or relay (optional)(Only if you confirm a faulty component)
- Vacuum and microfiber cloth(Clean up dust and debris)
- Thermostat (optional)(Replace if it’s misreading temperature)
- Safety gear (gloves, eye protection)(Personal protection during repairs)
Steps
Estimated time: 60-90 minutes
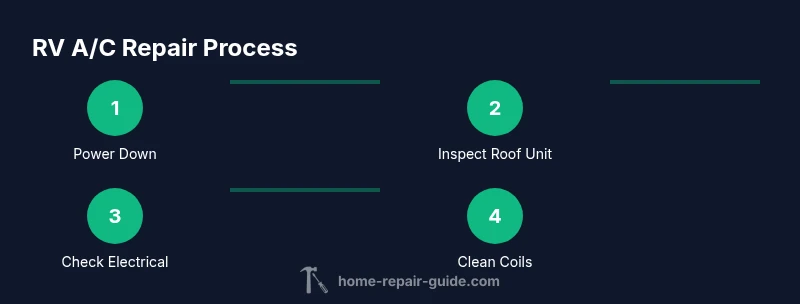
- 1
Power down and verify safety
Disconnect shore power and turn off any connected generator. Confirm there is no voltage on exposed leads before touching components. This step prevents shocks and arc flash.
Tip: Use the non-contact tester to check for live wires before you begin. - 2
Access the roof unit and inspection
Carefully open the exterior access panel or roof hatch and inspect for loose wiring, corrosion, or obvious damage. A visual check often reveals the root cause such as a loose connector or burned relay.
Tip: Do not lean directly over the fan or condenser when the unit is open. - 3
Test electrical supply to the unit
With safety verified, test that the unit receives 120V across the contactor when the thermostat calls for cooling. If power is present but the unit won’t start, the issue may be a faulty contactor or control board.
Tip: If the contactor clicks but relay doesn’t pull in, replace the contactor or relay. - 4
Check thermostat and controls
Calibrate or replace a malfunctioning thermostat. Ensure the temperature setting triggers the compressor; test multiple setpoints to verify responsiveness.
Tip: Resetting to factory defaults can resolve erratic readings. - 5
Inspect and clean coils and airflow
Clean the condenser fins and evaporator area; remove debris that restricts airflow. Replace or wash filters to restore proper airflow through the evaporator.
Tip: Be gentle with fins; use a soft brush to avoid bending them. - 6
Evaluate the blower and fans
Check that the blower motor runs smoothly and the evaporator fan spins freely. A seized or weak motor reduces cooling significantly.
Tip: Lubricate or replace a stuck motor only if manufacturer guidance allows. - 7
Check electrical connections and components
Inspect wires for wear, corrosion, or loose connections. If you suspect a failing capacitor, measure with a meter and replace if out of spec.
Tip: Do not bypass safety interlocks or fuses. - 8
Test run and final checks
Reassemble panels, restore power, and run the unit to verify cooling performance. Monitor for unusual noises or leaks during the first 15–30 minutes of operation.
Tip: Document any changes and test under typical camping conditions.
FAQ
What are common symptoms of RV A/C trouble?
Common signs include weak cooling, inconsistent airflow, unusual noises, and ice on coils. Leaks around fittings or a non-starting compressor indicate more serious problems.
Common issues are weak cooling, strange noises, or leaks around fittings—these often point to dirty coils, a bad capacitor, or a refrigerant leak.
Can I recharge refrigerant myself?
Recharging refrigerant requires specialized equipment and knowledge. It’s best handled by a licensed technician to avoid injuries and illegal handling.
Recharging refrigerant isn’t a DIY job; it needs certified equipment and training.
Is rooftop RV A/C repair safe for a DIYer?
Basic maintenance and cleaning can be DIY, but high-voltage work and refrigerant handling should be left to pros. Always follow safety guidelines and manufacturer instructions.
DIY is OK for simple cleaning, but avoid high-voltage work or refrigerant handling.
How long does RV A/C repair take?
Time varies with the issue. Minor cleaning or filter changes may take under an hour, while capacitors or fan motor replacements can extend to a few hours.
A quick fix can be under an hour, but more complex repairs may take several hours.
What maintenance helps prevent RV A/C problems?
Regular coil cleaning, filter changes, and duct checks reduce buildup and inefficiency. Keep the roof unit clear of debris and inspect seals yearly.
Clean coils and change filters regularly to keep the system efficient.
When should you replace the entire unit?
If the compressor, evaporator, or refrigerant leaks are chronic and repair costs exceed replacement value, consider a new unit with better efficiency and warranty.
If major parts fail often, replacement with a newer model is often cheaper long-term.
Watch Video
Key Takeaways
- Understand your RV A/C components and how they interact.
- Diagnose with power checks before touching wiring.
- DIY fixes cover cleaning, airflow, and basic parts; refrigerant work needs a pro.
- Regular maintenance saves energy and reduces repair frequency.