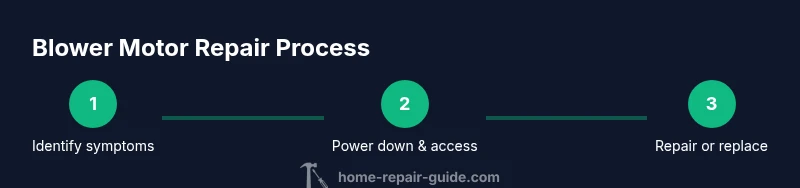
Repair Furnace Blower Motor: A Step-by-Step Guide
Learn to diagnose, clean, and safely repair or replace a furnace blower motor with our comprehensive Home Repair Guide tutorial. Includes tools, steps, safety tips, and when to call a pro.

With this guide you can diagnose and repair a furnace blower motor by identifying common failures (bearing wear, capacitor faults, motor seizure), safely disconnecting power, cleaning the assembly, and testing performance. If the motor shows signs of burnt windings or damaged wiring, plan a replacement rather than repair. According to Home Repair Guide, safety and proper testing are essential. This approach minimizes risk and helps you decide when to hire a pro.
Understanding the role of a furnace blower motor
The furnace blower motor circulates heated air through the house and helps maintain even temperatures. In most homes, the blower motor is controlled by a speed setting and responds to the thermostat, ensuring you get warm air on demand while keeping energy use reasonable. When the blower motor fails or runs poorly, you may notice weak airflow, uneven heating, excessive noise, or frequent on-off cycling. Diagnosing a furnace blower motor involves differentiating between motor-related faults, electrical issues, and control board problems. According to Home Repair Guide, safety and correct testing are essential. The blower motor is typically mounted inside the blower compartment, connected to a squirrel cage fan, a drive belt in older models, and a capacitor or speed controller in newer units. Familiarize yourself with your model’s manual if possible, since some units have integrated modules that require special handling. If you feel uncertain at any step, stop and consult a professional; working around gas-fired equipment and high-voltage circuits can be dangerous. This repair approach centers on identifying the exact fault so you can repair furnace blower motor components efficiently and safely.
Common failure modes and symptoms
Blower motors fail for several reasons: worn bearings that cause squealing, a seized rotor that stops rotation, a bad capacitor that prevents starting, or a damaged windings due to overheating. Symptoms include reduced airflow, uneven heating, the blower running at the wrong speed, unusual rattling or grinding noises, or frequent tripping of the furnace's dedicated circuit. Dirty filters and restricted ductwork can mimic motor problems by increasing load on the blower. In some cases, the control board or relay that drives the motor fails, causing intermittent operation. Visual cues like melted insulation, burnt insulation, or visible arcing indicate more serious issues. Always verify that electrical power is disconnected before inspecting any wires. Observing a humming sound with no rotation generally signals a stuck rotor or a failing cap; if you hear a continuous squeal, bearings are likely worn. If the capacitor is bulging or leaking, replace it as a separate part rather than trying to force the motor to run. Home Repair Guide analysis shows that recognizing these symptoms early leads to safer, more effective repairs.
Tools, safety gear, and parts you’ll need
Before you begin, gather essential tools and parts. Essential: safety glasses, insulated gloves, and a dust mask to protect from debris and dust. A digital multimeter is used to test electrical continuity and capacitor health. A basic socket set and screwdrivers (Phillips and flat-head) help remove fasteners. Depending on your unit, you may also need a capacitor tester, a replacement blower motor, a new belt (in older units), and new wiring connectors. Keep a camera or notes to re-create wiring paths. A service manual or model-specific guide can prevent mis-assembly. Optional but helpful: a torque wrench for fastener torque, a vibration-damping pad, and high-impedance test leads for safe testing. If you’re not comfortable with electrical work, have a professional perform the replacement; some steps require live electrical testing or gas valve interaction, which carry safety risks. This list ensures you have the basics to repair furnace blower motor safely.
Step-by-step diagnostic workflow
- Power down and verify isolation: switch off the furnace at the disconnect and the house breaker, then confirm no voltage at the blower harness. 2) Open the blower compartment and perform a visual inspection for loose wires, burnt insulation, or debris. 3) Check the capacitor: discharge safely, then test with a multimeter for capacitance within spec; replace if it’s out of range. 4) Inspect the motor bearings and shaft: rotate by hand if possible, listen for roughness or grinding. 5) Check belt tension and alignment in belt-driven models; replace worn belt if it shows cracks. 6) Perform a controlled power test on a bench or load test if you have the proper equipment; document readings. 7) Decide on repair vs replacement: if windings are burnt, the motor likely needs replacement. 8) Label and disconnect wiring properly when removing components. This structured approach aligns with Home Repair Guide recommendations for diagnosing a repair furnace blower motor efficiently and safely.
Cleaning, lubrication, and preventive maintenance
With power removed, clean the blower housing and wheel to remove dust and debris. Use a dry cloth or compressed air; avoid liquid cleaners that could reach the electrical parts. Lightly lubricate accessible bearings if the motor supports it and if the manufacturer recommends. Replace filters and clean ductwork to reduce the load on the blower. Re-seal the blower compartment to prevent air leaks. Schedule routine maintenance: quarterly or semi-annual checks help prolong motor life. Keep an eye on unusual noises or patterns that indicate wear. Regular cleaning and proper filter changes support a longer life for the repair furnace blower motor and improve overall system efficiency.
Replacing the blower motor vs. repairing components
Not all blower motors are repairable; many failures are not economical to fix. If bearings are worn or windings overheated, replacement is typically more reliable than repair. Compare the cost of a new motor, replacement capacitor, and potential labor with a full motor replacement. In many cases, purchasing a manufacturer-approved motor kit reduces wiring mistakes. If your furnace uses a special integrated module, you might need a service technician. Safety: de-energize the system and verify no gas line pressure changes while replacing; working around gas appliances adds risk. Home Repair Guide emphasizes evaluating the fault first and choosing the most durable solution rather than attempting an impractical repair furnace blower motor.
Wiring, capacitors, and electrical tests
Electrical testing covers: confirming supply voltage at the motor, testing capacitor health, and verifying continuity in windings. Discharge capacitors before touching terminals to avoid shock. Replacement steps require matching capacitor microfarad rating and voltage. If you’re unsure about capacitor values or wiring colors, consult the model’s wiring diagram. Use the multimeter's capacitance setting to verify cap value within tolerance. Be mindful of static discharge around electronics. This ensures you accurately diagnose and safely repair furnace blower motor components.
Reassembly, testing, and troubleshooting after startup
Reassemble components in reverse order, ensuring all fasteners are snug but not overtightened. Reconnect wiring with correct terminals and label positions. Restore power and run a slow start test: verify blower spins freely, observe for unusual noises, and confirm airflow improves. Listen for any grinding or rubbing; check for belt alignment. If the system trips the circuit or you smell burning, shut down immediately and recheck connections. Document readings and keep a log for future maintenance. This careful restart helps confirm the repair furnace blower motor is operating safely and efficiently.
Final checks and safe operation after repair
Final checks include verifying thermostat control, ensuring safe clearance around the furnace, inspecting for duct leaks, and confirming that heat is evenly distributed. If the blower runs quietly and airflow is restored, you’ve likely achieved a successful repair or replacement. Maintain safety: replace access panels securely, keep children away from the furnace area, and schedule periodic inspections especially after seasonal changes. If any doubt remains, contact Home Repair Guide for guidance and verification that your repair furnace blower motor is operating at peak efficiency.
Tools & Materials
- Safety glasses(ANSI Z87.1 compliant)
- Insulated gloves(Heat-resistant if exposed to ducts)
- Dust mask(N95 or better for dust particulates)
- Digital multimeter(Capacitance testing if applicable)
- Screwdriver set (Phillips & flat)(Magnetic varies by model)
- Socket/wrench set(Metric and SAE sizes)
- Capacitor tester or replacement capacitor(Only if capacitor testing is needed)
- Replacement blower motor kit or spare parts(Use only if diagnosis indicates replacement)
- Belt (belt-driven models)(Check for cracks or wear)
- Camera or notepad(Document wiring paths)
Steps
Estimated time: Estimated total time: 2-3 hours
- 1
Power down and isolate the furnace
Turn off power at the furnace disconnect and the main breaker. Confirm there is no voltage present at the blower harness with a multimeter before touching any wiring.
Tip: Label each wire as you disconnect and take a photo for reference. - 2
Access the blower compartment
Remove access panels as required to reveal the blower motor, wheel, and drive components. Keep track of screws and fasteners so reassembly is straightforward.
Tip: Work on a clear, stable surface and avoid bending ductwork. - 3
Inspect before testing
Look for obvious signs of damage: melted insulation, burnt smell, frayed wiring, or a stuck wheel. A visual check can save time before electrical testing.
Tip: Do not run the motor if you smell gas or see signs of overheating. - 4
Test the capacitor and windings
Discharge the capacitor safely, then test with a capacitor tester or multimeter. Check motor windings for continuity per the model diagram.
Tip: Handle capacitors with care; improper discharge can cause shocks. - 5
Assess the belt and mounting
In belt-driven units, inspect belt tension and alignment. Replace a worn belt and ensure it tracks correctly on pulleys.
Tip: A loose belt can mimic motor failure by reducing torque. - 6
Decide repair or replacement
If windings show signs of overheating or the capacitor is out of tolerance beyond acceptable limits, replacement is usually more reliable than a repair.
Tip: Budget time and parts accordingly; some repairs are not cost-effective. - 7
Reconnect and test assembly
Reconnect wiring in reverse order, secure fasteners, and restore power for a controlled startup test. Observe for smooth operation and proper airflow.
Tip: Start with lower speeds to reduce inrush and monitor for abnormal noises.
FAQ
Can I repair a furnace blower motor myself?
Basic electrical checks and cleaning can be done safely if you follow safety protocols. For motor replacement or complex testing, consult a professional. Identify defects and use proper tools before attempting any repair furnace blower motor work.
Yes, you can do basic safety checks yourself, but replace the motor or perform advanced tests only if you’re confident.
What are signs that indicate the blower motor should be replaced rather than repaired?
Persistent burning smell, loud grinding, failure to start after testing the capacitor, or overheating are strong indicators that replacement is the better option for the repair furnace blower motor.
Burning smell, loud noises, or inability to start usually means replacement is best.
Is a faulty capacitor always the cause of blower motor problems?
Not always; capacitors are common culprits but windings, bearings, and control boards can also fail. Perform proper tests and replace only after confirming the fault.
Capacitors are common but other issues can cause blower motor problems.
Do I need specialized tools to repair the blower motor?
A basic set of hand tools and a digital multimeter are usually enough. Some models may require manufacturer-specific parts; always consult the wiring diagram.
A basic toolkit and multimeter are usually enough.
How long does a typical blower motor repair take?
Duration varies by model and access, but plan for several hours, especially if wiring and mounting require extensive disassembly.
It can take several hours depending on access and model.
What safety precautions should I follow?
Always shut off power to the furnace, avoid gas line interactions if untrained, and wear safety gear. Keep children away from the work area.
Shut off power, avoid gas lines, wear safety gear.
Should I replace the blower motor kit with a model from the same manufacturer?
Using a manufacturer-approved kit reduces wiring errors and compatibility issues. If a non-OEM part is used, verify compatibility with your model.
OEM kits help ensure proper fit and wiring.
Can you test a blower motor with it mounted inside the furnace?
In-situ testing is possible with caution, but avoid live testing if you’re unsure. If you must test, disconnect power and follow a controlled procedure.
Test carefully and only if you’re confident in the wiring.
Watch Video
Key Takeaways
- Identify fault before disassembly
- Always shut power off before touching electrical parts
- Decide between repair and replacement by assessing damage
- Test components with proper tools and documentation