Repair Electric Fan Motor: A Comprehensive DIY Guide
Learn to diagnose, repair, and maintain an electric fan motor with a practical step-by-step guide from Home Repair Guide, designed for DIY homeowners.

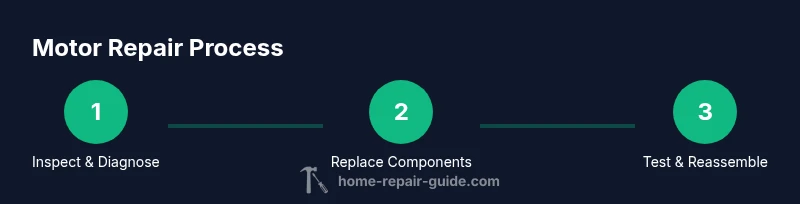
To repair an electric fan motor, you’ll diagnose common issues, test the capacitor and windings, and replace worn bearings or seals as needed. This step-by-step approach comes from Home Repair Guide, focusing on safe, practical DIY fixes. You’ll gather basic tools, disconnect power, and follow careful disassembly and reassembly to restore airflow efficiently.
Safety and planning before you start
Before you take on any repair, ensure safety is your top priority. Unplug the fan, disconnect it from any power source, and work in a dry area away from moisture. If the device is ceiling-mounted, turn off the corresponding circuit breaker. Gather the tools you’ll need and review the manufacturer’s model year specs if available. The Home Repair Guide approach emphasizes measuring and documenting every step, so you know what you touched and where it belongs when you reassemble. Plan your work by labeling wires and screws, and keep a clean workspace to minimize lost parts. If you notice smoke, a strong burning smell, or unusual heat during any test, stop immediately and seek professional help. Safety-first planning reduces the risk of electric shock or personal injury and helps you distinguish between a cosmetic fix and a meaningful motor repair. According to Home Repair Guide, starting with a written plan helps homeowners stay organized.
Common problems that signal motor repair is needed
Most electric fan motor problems fall into electrical or mechanical causes. Electrical issues include a failing capacitor, overheated windings, loose connections, or a switch that sticks on. Mechanically, wear on bearings, a bent rotor shaft, or debris inside the housing can reduce performance or cause noisy operation. In many cases, a simple cleaning and lubrication can improve efficiency, but more serious winding damage often requires component replacement. The Home Repair Guide analysis shows that diagnosing the fault accurately saves time and money, preventing unnecessary part swaps. Start by listening for grinding or rubbing sounds, and check for visible signs of wear around the shaft and bearings. Use a multimeter to test for continuity and resistance; compare readings to the service manual or known good values from a trusted source.
Tools and safety gear you should have
Equip yourself with a clean, organized toolkit before you begin. Essential tools include a set of screwdrivers (Phillips and flat-head), a nut driver, a pair of needle-nose pliers, and a multimeter for electrical checks. You’ll also need a small brush or clean cloth for debris removal, isopropyl alcohol for cleaning contacts, and a light lubricant designed for electric motors. Wear safety glasses and insulated gloves, especially when handling exposed wiring or capacitors. Keep a labeled bin or magnetic tray for screws and small parts, and have electrical tape on hand for securing connections during reassembly. If you encounter stubborn fasteners, use penetrating oil and allow it to sit for a few minutes. These steps reduce the risk of damaging screws or harming yourself during disassembly.
Diagnosing electrical issues: capacitor, windings, and switch
Capacitors are common failure points in ceiling and desk fans. A bad capacitor often causes weak starting torque or intermittent operation. Start with a physical inspection: look for bulges, cracks, or leakage. Then test with a multimeter or a dedicated capacitor tester if available. If readings are out of spec, replace the capacitor and test again. Windings can overheat or burn, creating a distinct odor and reduced performance. Inspect winding insulation for darkened areas or melt marks and perform a continuity/voltage test with the motor disconnected from power. The switch or speed control may also wear out or stick. Clean contacts, inspect wiring insulation, and ensure secure connections. If several electrical components fail, replacing the motor might be more cost-effective than multiple fixes.
Mechanical issues: bearings, shaft play, and rotor health
Bearings wear out over time and allow excess shaft play, leading to rubbing sounds and reduced airflow. If you can feel looseness when you wiggle the rotor, bearings may be worn. Replacement bearings or a proper bearing kit can restore smooth operation, but this may require a bearing puller and precise sizing. Check the rotor for scoring, bent blades, or rotor imbalance, which can cause vibration and noise even when electrical checks pass. Cleaning the rotor and ensuring the shaft spins freely by hand can reveal hidden friction. Use a small amount of motor-approved lubricant to reduce resistance, but avoid over-lubricating, which can attract dust and degrade insulation.
Cleaning and lubrication basics
Dirt and dust accumulation reduces cooling and increases resistance. Start with a gentle dusting and wipe down accessible surfaces with isopropyl alcohol. Avoid getting cleaners on windings or the capacitor. When lubricating, use a motor-grade lubricant sparingly on the bearings or bushing as directed by the manufacturer. Do not apply oil to fan blades or the rotor where it can sling onto windings. Reversing the lubrication frequency to your fan’s usage pattern preserves efficiency. After cleaning, inspect the wiring harness for cracked insulation or loose connectors and re-seat them carefully. A clean, well-lubricated motor tends to run cooler and longer.
Reassembly and testing
Carefully reassemble the housing, reconnect wiring using the original color codes, and secure all fasteners without overtightening. Before fully sealing the unit, perform a test run at the lowest speed setting to observe for unusual noises, heat, or vibration. If the fan starts reliably and runs smoothly, gradually increase speed while monitoring. If you observe trouble starting, weak airflow, or abnormal noises, power off and recheck the connections. Document any parts replaced and consider an after-action check after a few days of use. A deliberate reassembly process reduces the chance of cross-wired connections or loose blades.
When to replace vs repair
Not every motor issue is economical to repair. If windings show extensive burn damage, the capacitor tests fail repeatedly, or the rotor is bent beyond repair, replacement is often the safer and more cost-effective option. Compare the cost of parts, the time investment, and the motor’s age against the price of a new unit. In some cases, a professional rebuild may be warranted. The decision should balance safety, reliability, and long-term energy efficiency. If in doubt, consult a qualified technician or the manufacturer’s service center for a diagnosis.
Tools & Materials
- Flathead screwdriver(Precision blade; for prying and adjusting small parts)
- Phillips screwdriver #2(Common head for motor housing screws)
- Nut driver set(Sizes vary by model)
- Needle-nose pliers(For grip and wire manipulation)
- Electrical multimeter(Test capacitor, continuity, and resistance)
- Isopropyl alcohol (91%+)(Clean contacts and windings)
- Motor-grade lubricant(Light lubricant for bearings only)
- Electrical tape(Secure connections during reassembly)
- Safety glasses(Eye protection against debris)
- Insulated gloves(Protection when handling wiring)
- Screw organizers or magnetic tray(Keep fasteners organized)
- Replacement capacitor (if needed)(Match same rating as original)
- Bearing puller (optional)(Used for stubborn bearings)
Steps
Estimated time: 60-90 minutes
- 1
Disconnect power and remove the grill
Unplug the fan and remove the grille and blades to access the motor. Keep track of screws and note wire positions. This first step prevents electric shock and gives you clear work access.
Tip: Take a photo of wiring before disconnecting to aid reassembly. - 2
Open the motor housing to expose components
Loosen screws securing the housing and carefully lift the cover. Do not force parts; look for hidden fasteners or clips. This step reveals the capacitor, windings, and bearings for inspection.
Tip: Label connectors or color-code wires for easy reattachment. - 3
Test capacitor and windings with a meter
With the unit unplugged, test the capacitor for proper capacitance and check windings for continuity. If readings are out of spec, replace the faulty part before moving on.
Tip: Compare readings to the model’s service manual or a trusted spec chart. - 4
Inspect mechanical components for wear
Check bearings, rotor shaft, and any visible abrasion. Look for scoring, looseness, or bent parts. Replace worn bearings or straighten any minor misalignments carefully.
Tip: Rotate the rotor by hand to feel for binding or roughness. - 5
Clean, lubricate, and reassemble
Clean contacts and windings, apply a light motor-approved lubricant to bearings, then reassemble the housing in reverse order. Ensure all wires are insulated and connections secure.
Tip: Avoid over-lubricating—excess grease attracts dust and can contaminate windings. - 6
Test the motor and verify operation
Reconnect power and run the fan at low speed first. Listen for unusual noises and observe for overheating or vibration. If it runs smoothly, test at higher speeds gradually.
Tip: Document any parts replaced and plan a follow-up test over the next few days.
FAQ
Is it safe to repair an electric fan motor myself?
Yes, if you strictly follow safety protocols: unplug the device, work in a dry area, and use insulated tools. If you encounter burning smells or excessive heat, stop and seek professional help.
Yes, you can repair it yourself if you follow safety steps and stop if you smell burning or see excessive heat.
How do I know if the capacitor needs replacement?
A physical inspection for bulges or leaks plus a capacitance test with a multimeter or dedicated tester will indicate if replacement is needed. Replace and re-test the circuit.
Check for bulges or leaks and test with a meter to confirm before replacing.
What are the signs of motor winding damage?
Signs include a burning odor, visible insulation damage, excessive heat, or voltage drop under load. If windings are compromised, consider replacement rather than repair.
Burning smell, insulation damage, or overheating point to winding damage.
Can I reuse old bearings?
Only if there is no play, no scoring, and the bearings spin smoothly. If you feel roughness, replace with correct-sized bearings.
Only reuse bearings if they spin smoothly and show no wear.
What tools are essential for this repair?
Screwdrivers, a multimeter, lubricant, a bearing puller if needed, and safety gear are the core tools you’ll use.
You’ll need screwdrivers, a multimeter, lubricant, and safety gear.
When should I replace a motor entirely?
If windings are extensively damaged, or the cost and effort exceed a safe repair, replacing the motor is usually the better option.
If damage is extensive or repairs are costly, replacement is often best.
Watch Video
Key Takeaways
- Unplug before any work begins.
- Test electrical and mechanical parts to pinpoint issues.
- Use safety gear consistently and keep parts organized.
- Decide repair vs replacement based on damage and cost.
- Document steps for future maintenance.