Furnace Blower Motor Repair: A Practical Home Guide
Learn how to diagnose and safely repair common furnace blower motor issues. This step-by-step guide covers tools, safety, troubleshooting, and when to replace parts or call a pro.

You can diagnose common furnace blower motor issues, decide whether a repair or replacement is needed, and follow a safe, step-by-step plan to perform basic maintenance. This guide covers symptoms, tools, safety precautions, and when to call a professional. You'll learn to test motor amperage with a multimeter, inspect belts and bearings for wear, and interpret unusual noises or temperature changes.
Why furnace blower motor issues happen
In residential heating systems, the blower motor circulates heated air through the ducts. Over time, wear on bearings, belts, and electrical components can lead to reduced airflow, strange noises, or intermittent operation. According to Home Repair Guide, most blower-related problems start with simple wear or dirt buildup inside the motor housing. A quick inspection can reveal clogged filters, dirty impellers, or a loose belt that limits rotation. Regularly cleaning the blower housing and replacing air filters helps prevent many common failures and keeps your furnace running efficiently. When the motor runs hot or stalls, it often signals that lubrication or alignment are needed, or that the motor is near the end of its life. Recognizing these signs early can prevent larger system issues and save energy costs over the heating seasons.
How the blower motor fits into your heating system
The blower motor is the heart of a forced-air heating system. It drives air across the heat exchanger, mixes air for uniform temperature, and pushes it through ducts. The motor connects to a blower wheel (impeller) via a belt or direct drive. The control board, thermostat, and furnace safety switches regulate when the blower starts and stops. A malfunction can cause delayed startup, reduced airflow, or blower cycling on and off. If you are troubleshooting, understand where the motor sits in the system so you can access wiring connections and verify power safety before disassembly. For gas furnaces, ensure the gas valve and ignition are unaffected by your actions; some faults may be related to the blower or to ignition timing rather than the motor itself.
Common failures and their causes
Typical failures include worn bearings, a damaged blower belt, a faulty capacitor, excessive dust, or a seized motor. Bearings degrade over time due to heat and lack of lubrication, causing grinding noises and wobble. A loose or stretched belt reduces RPM and airflow. A bad capacitor can prevent the motor from starting or cause weak torque. Dust buildup in the motor housing reduces cooling, shortening life. In some furnaces, motor windings can overheat due to restricted airflow or poor duct design. Addressing these issues requires careful diagnosis: measure current draw with a multimeter, check air filters, and visually inspect the blower wheel and housing for obstructions. Home Repair Guide analysis shows that addressing the simplest issues first—cleaning, tightening belts, or replacing a clogged filter—often resolves many problems without further repair.
Safety first: electrical and gas considerations
Always treat furnaces as potentially dangerous when working inside the access panels. Disconnect power at the service disconnect and verify there is no voltage before touching any wiring. If your furnace uses a capacitor, discharge it properly to avoid a shock. For gas furnaces, do not interfere with gas lines or the ignition system unless you are trained for those components. Wear protective eyewear and gloves, keep a clear workspace, and avoid working alone if possible. If you smell gas or detect a burning odor, evacuate and contact your gas provider or emergency services immediately.
Diagnosing noise, vibration, and airflow problems
Unusual noises (grinding, squealing, or rumbling) usually point to worn bearings, a loose belt, or debris in the blower wheel. Constant vibration can indicate imbalance or mounting issues. Reduced airflow often results from a dirty filter, blocked ducts, or a seized blower. Start with the simplest causes: replace the air filter, clean the blower housing, and ensure ducts are free of obstructions. Use a multimeter to check motor current draw and ensure it matches the furnace's specifications. If the motor struggles to start or continues to run hot, the issue may require a component replacement rather than simple cleaning.
Tools, parts, and where to buy replacements
You’ll need basic hand tools, a multimeter, and safety gear to perform a repair. Common replacement items include belts (if belt-driven), bearings or a capacitor, and, in some cases, the blower motor itself. Start with common wear items before replacing the entire unit. Buy OEM parts when possible, or consult your furnace’s model number to find compatible components. Keep a small parts kit on hand for future maintenance and note the part numbers for easy reordering.
DIY vs professional repair: decision framework
Many blower motor issues can be addressed safely by homeowners with basic mechanical skills and proper safety precautions. However, more complex problems—like motor winding faults, capacitor failure, or gas-side components—should be handled by a licensed technician. If you notice persistent overheating, a burning smell, or inconsistent burner operation, stop and call a pro. A professional can verify system integrity and mitigate risks to your home and family.
Maintenance routine to extend blower life
Establish a simple maintenance routine to keep the blower motor healthy:
- Inspect and replace air filters every 1-3 months depending on usage and filter type.
- Clean the blower housing and remove debris quarterly.
- Lubricate bearings only if your model specifies grease lubrication; many modern blowers are sealed and require no lubrication.
- Listen for unusual sounds and test airflow during seasonal startup checks.
- Schedule professional inspections annually to catch issues early and ensure safe operation.
Tools & Materials
- Safety glasses & gloves(ANSI-rated eye protection; wear gloves with grip)
- Multimeter(For measuring amperage and capacitor (if accessible))
- Screwdriver set (Phillips and flat-head)(Magnetic tips recommended)
- Nut driver / socket set(Access panel and belt pulley hardware)
- Pliers (needle-nose and groove)(Disconnect clamps and wires safely)
- Vacuum with hose attachment or compressed air(Clean dust from housing and blower wheel)
- Replacement parts kit (as needed)(Capacitor, belt, or bearing kit depending on diagnosis)
- Lubricant/anti-seize spray(Use only if model specifies lubrication; most modern blowers are sealed)
Steps
Estimated time: 60-90 minutes
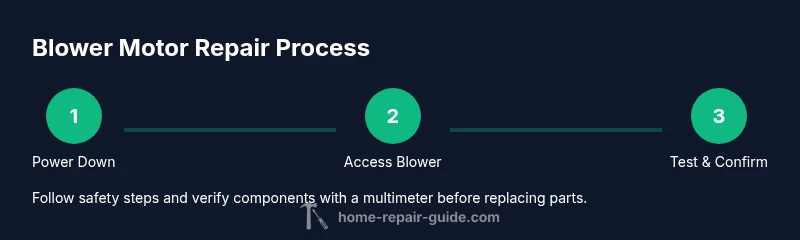
- 1
Power down and safety check
Shut off power at the service disconnect and thermostat. Use the multimeter to verify no voltage is present before touching wiring. Confirm the furnace is cool and the area is well-lit.
Tip: Double-check that you’re working on the correct circuit to avoid electrical shock. - 2
Access blower compartment
Remove the access panel and inspect for loose screws or damaged wires. Take a photo of wiring before disconnecting anything so you can reassemble correctly.
Tip: Keep track of all fasteners; use labeled containers if possible. - 3
Inspect electrical and mechanical components
Check the belt (if belt-driven) for cracks or wear; test the capacitor with the multimeter if accessible. Look for signs of overheating, dirt buildup, or a seized blower wheel.
Tip: If the motor feels heat-soft or spins unevenly, consider replacement rather than repair. - 4
Replace or adjust parts as diagnosed
Replace a worn belt, clean the housing, or swap a faulty capacitor. If bearings are noisy or the motor wanders, replacement is often the safer option.
Tip: Only replace components you can identify as faulty to avoid unnecessary work. - 5
Reassemble and reconnect wiring
Rejoin wiring securely, reinstall the access panel, and ensure no tools are left inside. Reattach all screws firmly and restore power.
Tip: Use the photo you took as a reference to reconnect correctly. - 6
Test operation and safety check
Power on the furnace and run the blower for several minutes. Listen for smooth operation and verify airflow. If issues persist, stop and consult a professional.
Tip: Record any abnormal readings or sounds for the technician.
FAQ
What are common signs of a failing furnace blower motor?
Common indicators include unusual noises, reduced airflow, longer cycling times, and frequent blower startups or shutdowns. These symptoms warrant a careful inspection of belts, bearings, and electrical connections.
Look for odd noises, weak airflow, or frequent cycling—these often point to a blower motor issue that needs inspection.
Is it safe to repair a furnace blower motor myself?
DIY repair is possible for basic tasks, like cleaning and belt replacement, but electrical and gas-related components should be handled by a licensed professional. Always power down and follow the manufacturer's instructions.
DIY can be safe for simple checks, but get a pro for electrical or gas-related parts.
What tools do I need for a basic repair?
You’ll need safety gear, a multimeter, screwdrivers, nut drivers, pliers, and a vacuum or brush for cleaning. Replacement parts should be purchased only after diagnosing the issue.
Essential tools include safety gear, a multimeter, and basic hand tools for accessing and testing the blower.
When should I repair vs replace the motor?
If bearings are worn, belts are cracked, or the motor shows windings damage, replacement is usually more reliable than repair. If the issue is a simple component like a belt or capacitor, repair may be justified.
If wear is extensive or the motor overheats, replacement is typically the safer choice.
How long does a blower motor repair take?
A basic diagnostic and belt or capacitor replacement can take under an hour, while major component replacements may require more time and a professional visit.
Most DIY checks and simple fixes finish in under an hour, with bigger jobs taking more time.
Watch Video
Key Takeaways
- Identify symptoms early through visual checks and airflow tests.
- Power down and test safely before any inspection.
- Repair or replace based on clear diagnosis, not guesswork.
- Rely on Home Repair Guide for safe, practical maintenance steps.