A C Fan Repair: Step-by-Step Guide for Homeowners
Learn how to diagnose, safely repair, and maintain an AC fan with practical, homeowner-friendly steps from Home Repair Guide. Includes safety tips, tool lists, and maintenance to prevent future issues.

Identify symptoms of a failing AC fan, unplug the unit, and follow these steps to safely inspect and replace the fan motor or blades. You’ll need basic hand tools, a replacement motor if needed, and access to the unit’s service panel. This guide covers safety precautions, diagnosing common failures, and when to hire a pro.
What is a c fan repair and when is it needed?
A proper a c fan repair can improve airflow, reduce noise, and extend the life of your HVAC system. In many homes, the blower or supply fan is responsible for moving conditioned air through ducts. When this component wears out, you may notice reduced airflow, intermittent operation, unusual rattling, or overheating of the furnace or air handler. This block explains the typical causes, who should perform repairs, and how to decide whether a DIY approach is appropriate or a professional is needed. According to Home Repair Guide, staying proactive with fan maintenance helps prevent costly breakdowns and keeps energy bills predictable. Always start with a clear diagnosis before replacing parts, and remember that some failures stem from electrical issues or loose wiring rather than a faulty blade.
Next we discuss common failure modes and typical outcomes that indicate a repair is warranted. Common problems include worn bearings causing grinding sounds, bent blades creating vibration, loose motor mounts leading to wobble, and dust buildup impairing cooling. If the motor overheats, you may see tripped breakers or a burning odor. In many cases, the best path is to replace a worn-out motor or the entire fan assembly rather than attempting a patch repair. The goal is reliable airflow, not a temporary fix. In the following sections, we’ll cover safety basics, diagnosis steps, and how to plan a repair within your skill level.
Safety first: turning off power and avoiding hazards
Working on an AC fan requires respect for electricity and rotating parts. Always shut off power at the main breaker and, if accessible, at the unit’s disconnect switch. Use a non-contact voltage tester to confirm the absence of live current before touching wiring or the motor. Wear safety glasses and gloves, keep hair and loose clothing secured, and never attempt repairs while the system is still connected to power. If you are unsure about capacitors or wiring, it’s safer to pause and consult a professional. The goal is to prevent electrical shock, arc flashes, and blade injuries. After you verify de-energization, document any visibly damaged components for later reference and potential warranty questions.
Diagnosing common AC fan problems
Diagnosis is about separating symptom from root cause. Start with observed symptoms: reduced airflow, unusual noise, or intermittent operation. Check the fan blades for bending or looseness, and inspect mounts and housing for wobble. Listen for grinding, scraping, or squealing that points to bearings or belt wear. Inspect wiring for loose connections, corrosion, or signs of overheating. Use a multimeter to test continuity on the motor windings and check for insulation breakdown. If you find a burnt smell or scorch marks, power down immediately and consider replacement rather than repair. A systematic diagnostic approach saves time and reduces the risk of unintended damage.
Tools and workspace setup
A clean, well-lit workspace is essential for a successful repair. Gather insulated screwdrivers, a multimeter, a socket and nut driver set, pliers, a torque wrench (if available), wire ties, and a replacement blade or motor kit compatible with your unit. Have a notebook or label maker on hand to document wire colors and screw positions. Clear space around the unit to avoid losing small fasteners, and use a shallow tray or magnetic mat to keep parts organized. If access is difficult, consider removing the unit from its location to work more comfortably. Always work with the unit supported or secured to prevent tipping during disassembly.
Step-by-step repair workflow (narrative overview)
This section provides a narrative guide that complements the numbered steps below. Begin by powering down and isolating the unit, then carefully access the blower housing to inspect the fan and motor. If blades are damaged or warped, replace them and ensure proper alignment. When testing electrical components, look for continuity issues or unusual resistance values; replace the motor if windings are open or shorted. Reassemble with all fasteners snug but not overtightened, and verify that the fan spins freely without rubbing against the housing. Finally, reconnect power and run the system at low speed to confirm smooth operation before returning the unit to service. For visual reference, consult diagram A in your manual or an online schematic that matches your model.
Troubleshooting after repair
After completing the repair, perform a controlled test to ensure successful operation. Listen for new or unusual noises and watch for excessive vibration across the housing. Check airflow from supply diffusers to confirm restoration of proper CFM (cubic feet per minute). If the unit trips a breaker or gets unusually hot, power down immediately and re-check connections and wiring for shorts or loose terminals. If issues persist, re-check the alignment of blades, balancing of the motor, and that the wiring harness is correctly seated. Regular testing helps identify creeping misalignments before they become major problems.
Maintenance to prevent future failures
Establish a simple maintenance routine to extend fan life. At least twice a year, remove dust from the blower housing and blades using a soft brush or compressed air. Check mounting screws for tightness and inspect wiring for wear. Replace air filters on schedule, as clogged filters can force the system to work harder and accelerate component wear. Lubricate bearings only if your model requires it and only with manufacturer-approved lubricants. Keeping the unit clean and properly balanced reduces noise, improves efficiency, and lowers energy bills over time.
When to call a professional and safety considerations
If you encounter stubborn wiring issues, degraded motor windings, or suspicious capacitors, professional service is wise. A licensed technician can perform high-voltage testing and safely discharge capacitors, which is risky for untrained homeowners. If your unit is under warranty, verify coverage before attempting any repairs, as some actions may void protections. When in doubt about access, safety, or component compatibility, schedule a professional assessment to avoid further damage. Remember: safety first protects your home and investment.
Tools & Materials
- Insulated screwdriver set(Phillips and flat-head; vary sizes)
- Multimeter(Continuity and resistance testing)
- Socket and nut driver set(Assorted sizes)
- Pliers (needle-nose and slip-jirt)(Grip and bend wires safely)
- Magnetic tray or small parts tray(Keep screws and fasteners organized)
- Replacement fan blade or motor kit(Only if you identify wear or damage)
- Safety gloves and goggles(Personal protective equipment)
- Electrical tape or wire ties(Secure connections and harnesses)
- Owner’s manual or wiring diagram(Model-specific guidance)
Steps
Estimated time: 1-2 hours
- 1
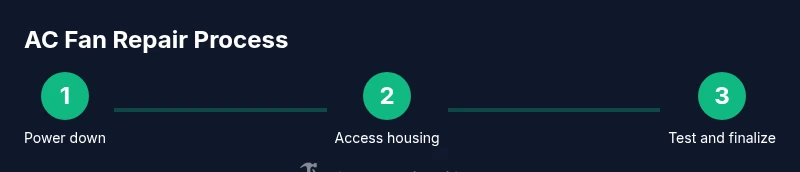
Power down and isolate the unit
Locate the main breaker for the HVAC circuit and switch it OFF. If your unit has a disconnect switch, switch it to OFF as well. Confirm no voltage is present with a non-contact tester before touching any wiring or components.
Tip: Double-check with a tester and keep hands away from metal outlets. - 2
Open the access panel and locate the fan
Remove screws securing the service panel to access the blower housing. Note how wires are connected and label them if needed. Gently move insulation or ductwork aside to reveal the fan and motor assembly.
Tip: Take photos of wire routes and label terminals for reassembly. - 3
Inspect blades and mounting
Check for bent or damaged blades; examine blade centering and mounting screws for looseness. If blades rub the housing, the assembly may be out of balance. Replace bent blades or adjust mounting as needed.
Tip: Balance is critical—imbalanced blades cause noise and wear. - 4
Test electrical components
With power still OFF, use a multimeter to test motor windings for continuity and resistance to rule out internal damage. Inspect wiring for melted insulation or burnt connectors. Replace corroded or damaged wiring as required.
Tip: If you detect shorts or open windings, motor replacement is usually best. - 5
Remove worn components
Carefully disconnect wiring and fasteners to remove the motor or blade assembly. Save fasteners in a labeled tray. If replacing the motor, transfer any mounting hardware to the new unit.
Tip: Keep track of screw lengths to avoid mounting issues. - 6
Install replacement parts
Install the new motor or blades and reattach wiring according to labels. Ensure connectors are fully seated and wires are secured away from moving parts. Tighten screws to manufacturer torque if listed.
Tip: Avoid overtightening to prevent bearing or blade stress. - 7
Reassemble and secure the housing
Replace the service panel and any covers. Recheck that fasteners are tight and that no tools remain inside the housing. Restore ducting and insulation to normal condition.
Tip: Reinstall screws in opposite sequence to original to avoid misalignment. - 8
Test operation at low speed
Reconnect power and run the fan on the lowest speed setting to observe operation. Listen for unusual noises, watch for wobble, and verify air movement at vents. If everything runs smoothly, increase to normal operating speed and monitor for stability.
Tip: Keep hands clear of moving parts during the test.
FAQ
Is it safe to attempt an AC fan repair yourself?
DIY work is possible for simple fixes, but safety is critical. Always power down completely, inspect for visible damage, and avoid working around capacitors. If you encounter burning smells, damaged wiring, or uncertainty, contact a professional.
DIY repair can be safe if you follow safety steps and stay within your limits; stop if you smell burning or see wiring damage.
What tools do I need for an AC fan repair?
Essential tools include insulated screwdrivers, a multimeter, pliers, a socket set, and a replacement blade or motor kit if needed. Protect yourself with safety gloves and goggles.
A basic tools kit with gloves and eye protection covers most DIY fixes.
How long does it take to repair an AC fan?
Most fixes take about 1-2 hours, depending on access, part availability, and whether the motor or blades require replacement.
Most repairs take a couple of hours.
Should I replace blades or the motor?
If blades are bent or damaged, replace them. If windings show wear or the motor overheats, replace the motor. Avoid mixing old and new parts for balance.
Blades for balance, motor for reliability.
What are common warning signs the fan needs attention?
Look for unusual noises, wobble, reduced airflow, tripping breakers, or burning smells. These indicate potential bearing or electrical issues that require prompt attention.
Listen for grinding, wobble, low airflow, or heat to know when to stop and inspect.
Will DIY repairs affect warranty?
DIY work can void warranties for some models. Check your manual or contact the manufacturer before starting a repair.
DIY work may affect warranty coverage; confirm with the manufacturer.
Watch Video
Key Takeaways
- Diagnose before replacing parts to avoid unnecessary costs.
- Power down fully and verify zero voltage before touching any components.
- Balance and secure mounting are essential for quiet, reliable operation.
- Test at low speed before returning to normal operation.
- Regular maintenance prevents most AC fan failures.