A Comprehensive AC Unit Repair Guide for Homeowners
Learn practical, step-by-step methods for diagnosing and safely repairing common AC unit issues. This Home Repair Guide tutorial covers safety, tools, and maintenance to keep your cooling system efficient and reliable.

You will learn practical steps to diagnose and safely perform common AC unit repairs, from capacitor checks to thermostat validation. This guide covers essential safety measures, required tools, and a clear repair sequence you can follow as a homeowner. It also helps you decide when a professional service is warranted.
Why a c unit repair matters
A properly functioning air conditioning system keeps your home comfortable and energy bills manageable. When a c unit repair becomes necessary, you protect indoor air quality and prevent small problems from turning into expensive breakdowns. In this article, we walk through common faults, safe diagnostics, and practical repair steps you can perform as a handy homeowner. From capacitor checks to thermostat calibration, learning these basics helps you decide whether you can fix it yourself or need a pro. Using clear checklists, you’ll gain confidence and improve system longevity. For a c unit repair, start with a safety shutdown and a visual inspection to identify obvious issues before you touch electrical components. This approach keeps you safer and reduces the chance of creating new problems.
This section sets the stage for practical, at-home fixes and emphasizes the importance of methodical testing rather than guesswork. You’ll learn to recognize warning signs such as uneven cooling, strange noises, ice formation on coils, or icing of the refrigerant lines, all of which indicate issues that require care and attention.
Safety first: before you begin
Before you touch any part of the AC system, shut off power to both the outdoor condenser and the indoor air handler. Lock out the disconnect switch if possible and verify zero voltage with a non-contact tester. PPE matters: safety goggles, insulated gloves, and sturdy footwear are essential when working near electrical connections and moving parts. Clear the area of children and pets, and never work alone if you’re unfamiliar with electrical systems. Document the power-down time and keep a written checklist to ensure you return power only after you’ve completed the inspection. Understanding risk and following a calm, deliberate process dramatically lowers the chance of harm or further damage.
Understanding your system: the essentials
A modern central AC system consists of an outdoor condenser, an indoor evaporator coil, the thermostat, and a control board that coordinates cycles. The outdoor unit compresses refrigerant, exchanging heat with the air, while the indoor side uses the evaporator to remove heat from indoor air. Critical components for DIY checks include the run capacitor, contactor, blower motor, and drainage lines. Knowing how these pieces interact helps you pinpoint where faults are most likely to occur. Keeping a temporary log of symptoms and tests you perform will help you monitor changes and determine if a professional assessment is needed.
Common failure modes you can fix
Common failures in AC units that homeowners often tackle include capacitor degradation, worn contactors, dirty coils, clogged condensate drains, and thermostat miscalibration. A c unit repair often begins with visually inspecting for bulging capacitors or burnt smells and verifying that the outdoor compressor starts and stops predictably. If the system runs but has weak airflow, check the blower and evaporator coil for dirt buildup. If you detect ice on the refrigerant lines, turn off the system and let it thaw before investigating the cause. Always document findings and avoid making multiple repairs in one session unless you understand how each fix affects the others.
Tools and prep: how to set up
Gather the items listed below before you begin to minimize interruptions. Prepare a safe, well-lit workspace with a clear area around the outdoor unit. Label wires if you disconnect anything, and keep a photo log of the wiring configuration. Having a dedicated area for tools and spare parts will help you stay organized, reduce the risk of miswiring, and save time. Finally, check the unit’s outdoor disconnect and indoor access panels for any loose screws or obvious damage. A little prep goes a long way toward a successful repair.
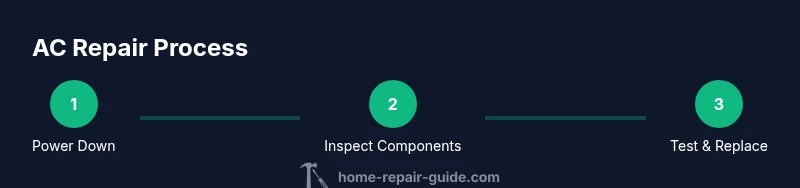
Step-by-step overview
This section outlines the high-level flow of a DIY repair for a typical residential AC system. Start with a safety shutdown, then inspect electrical components, test with a multimeter, and replace any defective parts such as a capacitor or relay. If refrigerant handling becomes necessary, stop and call a licensed technician, as improper handling can be dangerous and illegal in many jurisdictions. The overview below aligns with the detailed steps in the dedicated STEP-BY-STEP section and can help you prepare mentally for the work ahead.
Diagnosing capacitor and contactor faults
Capacitors provide the surge of current to start motors; if they fail, you may hear a click without the compressor starting, or you may notice swelling at the top of the capacitor. Testing with a multimeter after discharge confirms fault conditions. Inspect the contactor for welded or pitted contacts. If replacement is needed, ensure you select a capacitor with the correct microfarad rating and voltage. Do not reuse scorched parts; defective components can deliver inconsistent performance or hazardous conditions.
Thermostat and control board checks
A miscalibrated thermostat can cause short cycling or insufficient cooling. Check the wiring harnesses for loose or burnt connectors and verify that the thermostat settings correspond to the cooling demand. If you’re comfortable, test the control board for error codes or blinking LEDs as described in the unit’s manual. Faulty boards can mimic other component problems, so rule out simpler causes before replacing the board itself.
Refrigerant safety and leakage concerns
Refrigerant leaks require specialized equipment and certification to handle responsibly. Do not attempt to recover or add refrigerant unless you’re properly trained and licensed. Signs of a leak include oily residue around connections, hissing sounds, and weak cooling performance. If you suspect a leak, schedule a professional service promptly to avoid environmental harm and ensure proper refrigerant recovery. This area is one of the most common reasons homeowners call for professional support.
Coils, drains, and airflow: cleaning and maintenance
Dirty condenser coils block heat exchange, forcing the system to work harder and waste energy. Clean coils gently with a soft brush or garden hose on a cool unit (avoid high pressure). The condensate drain line should flow freely; a clog can trigger overflow and water damage. Regularly checking and clearing these pathways reduces the likelihood of future breakdowns and keeps the system running efficiently.
Reassembly and test run: verifying results
With the faulty parts replaced and connections re-seated, reassemble access panels and enable power. Start the system and listen for normal operation: comfortable air temperature, steady blower, and no unusual noises. Run a short test cycle and monitor voltages and temperatures to confirm that repairs corrected the underlying issue. Finally, update your maintenance log with dates, parts replaced, and performance notes.
Maintenance plan and seasonal care
Create a simple maintenance schedule that includes coil cleaning, filter changes, and thermostat checks. Scheduling semi-annual inspections can catch problems early and protect system efficiency. Consider keeping an emergency fund for potential parts or professional visits. A proactive maintenance approach keeps your AC running smoothly and reduces the likelihood of unexpected outages.
When to call a professional and budgeting for repair work
Certain repairs are beyond typical DIY scope, especially refrigerant handling, major compressor failures, or electrical panel work. If you’re unsure at any point, stop and consult a licensed HVAC technician. Budgeting for AC repairs involves considering labor rates, replacement parts, and potential refrigerant costs. Home Repair Guide recommends building a small repair fund to cover routine maintenance and unexpected issues so you’re prepared for seasonal heatwaves.
Tools & Materials
- Safety goggles(Impact-resistant, ANSI-approved)
- Insulated gloves(Heat-resistant when handling electrical components)
- Digital multimeter(Voltage, continuity, resistance checks)
- Non-contact voltage tester(Verify live circuits without contact)
- Screwdriver set (Phillips and flathead)(Various sizes)
- Nut driver set(For loosening/tightening hardware)
- Wrench set or pliers(Adjust as needed)
- Electrical tape(Insulation and quick wiring repairs)
- Gloves and rags(Clean up and safety)
- Replacement capacitor(s) (proper rating)(Check rating and voltage)
- Cleaning brush / soft cloth(Coil cleaning)
- Bucket and towels(Contain drips and spills)
Steps
Estimated time: 2-4 hours
- 1
Power down and verify safety
Shut off power at the outdoor disconnect and indoor handler. Use a non-contact tester to confirm zero voltage before touching wires.
Tip: Label circuits and document the shutdown time to avoid accidental re-energizing. - 2
Inspect the outdoor unit visually
Look for bulging capacitors, burnt smells, loose wiring, or exposed refrigerant lines. A quick physical check helps you decide if a component is obviously faulty.
Tip: Never touch a live contactor; wait for the unit to stay powered off. - 3
Test the run capacitor and contactor
Discharge the capacitor safely, then test with a multimeter for proper capacitance and continuity of the contactor contacts.
Tip: Replace if the capacitor shows bulging or the contactor has pitted contacts. - 4
Check the thermostat and wiring
Verify the thermostat is calibrated and wires are secure. Ensure settings match the cooling demand and that no loose connections exist.
Tip: Test a simple call for cooling to observe the outdoor unit engagement. - 5
Inspect refrigerant lines and leaks (if licensed)
Look for oil stains or hissing sounds at joints. Do not attempt refrigerant recovery unless you’re licensed.
Tip: If a leak is suspected, stop work and contact a licensed tech. - 6
Clean coils and drain lines
Gently clean the condenser coils and ensure the condensate drain is clear to prevent overflow.
Tip: Use low-pressure water and avoid bending delicate fins. - 7
Reassemble and power up for test run
Reinstall panels, restore power, and run a short cycle to check for smooth operation.
Tip: Monitor voltages and check for unusual noises or odors. - 8
Evaluate performance and document results
Record temperatures, run times, and any parts replaced for future reference.
Tip: Keep a maintenance log and schedule follow-up checks.
FAQ
What is the first step in a DIY a c unit repair?
Always shut off power at the disconnect and confirm zero voltage before touching any wires. This minimizes risk of shock or further damage.
First, switch off power at the disconnect and check that there’s no voltage before you touch anything.
Can I replace a capacitor myself?
Replacing a capacitor is a common DIY task if you’re comfortable with electrical work and you use the correct rating. Discharge the old capacitor safely before removal.
You can replace a capacitor if you use the right rating and discharge it first, but be careful with electrical safety.
Is it safe to check refrigerant levels at home?
No. Handling refrigerant requires licensed technicians and proper recovery equipment. Homeowners should avoid refrigerant work unless trained.
No, refrigerant handling should be left to licensed technicians with proper equipment.
When should I call a professional for an AC repair?
If you notice refrigerant leaks, compressor failure, or frequent electrical issues, contact a licensed HVAC technician. They can diagnose and safely repair complex problems.
Call a professional if you suspect leaks or electrical issues beyond basic checks.
What tools are essential for basic AC repairs?
A digital multimeter, voltage tester, screwdrivers, and a replacement capacitor are core tools for many DIY fixes. Keep safety gear handy.
You’ll need a multimeter, voltage tester, screwdrivers, and a capacitor for many fixes.
How long does a typical DIY AC repair take?
Most basic checks and replacements can be completed in a few hours, depending on your experience and the system’s complexity.
Most DIY fixes take a few hours, depending on the task and your experience.
Watch Video
Key Takeaways
- Identify fault symptoms with methodical tests
- Power safety first; never bypass disconnects
- Differentiate DIY fixes from professional needs
- Document repairs for future maintenance