AC Air Compressor Repair: A Practical Guide for Homeowners
Learn practical, safe steps to diagnose and repair an AC air compressor. This Home Repair Guide tutorial covers tools, safety, DIY options, and when to call a pro for reliable cooling repairs.

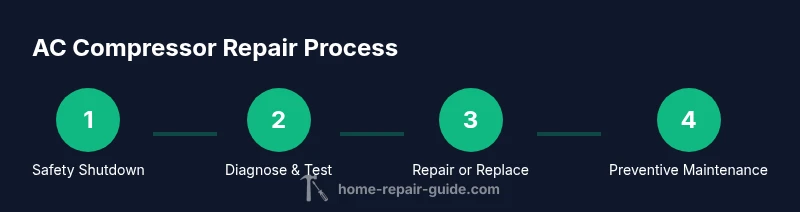
AC air compressor repair focuses on restoring proper refrigerant flow, electrical safety, and compressor operation in residential cooling systems. The aim is to accurately diagnose symptoms, use basic diagnostic tools, and decide between DIY fixes or professional service. This quick guide highlights essential steps, safety precautions, and when to escalate to a licensed technician.
Why AC air compressor repair matters
The AC system's compressor is the heart of the cooling loop, moving refrigerant and creating the pressure differential that enables heat transfer. When the compressor starts failing, you may experience warm air, longer run times, or cycling issues that drive up energy use. Maintaining a healthy compressor keeps the system efficient and reduces the likelihood of costly breakdowns. According to Home Repair Guide, prioritizing compressor health helps homeowners preserve comfort and prevent cascading failures in the outdoor unit and indoor coil. Understanding how the compressor fails and how to identify warning signs early empowers you to schedule timely repairs, minimize downtime, and protect the life of your equipment. In this section, we lay out the typical failure modes, how they manifest in day-to-day operation, and the practical steps you can take to address them, whether you are a DIY enthusiast or working with a licensed technician. The goal is to give you a clear, actionable framework for diagnosing, deciding, and acting with confidence.
Safety first: precautions before working on AC compressor
Working on an air conditioner involves electricity, refrigerants, and high-pressure components. A single mistake can cause injury or environmental harm. Before touching the unit, switch off power at the disconnect and, when feasible, at the indoor control board. Wear insulated gloves, eye protection, and long sleeves. Avoid working alone and keep a dry, uncluttered workspace around the outdoor condenser and indoor unit. If you smell refrigerant or suspect a leak, exit the area and call a licensed technician; refrigerants can be harmful and venting is illegal in many jurisdictions. Always verify that capacitors are discharged before handling electrical components, and never attempt to force-start or bypass safety interlocks. The guidance here aims to minimize risk while enabling careful inspection, testing, and basic maintenance tasks. If you feel uncertain at any point, pause and reach out to a professional. Safety is the foundation of any successful repair, especially when dealing with refrigerant systems and high-voltage equipment.
How to prepare: staying organized and documenting issues
Set up a clean, well-lit workspace around the outdoor condenser and nearby access panels. Have a notepad or smartphone ready to record symptoms, times of operation, and any observed noises or leaks. Take photos of wiring, label connectors, and note model numbers before removing any parts. Create a simple wiring map if you must disconnect components, and keep screws and fasteners in labeled containers. A basic diagnostic mindset helps you differentiate between electrical problems and refrigerant-related faults. For this task, common tools like a digital multimeter, insulated screwdrivers, and a socket set keep work orderly and reduce the risk of shorts. Consider having a pressure gauge or manifold set handy if you plan to assess refrigerant pressures, but only if you are trained to handle refrigerants. Finally, check warranty status and service agreements; some components may be covered, reducing your costs. With proper preparation, you’ll approach the job with clarity and confidence, making it easier to interpret results and decide on the next best step.
Diagnosing the compressor: symptoms and tests
Begin with symptom analysis: does the outdoor unit hum but not start, is there excessive noise, or is cooling performance poor? Check if the contactor switch engages, listen for a grinding or rattling sound, and observe the current draw with a multimeter when the thermostat calls for cooling. Use a digital multimeter to measure voltage at the contactor and, if safe, check the capacitor’s capacitance with an appropriate tester. A failing start capacitor or relay is a common cause of failure to start. If the compressor runs briefly and then stops, or if it runs but overheats, internal winding damage or mechanical seizure could be involved. Use refrigerant gauges to compare high- and low-side pressures to manufacturer specs; abnormal readings often indicate leaks, undercharge, or overcharge conditions. Note any refrigerant odors and inspect line-set connections for signs of oil residue, which may signal a leak. Avoid running the system if pressures are outside safe ranges, and never bypass safety controls. If tests point toward a major mechanical fault, prepare for professional evaluation.
Common failure modes and what they mean
Capacitor failure: A bad start or run capacitor commonly causes slow starts, hard starts, or repeated tripping. Replacing the capacitor with one of the same capacitance and voltage rating is a common DIY fix, but ensure you discharge energy safely before handling. Electrical relay or contactor wear: Worn or pitted contacts can prevent the compressor from receiving a proper start signal or from staying energized. Replacing the relay or contactor is often straightforward for a trained DIYer. Seized or worn compressor: If the piston or rotor cannot move smoothly due to dry bearings or internal corrosion, the unit may overheat, produce noise, or trip breakers. Replacement of the compressor is typically a job for a pro. Refrigerant issues: Low refrigerant from leaks or improper charging can cause reduced cooling efficiency and increased compressor workload. Leak sealing and proper recharge require a licensed technician. Overheating and trapped debris: Dirty coils, restricted airflow, or a bent condenser fin can cause the compressor to work harder, raising temperatures and accelerating wear. Finally, electrical supply problems: Incorrect voltage, poor grounding, or damaged wires can cause erratic operation and component damage.
Step-by-step overview: practical inspection and testing (conceptual)
Note: This block provides a high-level overview; follow the formal step-by-step guide in the dedicated STEP-BY-STEP section for actionable actions. Start with safety, then perform non-invasive diagnostic checks: verify airflow, listen for abnormal sounds, and inspect wiring for signs of wear. With the power off, test the electrical input to the compressor and verify that the contactor and capacitors appear intact. If you detect leaks, use a leak detector and arrange for professional handling of refrigerant. If you confirm a faulty capacitor, you can replace it after safely discharging energy. For motor windings or mechanical seizure, professional replacement may be the only viable option. Document all findings, then calculate a repair vs replacement decision based on age, warranty, and total expected cost.
Repair options: DIY fixes vs professional service
DIY fixes can cover non-intrusive repairs such as capacitor replacement, cleaning a dirty condenser, and tightening electrical connections. Capacitor replacement is feasible for many homeowners with basic electrical knowledge; consult the unit’s nameplate to match capacitance and voltage. More complex tasks—replacing a compressor, recovering refrigerant, or resolving internal motor damage—require licensed HVAC technicians. When choosing to DIY, ensure you have the right safety gear, follow lockout/tagout, and avoid opening pressurized lines. If the unit is under warranty, check whether DIY work would void coverage. For most homeowners, a professional inspection is recommended if there is any sign of refrigerant leaks, unusual noises inside the compressor, or persistent failure after simple fixes. A pro can verify system refrigerant charges, test for foundation issues in the outdoor unit, and perform leak checks with certified equipment.
Preventive maintenance to extend compressor life
Preventive maintenance helps delay compressor failures and maintain energy efficiency. Schedule seasonal checks: clean filters, clear debris from the outdoor unit, and ensure proper airflow across the condenser. Keep the area around the unit free of vegetation and snow buildup. Inspect electrical connections and the contactor for signs of wear every 6–12 months, and replace worn parts before they fail. Maintain the refrigerant charge within manufacturer specifications; leaks should be repaired promptly by a licensed tech. Lubricate moving parts where applicable and ensure the thermostat operates correctly. Use an affordable maintenance plan to catch issues before they escalate, and record service dates for reference. This ongoing care reduces unexpected outages and keeps your system performing at peak efficiency.
What to expect in repair costs and timelines
Costs for AC compressor repairs vary widely based on the extent of the problem, parts availability, and labor rates in your region. A simple fix such as capacitor replacement may be relatively inexpensive, while a full compressor replacement combined with refrigerant handling can drive up the bill. In general, homeowners should budget for diagnostic fees, parts, and labor. The total cost is influenced by whether the system is under warranty, the age of the equipment, and the accessibility of the unit. It is important to obtain a written estimate and to compare options with a licensed technician. Based on Home Repair Guide analysis, routine maintenance and early detection can dramatically reduce the risk of expensive breakdowns and unexpected downtime, helping you plan repairs with less stress. When deciding between repair and replacement, weigh the cost against the model’s remaining lifespan, energy efficiency, and warranty coverage.
Tools & Materials
- Multimeter (digital or auto-ranging)(to test voltages, resistance, and capacitor health)
- Insulated screwdriver set(for electrical components without risk)
- Socket set / nut drivers(for disconnecting fasteners and mounting hardware)
- HVAC manifold gauge set(to verify refrigerant pressures (low/high))
- Replacement capacitors (same microfarad rating)(box-fresh; match voltage and capacitance)
- Electrical tape, wire labels(keep connections organized)
- Safety gear (gloves, goggles, long sleeves)(protect against shocks and refrigerant exposure)
- Leak detector spray / electronic leak detector(help identify refrigerant leaks)
- Thermometer or infrared temp gun(monitor refrigerant temperatures during tests)
Steps
Estimated time: 2-4 hours
- 1
Power down and verify safety
Shut off power at the disconnect and, if possible, at the indoor control board. Use a non-contact tester to confirm no voltage on the outdoor unit. This step prevents shocks and short circuits when you begin inspection.
Tip: Always lockout the circuit and let the system cool before touching components. - 2
Access, inspect, and document
Open the service panels and inspect wires, connections, and the condenser. Take clear photos and label wires before disconnecting anything. Look for obvious signs of wear, corrosion, or oil residue around the compressor.
Tip: Document model numbers and component ratings for accurate replacements. - 3
Check electrical components
Test the contactor for sticking or pitting. Measure voltage at the compressor terminals and check the start and run capacitors with the proper tester. Replace a failing capacitor with the same capacitance and voltage rating.
Tip: Discharge energy from capacitors safely before handling. - 4
Evaluate refrigerant pressure (if trained)
If you’re trained and authorized, connect the manifold gauge and compare pressures against manufacturer specs. Look for signs of undercharge or overcharge and check for leaks around line-sets and seals.
Tip: Never vent refrigerant; follow local regulations and use certified recovery equipment. - 5
Assess compressor operation
With power restored, observe the compressor operation: does it start, run smoothly, and maintain pressure? Listen for abnormal noises that indicate mechanical wear or seizing.
Tip: If you hear grinding, power down immediately and recheck connections. - 6
Decide on repair vs replacement
Weigh the age of the system, repair costs, and probability of recurring failures. If major components are failing or the unit is near end of life, replacement may be more cost-effective in the long run.
Tip: Ask for a written comparison of repair vs replacement options. - 7
Complete the repair or schedule pro service
If you’re replacing a capacitor or tightening connections, reassemble carefully and test again. For compressor replacement or refrigerant handling, arrange professional service and schedule downtime.
Tip: Keep a service log with dates and parts for future maintenance. - 8
Document results and plan next steps
Record test results, temperatures, and any warranty considerations. Set a maintenance reminder and schedule a follow-up check to ensure the system remains healthy.
Tip: Regular checks reduce the risk of unexpected outages.
FAQ
What are the first signs my AC compressor is failing?
Common signs include warm air, unusual noises, reduced cooling, and breakers tripping. Document symptoms and check simple electrical connections before calling a pro.
Watch for warm air, loud noises, reduced cooling, or tripped breakers—the compressor may be failing.
Can I repair an AC compressor myself?
Some fixes, like capacitor replacement, are feasible for DIYers with basic electrical knowledge. Complex issues, especially those involving refrigerant or internal motor damage, should be handled by a licensed technician.
DIY fixes exist for simple parts, but complex compressor problems usually need a pro.
Do I need to recover refrigerant before starting work?
Yes. If you must open the system or neutralize pressure, refrigerant recovery should be performed by a certified technician following local codes. Do not vent refrigerant to the atmosphere.
Yes—refrigerant must be recovered by a pro; never vent it yourself.
How long does a typical AC compressor repair take?
Time varies by damage and parts availability. Simple capacitor replacements may take 1–2 hours; full compressor replacement with refrigerant handling can require a full day.
It varies, from 1–2 hours for simple fixes to a full day for major repairs.
When should you replace rather than repair the compressor?
If failures are persistent or the repair cost approaches or exceeds the unit’s remaining lifespan, replacement is often more economical in the long run.
If failures keep happening or repairs cost as much as a new unit, replace.
Are there safety concerns I should be aware of?
Yes. Electrical shocks, refrigerant exposure, and high-pressure lines pose risks. Follow safety steps, and hire a pro if you’re unsure.
There are electrical and chemical hazards—be cautious and seek professional help if unsure.
Watch Video
Key Takeaways
- Identify whether the issue is electrical or refrigerant-related
- Capacitors and relays are common failure points and often DIY-friendly
- Leaning on a pro is wise for refrigerant handling and compressor replacement
- Preventive maintenance dramatically reduces sudden failures