AC Unit Repair: A Practical Homeowner's Guide
Learn how to diagnose and safely repair common residential AC issues with practical steps, tool lists, and safety guidance. Based on Home Repair Guide Analysis, 2026, this guide helps homeowners decide when to DIY and when to hire a pro.

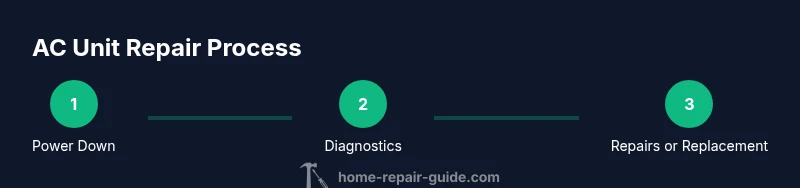
AC unit repair involves diagnosing common cooling problems and performing safe, practical fixes that homeowners can complete. This guide shows you how to shut down power, identify symptoms, and decide whether to DIY or hire a pro. According to Home Repair Guide, regular maintenance dramatically reduces breakdowns and extends system life.
What is AC unit repair?
AC unit repair is the process of diagnosing and fixing problems that prevent an air conditioning system from cooling effectively. It covers electrical checks, airflow improvements, refrigerant considerations (refrigerant work is for licensed techs), and component replacements such as capacitors, contactors, fans, and filters. In a typical home, the most common repairs involve restoring proper airflow, fixing thermostat communication, and addressing dirty coils or clogged condensate drains. Home Repair Guide emphasizes that understanding ac unit repair helps homeowners plan a safe workflow. According to Home Repair Guide, a well-timed maintenance habit reduces wear and extends the life of your system, improving efficiency and reliability. By understanding the core parts of an AC system—thermostat, blower, evaporator coil, condenser, and refrigerant circuit—you can approach repairs with confidence while respecting safety boundaries. This section sets the stage for practical, real-world steps you can take to keep an AC unit repair on track rather than avoiding the task.
Safety first: power, refrigerant, and risks
Safety is non negotiable when working on any AC system. Always shut off power at the main breaker, lock out the circuit if possible, and verify zero voltage with a non-contact tester before touching wires. Refrigerant work requires proper licensing; never attempt to vent or recharge refrigerant yourself. Personal protective equipment such as safety glasses, gloves, and long sleeves should be worn. Work in a well-ventilated area, and keep children and pets away from the work zone. Following these safety steps significantly lowers the risk of electric shock, burns, or refrigerant exposure, and aligns with the guidance from Home Repair Guide. After powering down, unplug any connected devices and wait a few minutes for stored energy to dissipate before beginning inspections.
Diagnosing common symptoms
Common AC symptoms can point to different root causes. If cooling is weak, check air filters and coils for dirt buildup that restricts airflow. If the unit cycles on and off quickly, thermostat calibration or sensor issues may be the culprit. Listen for odd noises, such as grinding or squealing, which can indicate a failing blower motor or loose components. Ice on the refrigerant lines suggests a refrigerant flow issue or fan problems. Home Repair Guide Analysis, 2026 indicates that most residential failures stem from airflow and maintenance neglect, not a dramatic compressor failure. Use symptom checklists to narrow down likely causes before deeper inspection or professional help.
When to DIY vs call a pro
Simple tasks like replacing a dirty air filter, cleaning accessible coils, or reseating a loose electrical connector are suitable for DIYers. More complex issues—refrigerant leaks, compressor failures, or dangerous electrical problems—require a licensed HVAC technician. If you notice refrigerant smells, hissing sounds, or frost on lines, stop work and contact a pro. This guidance, supported by Home Repair Guide, helps homeowners make safer, smarter decisions without compromising system reliability or warranty coverage.
Basic troubleshooting steps you can perform
Starting with low-risk checks can save time and money. Begin by turning off power, inspecting the air filter, and cleaning visible coils. Check thermostat settings and replace batteries if needed. Clear the condensate drain line to prevent water damage and moisture-related issues. Inspect outdoor unit for debris, unobstructed airflow, and a clean fan blade. If these steps do not restore performance, consult a professional for refrigerant and electrical diagnostics. Remember, many fixes are straightforward, but refrigerant handling and high-voltage components require expertise and safety precautions. This section lays the groundwork for responsible DIY care.
Maintenance and preventative care
Preventative maintenance is the best defense against costly AC repairs. Schedule a seasonal check to inspect electrical connections, test capacitors and relays, and confirm proper refrigerant charge with a licensed technician. Regularly replace filters every 1–3 months, depending on usage and indoor air quality. Clean the evaporator and condenser coils to improve heat exchange efficiency and airflow. Seal ductwork to minimize energy loss and maintain consistent cooling throughout the living space. By adopting a maintenance routine, homeowners reduce the likelihood of unexpected breakdowns and extend system life.
Energy efficiency and cost-saving tips
Efficient operation translates to lower energy bills. Keep outdoor units clear of vegetation, clean coil surfaces, and ensure proper refrigerant management by a licensed pro. Regularly replacing filters and using a programmable thermostat helps maintain stable indoor temperatures and reduces compressor workload. Proper sizing and seasonal maintenance also prevent overcooling or undercooling, which wastes energy. Home Repair Guide emphasizes that small, consistent maintenance actions yield meaningful long-term savings and comfort improvements.
What to expect during a professional repair
A licensed technician typically begins with a thorough diagnostic, including electrical checks and refrigerant system evaluation. They will test for leaks, verify system charge, inspect safety components, and perform necessary replacements with factory-approved parts. Expect a detailed explanation of findings, a quoted scope of work, and any warranty implications. If refrigerant work is required, the tech will handle it in compliance with environmental and safety regulations. This section provides a realistic preview so homeowners know what steps follow the initial DIY checks.
Common mistakes and how to avoid them
Avoid assuming DIY fixes are always inexpensive or quick. Skipping the safety steps, ignoring refrigerant regulations, or mislabeling wires can create hazards and damage. Never operate a unit with a known refrigerant leak or exposed wiring; these situations require professional attention. Keep comprehensive notes of all maintenance actions and dates to track wear patterns and plan future service. By recognizing frequent missteps, homeowners can approach ac unit repair confidently and safely, while preserving equipment longevity and safety.
Tools & Materials
- Screwdriver set (Phillips and flat)(Assorted sizes for access panels and electrical connections)
- Nut driver(For panel screws and terminal blocks)
- Volt-ohm meter / multimeter(Test voltage and resistance; ensure safe measurements)
- Safety glasses(Protect eyes during inspections and adjustments)
- Insulated gloves(Minimal risk when near energized components)
- Shop rag or microfiber cloth(Clean surfaces and wipe drains/filters)
- Non-contact voltage tester(Quickly verify de-energized circuits before touching wires)
- Flashlight or headlamp(Illuminates dark cabinets and panels)
Steps
Estimated time: 60-120 minutes
- 1
Power down and verify safety
Shut off power at the main breaker and the AC disconnect if present. Use a non-contact tester to confirm there is no voltage present before touching any components. This first step prevents electric shock and is the foundation of a safe repair.
Tip: Verify zero voltage twice—once at the breaker and again at the service panel before starting. - 2
Check thermostat settings and battery
Ensure the thermostat is in cooling mode with a target temperature lower than the current room temperature. If the thermostat uses batteries, replace them to rule out a faulty signal.
Tip: Calibrate the thermostat if it has a test mode or advanced options. - 3
Inspect air filter and coils
Remove and inspect the air filter; replace if dirty. Check the evaporator coil for visible dirt or frost and clean carefully if accessible, taking care not to bend delicate fins.
Tip: A clogged filter reduces airflow and can trigger ice formation on coils. - 4
Inspect outdoor condenser and fan
Clear debris from the condenser unit, ensure the fan spins freely, and remove any vegetation that blocks airflow. Inspect condenser fins and straighten bent fins with a plastic fin comb if needed.
Tip: Outdoor airflow is essential; even small obstructions can reduce cooling efficiency. - 5
Check electrical connections and components
Inspect accessible wiring for loose connections, burn marks, or corrosion. Use the multimeter to test fuses, relays, and contactors for proper operation.
Tip: Loose connections are a common cause of random cycling or failure to start. - 6
Evaluate refrigerant-related issues
If there are signs of a leak, frost, or low cooling despite clean coils and proper charge, do not attempt to recharge refrigerant yourself. Call a licensed HVAC technician.
Tip: Handling refrigerant without credentials is illegal and hazardous. - 7
Test run and monitor system
Reconnect power, set the thermostat, and observe compressor cycling, airflow, and overall temperature performance for 10–15 minutes. Note any abnormal noises or shutdowns for further diagnosis.
Tip: Document observed behaviors to share with a technician if needed.
FAQ
Can I fix my AC unit by myself?
Yes for simple tasks like filter changes and coil cleaning. More complex issues, especially refrigerant handling or electrical problems, require a licensed technician. Always prioritize safety and warranty terms.
You can handle simple maintenance, but leave refrigerant and risky electrical work to pros.
What are the signs I need a professional?
Signs include refrigerant odor or hissing, ice or frost on lines, buzzing noises, or continuous operation without cooling. If unsure, consult a licensed HVAC technician.
If you notice leaks, frost, or unusual noises, call a pro.
What basic maintenance should I perform monthly?
Replace filters, inspect coils and ducts for dirt, clear debris around the outdoor unit, and verify thermostat accuracy. Routine checks prevent many common problems.
Do simple monthly checks like changing filters and keeping the outdoor unit clean.
Is there a safe DIY I can do to improve efficiency?
Yes. Regular filter changes, proper thermostat programming, and keeping coils clean can improve efficiency. For major efficiency gains, consider a professional tune-up.
Keep filters clean and set a smart thermostat for better efficiency.
How much does professional repair usually cost?
Costs vary with the issue, parts, and regional rates. Expect a diagnostic charge plus parts, but avoid guessing—get a written estimate before work.
Prices vary; ask for a written estimate before any work.
Watch Video
Key Takeaways
- Power down first to ensure safety
- Differentiate DIY tasks from problems needing a pro
- Regular maintenance reduces unexpected failures
- Keep a maintenance log for trend tracking
- Know when to call a professional for refrigerant/electrical issues