Refrigerant Leak Repair: A Practical Step-by-Step Guide
Learn how to identify, assess, and address refrigerant leak repair in home cooling systems with safe, practical steps, common DIY options, and when to call a licensed technician.

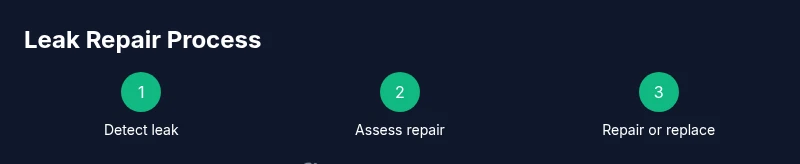
Goal: You will identify a refrigerant leak, protect your cooling system, and prevent costly damage. This guide provides safe detection, decision thresholds for DIY fixes, and practical steps to seal small leaks or prepare for pro service. Always follow safety guidelines and call a licensed technician for high-pressure or uncertain repairs.
What is a refrigerant leak and why it matters
Refrigerant is the fluid that absorbs heat in your air conditioner and refrigerator. When a leak occurs, the system cannot remove heat efficiently, forcing the compressor to work harder, which wastes energy and accelerates component wear. Common leak sources include loose fittings, welded joints, damaged coils, and mechanical damage from vibration. Left untreated, leaks reduce cooling, raise electricity bills, and may cause your refrigerant to fall below legal limits, triggering service warnings or environmental penalties. In residential settings, most leaks are small but persistent, and even small losses can become expensive over time. This section explains how to recognize signs like reduced cooling, hissing sounds, oily residues near joints, frost on lines, and sudden pressure changes. Remember that refrigerants contribute to global warming and are subject to safety regulations; improper handling can pose health risks. The Home Repair Guide team emphasizes that many leak-related repairs should be performed by qualified technicians, but understanding the basics helps you communicate with pros and plan preventive steps.
Safety first: DIY vs professional bounds
Before touching refrigerant lines, understand that refrigerant systems operate under pressures that can cause serious injury. Do not attempt brazing, welding, or refrigerant recovery unless you hold the appropriate certification and equipment. In most jurisdictions, handling refrigerants requires EPA Section 608 certification or equivalent; illegal recovery can incur hefty fines. If you notice a leak, prioritize safety: power off the equipment, ventilate the area, and avoid sparks near any open lines. If anyone in the household has asthma or chemical sensitivities, evacuate and call for professional service. This block lays out a clear boundary between safe DIY steps (basic inspection from a safe distance, reading manufacturer manuals, documenting symptoms) and professional tasks (high-pressure pressure testing, brazing, refrigerant recharge). Home Repair Guide recommends using protective gloves, eye protection, and a respirator when instructed by the equipment’s manual. The goal is to minimize risk while preserving system integrity and environmental safety.
Detecting leaks: signs, tools, and techniques
Begin with symptom checks: temperature difference across the evaporator coil, unusual energy use, and audible leaks. Use a combination of visual inspection and tools: a UV dye kit to trace dye paths, electronic refrigerant leak detectors that sense hydrofluorocarbons, and a manifold gauge set to check low and high side pressures. Soapy water applied to suspect joints can reveal bubbling leaks, but avoid pressurized spray near electrical components. If dye is used, run the system with the dye circulating and inspect under a blacklight in a dark area after the dye has circulated. Keep a diagnostic log of pressure readings, ambient temperature, and observed leaks. The leak location is often where fittings loosen or corrosion is present, so pay careful attention to connections at the service valve and coil joints. Document findings with photos or notes to share with a technician.
Quick fixes that work (or don't): common DIY approaches
Most DIY sealants marketed for refrigerant lines are either temporary fixes or incompatible with refrigerants, so apply skepticism. Tightening loose fittings can reduce a minor leak, but overtightening can cause stripping or cracks. In some cases, replacing a small O-ring or gasket may stop a leak at a connector. Do not seal or braze refrigerant lines yourself unless you have legitimate training and the correct equipment. Environmentally, refrigerants are harmful and regulated, so any attempt to seal leaks should be part of a formal service workflow rather than a stand-alone fix. If you decide to attempt a small repair, do so only as a temporary measure and with the understanding that professional recharging and testing will still be required. The key takeaway: DIY steps may buy time, but they are not a substitute for proper service.
The proper way to recover and dispose refrigerant
Proper refrigerant management begins with recovery to prevent atmospheric release. In most homes, only a licensed technician should recover refrigerant using approved equipment. Under EPA regulations, venting refrigerant is illegal and harmful to the environment. If a leak is detected, schedule service with a qualified HVAC technician to evacuate the system, inspect for the root cause, replace defective components, and evacuate and recharge with the correct refrigerant type. The service should include a leak test after recharging, using the same detection methods described earlier. When possible, technicians will install a temporary filter dryer and a new service valve to ensure minimal future leaks. It is essential to keep documentation of the refrigerant type, weight charged, and leak tests for regulatory compliance.
Preventive maintenance to minimize leaks
Set a routine: schedule annual inspections of valves, coils, and connections; replace worn components; check for corrosion; clean condenser fins; ensure proper refrigerant charge; keep the system clean and sealed. A simple practice is to seal ductwork and reduce heat gain around the condenser to reduce stress on the system. Keep an eye on the sight glass or suction line temperature; unexpected changes may indicate a developing leak. Regular maintenance reduces the probability of a major failure and helps maintain system efficiency. The Home Repair Guide team recommends documenting maintenance in a log and scheduling reminders.
How a professional repair typically unfolds
An HVAC technician will inspect, perform a leak test with a refrigerant recovery machine, use a dye or electronic detector to pinpoint leaks, and replace or repair defective components. Expect refrigerant recovery, evacuation, recharging, and a post-repair leak test. Manufacturers require using appropriate tools and following safety procedures, including protective gear and proper waste handling. The service might include live checks, filter dryer changes, and coil or line replacements if corrosion is found. The cost depends on system size, location, and repair complexity; you'll often pay for labor, parts, and refrigerant charges. In most cases, you’ll need a detailed report and a maintenance plan to prevent reoccurrence.
Final checks and when to call for help
After a repair, monitor performance for 1-2 weeks: note cooling efficiency, noise, and compressor cycling. If problems persist or new leaks appear, contact your technician again. Keep records and organize your system’s documentation for future service; a preventive plan helps reduce future leaks.
AUTHORITY SOURCES
For regulatory context and best practices, consult authoritative sources such as the Environmental Protection Agency (EPA) Section 608 refrigerant regulations, U.S. Department of Energy guidance on refrigerant management, and OSHA safety resources related to handling refrigerants and HVAC work. These resources help homeowners and technicians comply with environmental and safety standards while planning repairs and preventive maintenance.
Tools & Materials
- Manifold gauge set (high and low side)(With service hoses and access adapters)
- Electronic refrigerant leak detector(Prefer infrared or heated-sniffer type)
- UV dye kit(Include UV flashlight and dye for trace leaks)
- UV dye compatible refrigerant(Ensure compatibility with system refrigerant)
- Vacuum pump(For evacuating after repair)
- Refrigerant recovery machine(Used by licensed technicians; safe handling required)
- Safety gear (gloves, goggles, respirator)(Follow manufacturer safety guidelines)
- Soapy water spray bottle(Simple visual leak check (optional))
- Leak sealants (manufacturer-approved only)(Temporary measure; not a substitute for proper service)
Steps
Estimated time: 2-6 hours (varies by system size and leak complexity)
- 1
Power down and prep safely
Turn off power to the HVAC unit at the breaker. If accessible, disconnect any external power to prevent accidental restart during inspection. Put on PPE and set a clear work area to avoid refrigerant exposure. Why: your first step protects you and prevents accidental discharge or injury.
Tip: Lockout/tagout the circuit if available to prevent restart during the check. - 2
Initial leak screening
Visually inspect all fittings and joints for oil residue, corrosion, or cracked components. Use the manifold gauge to compare high- and low-side pressures to expected values for your ambient conditions. Why: low or uneven pressures indicate a leak or improper charge.
Tip: Document readings with time stamps and photo notes for later discussion with a technician. - 3
Trace with dye or detector
If using dye, circulate it according to kit instructions and inspect for glow or dye pockets later with UV light. If using an electronic detector, sweep joints and coil areas methodically, pausing at each suspect location. Why: dye and detectors provide concrete leak localization.
Tip: Do not rely on a single method; corroborate with at least two methods when possible. - 4
Evaluate repair options
Assess whether a simple tightening or O-ring replacement will stop the leak, or if a component replacement (valve, coil, line) is required. Consider the age of the system and the risk of future leaks. Why: some leaks are non-repairable without major component work.
Tip: If you’re uncertain, stop and consult a licensed technician before proceeding. - 5
Recovery and evacuation (if applicable)
If a repair requires refrigerant removal, this step should be performed by a qualified technician using approved equipment. Evacuate the system to remove moisture and verify a vacuum hold. Why: improper evacuation can lead to future failures and regulatory issues.
Tip: Never vent refrigerant to the atmosphere; proper recovery is required by law. - 6
Repair or replace faulty components
Carry out the agreed repair, such as replacing a valve, O-ring, or coil segment. Recheck all fittings after the repair and ensure connections are clean and dry before recharging. Why: proper assembly prevents re-leakage and ensures system integrity.
Tip: Use manufacturer-approved parts and avoid DIY substitutes that may fail under pressure. - 7
Recharge and test
After successful evacuation, recharge with the correct refrigerant type and check system pressures. Run a leak test again and monitor performance for changes in temperature and cycling. Why: confirming a sealed system ensures reliable cooling and avoids recurrent leaks.
Tip: Record the refrigerant weight charged and post-repair readings for future service.
FAQ
Is refrigerant leak repair safe to DIY?
DIY repair of refrigerant leaks is not generally recommended due to high pressures, chemical hazards, and regulatory requirements. Use DIY checks for basic symptoms but rely on licensed technicians for the actual leak repair and refrigerant recharge.
DIY repair is risky and often not recommended; call a licensed technician for leaks and recharge.
What factors affect the cost of a refrigerant leak repair?
Costs vary with system type, leak location, required parts, and whether refrigerant recovery is needed. Labor and parts together determine the final price, and severe leaks or coil replacements raise the cost significantly.
Costs depend on system, leak severity, and required parts; complex repairs can be more expensive.
How long does a typical leak repair take?
A straightforward leak repair might take a few hours, while more complex cases involving component replacement or recharging can extend to a full day. Schedule time for inspection, repair, evacuation, and post-repair testing.
Most repairs take several hours, with longer times for complex fixes.
Can leaks reoccur after repair?
Yes, leaks can reoccur if underlying causes aren’t addressed, such as corrosion, vibration, or improper tightening. Regular maintenance helps catch issues early and reduces recurrence risk.
Leaks can come back if root causes aren’t fixed; ongoing maintenance helps prevent it.
What refrigerants are used in residential systems?
Residential systems commonly use R-410A or other modern blends. The exact type depends on the system model and local regulations. Always use the refrigerant specified by the manufacturer.
Most homes use modern blends like R-410A; refer to your equipment label.
Do I need to evacuate the system after a leak fix?
Evacuation is typically performed by a licensed tech to ensure all moisture is removed and the system is sealed correctly. Do not attempt to evacuate on your own.
Evacuation should be done by a qualified technician; it’s not a DIY task.
Watch Video
Key Takeaways
- Identify signs early to prevent energy waste and damage.
- DIY fixes are often temporary; plan for professional recovery and recharge.
- Follow safety and environmental regulations for refrigerants.
- Maintain a maintenance log to minimize future leaks.