Heating and Cooling Repair: A Homeowner's Guide
Learn how to diagnose, plan, and safely repair heating and cooling systems with clear, step-by-step guidance for homeowners and renters from Home Repair Guide.

With basic diagnostic steps and safety precautions, you can identify and fix many common heating and cooling issues at home. Start by powering down and checking the thermostat, air filters, and outdoor unit, then test system response. If the unit still misbehaves or involves gas, electricity, or refrigerant, contact a licensed HVAC professional. Document symptoms, noises, smells, and comfort gaps to guide the repair or service visit.
Understanding Heating and Cooling Systems
Heating and cooling in most homes rely on an arrangement of components that work together to maintain comfortable indoor temperatures. The furnace or heat pump provides heating, while the air conditioner handles cooling. A central air system circulates air through ductwork, delivering consistent temperatures to each room. Regular maintenance and awareness of how these parts interact helps homeowners prevent outages and extend equipment life. According to Home Repair Guide, the most common HVAC issues stem from airflow restrictions, thermostat misconfigurations, and dirty filters. Understanding the basics—thermostats, heat sources, ducts, and vents—gives you a solid foundation for safe, proactive repairs and smarter maintenance decisions.
A typical system includes a few core subsystems: the thermostat (controls when the system turns on), the distribution network (ductwork and vents), and the mechanical units (furnace/air handler and outdoor condenser/coil). Heat pumps can provide both heating and cooling, while furnaces primarily generate warmth. Recognizing where each component lives in your home helps you identify what to check first and what to leave to a pro. Home energy notes suggest keeping thermostats and indoor air pathways clean, and ensuring outdoor units have ample clearance for airflow.
Key terms to know: thermostat, air filter, blower, condenser, evaporator coil, ductwork, refrigerant lines, plenum. If you’re unsure about a term, take a quick photo and note the component name as you learn.
Diagnosing Common Problems and Symptoms
Diagnosing heating and cooling problems begins with a clear checklist of symptoms. Typical issues include no heat in winter, no cooling in summer, uneven comfort between rooms, strange noises, and odors when the system runs. Start by observing the system for a few cycles to see when problems first appear. A few frequent culprits include dirty air filters choking airflow, a malfunctioning thermostat that misreads room temperature, and restricted ductwork that creates cold spots or hot zones. A dramatic drop in airflow usually points to dirty filters or a blocked return vent, while a nonresponsive thermostat commonly signals wiring problems or incorrect settings. When the outdoor unit is blocked by debris or has a refrigerant leak, cooling efficiency drops noticeably. Home Repair Guide analysis shows that most breakdowns trace back to airflow issues and thermostat problems rather than large, hard-to-fix failures.
Simple tests can help distinguish issues: check the thermostat schedule, replace or clean air filters, and verify that vents are open and unobstructed. Listen for rattling or grinding that may indicate a loose component, and check for ice on refrigerant lines, which signals a potential refrigerant or airflow problem. If you can safely observe these signs without disassembling major parts, you’ll save time and often prevent further damage. When in doubt, document symptoms with photos and notes to aid a professional diagnosis later.
Note: If you smell gas, hear a hissing leak, or notice burning or electrical smells, immediately turn off power to the system and call emergency services or your gas utility. These can indicate serious safety risks and require professional intervention.
Safety and Preparation for DIY Tasks
Safety should be your first priority when tackling heating and cooling repairs. Before touching electrical components or refrigerant lines, shut off power at the thermostat and the main service disconnect for the outdoor unit. If your system uses natural gas, ensure all gas valves are closed before inspection. Wearing protective gear such as safety glasses and gloves helps protect against sharp edges, and a properly rated flashlight makes it easier to inspect in dim spaces. Keep children and pets away while you work, and never bypass safety switches to complete a repair. If you must work in tight spaces or high locations, use a sturdy ladder and have a helper nearby. When dealing with electrical components, never work on live circuits; use a multimeter to verify there is no voltage before touching wires.
Clear your work area of clutter and store any screws or small parts in labeled containers. If you’re unsure about any step, stop and consult a professional. Regular maintenance is a safer alternative to reactive repairs, and it reduces the risk of accidents or incorrect wiring during DIY tasks.
A Practical Troubleshooting Framework
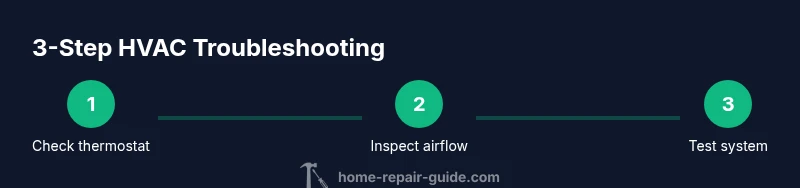
Adopt a consistent troubleshooting workflow to reduce guesswork and avoid creating new problems. Start with the simplest potential causes, then progressively test more complex components. Step 1: Verify thermostat settings and power. Step 2: Inspect and replace air filters; ensure air can move freely through vents. Step 3: Check for unusual noises or odors that indicate mechanical wear or electrical issues. Step 4: Inspect the outdoor condenser for debris, and ensure surrounding clearance for airflow. Step 5: If heat or cooling still fails, test electrical connections and voltage with a multimeter, and review wiring diagrams if available. Step 6: Assess whether the issue is refrigerant-related or a major component failure—if so, plan for professional service.
Document each finding with photos and notes to share with a technician if you need to call for help. Keeping a repair log improves future diagnostics and helps you schedule proactive maintenance.
Tip: Take a before-and-after photo of any component you adjust so you can revert if needed. A systematic approach reduces trial-and-error time and improves outcomes.
Maintenance for Longevity and Efficiency
Maintenance directly influences system longevity and energy efficiency. Replace disposable air filters every 1-3 months depending on usage and indoor air quality. Schedule regular coil cleaning to reduce energy consumption and improve heat exchange. Ensure outdoor units have at least 2 feet of clearance on all sides for adequate airflow, and trim surrounding vegetation as needed. Thermostats should be calibrated every year or two, and batteries replaced when needed. Consider upgrading to a programmable or smart thermostat to optimize energy usage when you’re away or asleep. If you own an older heat pump or furnace, schedule seasonal inspections to catch wear before it becomes a fault. A small investment in routine maintenance can prevent expensive breakdowns and keep your system running smoothly.
From a reliability perspective, many homeowners find value in a simple maintenance checklist: replace filters, inspect ductwork for obvious leaks, clean condensate drains, and verify electrical connections are tight. Routine maintenance also helps you catch signs of aging components before they fail, which can save time and money during peak seasons.
Warning: Do not attempt to repair refrigerant leaks or high-voltage components yourself. Refrigerant handling and certain electrical tasks require licensed professionals and proper safety certifications.
Authority Sources
For further reading and standards, consult these external resources:
- U.S. Department of Energy: https://www.energy.gov/
- Energy Star – Air Conditioning: https://www.energystar.gov/products/heating_cooling/air_conditioners
- EPA Indoor Air Quality Guide: https://www.epa.gov/iaq/indoor-air-quality-guide
These sources provide safety guidelines, efficiency standards, and best practices that complement the home-based troubleshooting strategies above. According to Home Repair Guide, referencing federal and institutional guidance helps homeowners make informed decisions and avoid unnecessary risks when repairing HVAC systems.
Next Steps and Quick-Start Checklist
If you’ve worked through the steps above and the system still isn’t performing as expected, prepare for a professional evaluation. Create a summary of symptoms, a list of actions you’ve taken, photos of wiring and components, and the model numbers of your equipment. This information speeds up diagnostics and can reduce diagnostic costs. For many homeowners, preventive maintenance and timely minor fixes are enough to extend system life and maintain comfort. Keep your repair log current and review it before seasons of heavy use to anticipate service needs. End-of-season checks can help you prepare for the next heating or cooling cycle and prevent surprises when temperatures shift.
Tools & Materials
- Digital multimeter(For verifying electrical circuits and thermostat wiring)
- Screwdrivers (Phillips and flat-head)(For accessing panels and mounting hardware)
- Non-contact voltage tester(Safer confirmation of live wires)
- Flashlight(Illuminates dim spaces and ductwork)
- Replacement air filters(Keep on hand for immediate airflow improvement)
- Thermostat wiring diagram(Helpful if diagnosing wiring or installing a new thermostat)
- Safety gear (glasses, gloves)(Protect eyes and hands during inspections)
Steps
Estimated time: 60-90 minutes
- 1
Power down and verify safety
Turn off power at the thermostat and the main service disconnect for the outdoor unit. Use a multimeter to ensure there is no voltage before touching wiring. This prevents electrical shock and other injuries.
Tip: Double-check that power is actually off before handling any wiring. - 2
Check thermostat settings and wiring
Ensure the thermostat is set to the correct mode (heat or cool) and that the temperature sensor isn’t misreading. If wiring looks loose or corroded, take a photo before tightening connections.
Tip: Label wires if you disconnect anything to simplify reassembly. - 3
Inspect and replace air filters
A dirty air filter reduces airflow and can cause system freezing or overheating. Replace with the correct MERV-rated filter and note the date for your maintenance log.
Tip: If you have pets or heavy dust, consider more frequent changes. - 4
Check outdoor condenser and indoor coil
Clear debris from the condenser and ensure 2 feet of clearance around the unit. Inspect the evaporator coil for frost or ice buildup and thaw if needed, using a safe heat source or professional service if unsure.
Tip: Keep plants at a safe distance to avoid airflow restriction. - 5
Test system response and observe
Restore power and run a short cycle to observe waiting times, cycling behavior, and airflow. Note any abnormal noises, vibration, or odors that persist after these checks.
Tip: Record observations to share with a technician if you need professional help. - 6
Decide on DIY or pro help
Based on the observations, determine if the issue is safe to continue addressing or if it involves gas, refrigerant, or high-voltage components that require an HVAC technician.
Tip: Prioritize safety—when in doubt, call a pro.
FAQ
What are the most common causes of no heat in winter?
Common causes include a misconfigured thermostat, a dirty air filter, a faulty blower, or issues with the gas valve or ignition system. Start by checking the thermostat settings and airflow before inspecting the ignition and burner if you’re comfortable.
Most no-heat issues start with thermostat settings or airflow. If those aren’t the problem, check the ignition or gas valve next, and call a pro if you’re unsure.
Can I repair a cooling system myself?
Some basic maintenance tasks, like replacing filters and cleaning coils, can be done safely. More complex issues—refrigerant leaks, electrical faults, or compressor problems—should be handled by a licensed technician.
You can do simple upkeep, but avoid refrigerant handling or major electrical work if you don’t have training.
How often should I replace air filters?
In general, replace disposable air filters every 1-3 months depending on system usage, indoor air quality, and whether you have pets or dust in the home.
Typically every one to three months, but adjust based on your home conditions.
Is it safe to work around electrical components while the system is on?
No. Never work on energized components. Always shut off power at the thermostat and main disconnect before inspection, and use a non-contact tester to confirm no voltage.
Always turn off power before touching electrical parts and verify no voltage first.
When should I replace rather than repair HVAC equipment?
If repairs exceed a significant percentage of the system’s replacement cost, or if the equipment is old and inefficient, replacement may be more cost-effective and reliable in the long run.
Consider replacement if repairs pile up and efficiency suffers; a newer unit can save energy and reduce maintenance.
Watch Video
Key Takeaways
- Know your HVAC components and how they interact.
- Prioritize safety and documentation during any DIY check.
- Address airflow and thermostat issues first for fastest improvements.
- Use a systematic troubleshooting framework to avoid guesswork.
- Recognize when professional help is needed for gas, refrigerant, or high-voltage tasks.