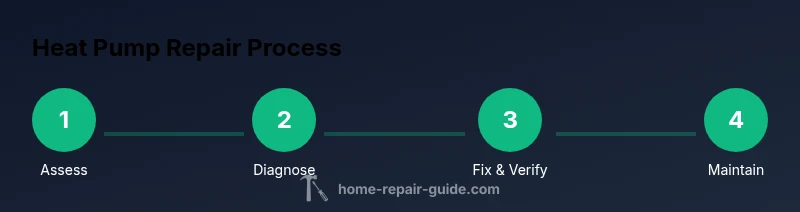
Heat Pump Repair: A Practical Step-by-Step Guide
Comprehensive, safe heat pump repair guidance for homeowners. Learn diagnostics, basic DIY fixes, maintenance, and when to call a pro to keep your system efficient.

This guide helps homeowners perform safe, basic heat pump repair tasks at home, focusing on diagnosing common problems, improving efficiency, and avoiding unnecessary service calls. You’ll learn how to inspect the outdoor unit, clean coils, replace accessible air filters, verify thermostat settings, and determine when to call a licensed technician for refrigerant issues. According to Home Repair Guide, safety comes first.
What is a heat pump and how it works
A heat pump is a versatile home heating and cooling device that moves heat between indoors and outdoors. In heating mode, it extracts heat from outside air (even when it feels cold) and transfers it inside. In cooling mode, the process reverses. Because a heat pump relies on electrical components, control circuitry, and refrigerant passages, a range of issues—from a dirty filter to a faulty defrost sensor—can reduce performance. When heat pump repair is needed, most homeowners start with simple checks and maintenance that restore efficiency without risking safety. This guide emphasizes practical, safe steps for common problems, while clearly delineating tasks that require a licensed HVAC technician. Throughout, you’ll learn to identify symptoms, verify settings, inspect hardware, and decide when professional service is the best option. Home Repair Guide recommends approaching repairs systematically, documenting observations, and never bypassing safety protocols. By understanding the basics of how heat pumps work, you can diagnose issues faster and avoid unnecessary service calls.
Safety first: Key precautions before you start
Working on a heat pump involves electricity, refrigerants, and moving parts. Always cut power to the unit at the main breaker and lock it out if possible. Use a non-contact voltage tester to confirm the circuit is dead before touching wires. Wear safety goggles and gloves; long hair should be tied back; avoid jewelry. Keep children and pets away from the work area. Read the unit’s manual for any model-specific warnings. If you smell refrigerant or suspect a leak, evacuate and call a licensed technician—refrigerants can cause serious health hazards. Dispose of cleaning products and used filters according to local regulations. If you’re unsure about any step, pause and seek guidance. The approach to heat pump repair should prioritize your safety and that of others in the home.
Essential tools and materials for heat pump repair
Before you begin, gather these tools and supplies:
- Safety gear: safety glasses, insulated gloves (required)
- Multimeter or non-contact voltage tester (required)
- Screwdrivers (Phillips and flat-head) and nut drivers (required)
- Adjustable wrench and pliers (required)
- Coil cleaning brush, soft cloth, and mild detergent (required)
- HVAC coil cleaner approved for your system (required)
- Clean bucket and towels for spills (optional)
- Rags and a flashlight (required)
- Thermometer or digital sensor (optional for precise checks)
Having these items on hand keeps the process moving and helps you document issues for future heat pump maintenance.
Diagnosing common heat pump problems
Start by listing the symptoms: no heat or no cooling, short cycling, or unusual noises. Check for basic causes you can safely verify, such as thermostat settings, airflow obstructions, and dirty filters. A mis-set thermostat or a blown fuse can mimic more serious issues; correct these first. If the outdoor unit isn’t dispersing heat, inspect the condenser inlet for debris and verify that the unit has clearance around it. Listen for a grinding, squealing, or buzzing sound that might indicate a failing fan motor or loose components. Check the condensate drain for clogs, because blocked drains can trigger safety shutoffs. In many cases, simple fixes restore operation without the need for a full heat pump repair by professionals.
DIY fixes: air filters, thermostat, and basic cleaning
A clogged air filter reduces airflow, makes the system work harder, and can trigger a defrost cycle that won’t resolve until airflow improves. Replace disposable filters or clean reusable ones according to manufacturer guidance. Verify the thermostat is set correctly (heat vs. cool, fan on, and auto mode). If the indoor blower isn’t circulating air, inspect the blower wheel for obstructions and ensure ductwork is sealed. For outdoor units, remove lightweight debris from the coil surface using a soft brush and light rinse; never use a high-pressure washer on coils. These fixes typically restore efficiency without professional heat pump repair.
Cleaning outdoor condenser coils and improving airflow
Outdoor coils collect dirt and leaves over time, which impairs heat transfer. Gently remove loose debris, then scrub coils with a mild cleaner designed for condensers. Rinse lightly and allow to dry before powering the unit back on. Ensure at least 2 feet of clearance around the unit, and trim nearby shrubs or grass that encroaches on the space. Proper airflow prevents overheating and reduces energy use, keeping heat pump repair needs minimal.
Inspect refrigerant lines and insulation
Refrigerant lines should be insulated and free from obvious damage. Do not attempt to reseal or recharge refrigerant yourself; leaks or improper charging require a licensed HVAC technician. Visually inspect for oily spots or frost near the lines, which can indicate a leak. If you suspect a leak, schedule a professional service promptly to avoid environmental harm and system damage. This step highlights why DIY heat pump repair stops short of refrigerant work.
Electrical checks and safe testing
Some heat pump repairs involve electrical connections. With power off, inspect accessible wiring for signs of wear, loose connections, or scorch marks. Use a multimeter to test for continuity on controls and fuses, but avoid measuring live circuits. If you find damaged wiring, replace it or call a licensed professional. Always follow the unit’s wiring diagram and turn off power before any inspection.
Safe troubleshooting flow to follow before a service call
Create a simple decision tree: confirm power is off, verify thermostat settings, test airflow, and inspect for obvious blockages. If results are inconclusive, note the symptoms, capture photos of wiring, and prepare a service history for the technician. This disciplined approach helps you communicate clearly with a pro and speeds up heat pump repair.
When DIY isn’t enough: refrigerant and major components
Refrigerant handling, compressor work, and major electrical rewiring require a licensed HVAC technician. Attempting these tasks can be dangerous and illegal in many places. If heat pump repair signals point to refrigerant issues, refrigerant leaks, or a failed compressor, don’t delay—call a pro.
Routine maintenance to extend heat pump life
Establish a seasonal maintenance routine that includes filter changes, coil cleaning, and a yearly professional inspection. Keep the outdoor unit free of debris and confirm electrical connections remain tight. A simple calendar reminder helps you stay on top of checks and reduces the chance of unexpected failures.
Energy efficiency tips and long-term care
Small changes, like keeping the thermostat steady and reducing auxiliary heat usage, can improve efficiency. Invest in a programmable or smart thermostat to optimize performance and heat pump repair intervals. Regular maintenance and mindful operation help you stretch performance between service visits.
Tools & Materials
- Safety gear (glasses, gloves)(Protect eyes and hands during inspections)
- Multimeter or non-contact voltage tester(Verify circuits are de-energized)
- Screwdrivers (Phillips and flat-head)(Access electrical components)
- Nut drivers and adjustable wrench(Remove panels and tighten fittings)
- Coil cleaning brush and soft cloth(Gently scrub outdoor coils)
- HVAC coil cleaner(Use manufacturer-approved product)
- Bucket, towels, and rags(Clean spills and dry surfaces)
- Flashlight or headlamp(Improve visibility in tight spaces)
- Thermometer or digital sensor(For precise readings if needed)
Steps
Estimated time: 60-120 minutes
- 1
Prepare safety and workspace
Power down the heat pump at the main breaker and outdoor disconnect. Clear the area of debris and secure ladders if used. If there are multiple breakers, turn off the dedicated heat pump circuit to prevent accidental restart.
Tip: Label wires before disconnecting or removing panels to simplify reassembly. - 2
Verify power is off
Use a non-contact tester to double-check that no live voltage remains in the control cabinet and outdoor unit. Do not touch exposed conductors. Recheck after loosening fasteners if you move panels.
Tip: When in doubt, wait for a professional. - 3
Check thermostat settings
Confirm the thermostat is set to the correct mode (heat or cool), and verify the system is not in emergency heat or fan-only mode. If the thermostat is programmable, ensure schedules align with current use. Adjust temperature setpoints to test different operating states.
Tip: Keep a log of thermostat changes and outcomes. - 4
Inspect and replace air filters
Locate indoor air filter and assess cleanliness. Replace disposable filters or clean reusable ones according to manufacturer guidance. A clogged filter often causes reduced heating efficiency and short cycling.
Tip: Always use the filter size stamped on the frame. - 5
Clean outdoor condenser coils
Shut off power before cleaning. Gently remove visible debris, then scrub the coil surface with a mild HVAC cleaner and soft brush. Rinse lightly and let dry before re-powering the unit.
Tip: Avoid high-pressure water; it can bend fins. - 6
Check outgoing airflow and clearance
Ensure at least 2 feet of clearance around the outdoor unit and remove any nearby vegetation. Inspect for ice or frost along refrigerant lines that may indicate a deeper issue.
Tip: Trim surrounding plants to maintain airflow. - 7
Inspect refrigerant lines and insulation
Look for insulation damage or oil stains near the lines—these can hint at leaks. Do not attempt charging or sealing leaks yourself. Schedule a pro if you suspect refrigerant issues.
Tip: Document observations with photos for the technician. - 8
Electrical checks and connections
With power off, examine accessible wiring for wear, loose connections, or scorch marks. Use a meter to test control circuits only when safe, per the wiring diagram.
Tip: If wiring looks damaged, stop and consult a pro. - 9
Test run and observe performance
Restore power and listen for abnormal noises. Observe cooling or heating cycle; check for even airflow and proper defrost operation. If the system stalls or cycles irregularly, record symptoms for the pro.
Tip: Take note of cycle times and any error codes. - 10
Document findings
Create a service history with photos, observations, and steps you took. This helps a technician diagnose more quickly and reduces duplicate work.
Tip: Keep a dedicated heat pump maintenance log. - 11
Plan for next steps
Based on your observations, decide if DIY fixes were sufficient or if professional service is required. For refrigerant-related concerns, assume professional service is needed.
Tip: Set expectations for the service visit and a scope of work. - 12
Schedule routine maintenance
Arrange an annual check with a licensed HVAC technician. Regular maintenance helps prevent costly heat pump repair and maintains efficiency.
Tip: Mark your calendar for a yearly service window.
FAQ
What is heat pump repair?
Heat pump repair involves diagnosing and fixing components that affect heating and cooling, such as filters, fans, coils, thermostats, and electrical connections. It excludes refrigerant handling, which requires licensed professionals.
Heat pump repair means fixing parts like filters, fans, and coils, but not refrigerant work which needs a pro.
Can I fix a heat pump myself?
You can handle simple tasks like cleaning coils or replacing filters, but avoid refrigerant work or high-voltage tasks unless you’re trained. If in doubt, call a licensed HVAC technician.
You can do simple things like cleaning and filter changes, but refrigerant work should be left to pros.
How often should heat pumps be serviced?
Most homes benefit from an annual professional service, along with proactive DIY checks such as monthly filter changes and coil cleaning to maintain efficiency.
Have a professional service once a year and do simple DIY checks monthly.
What are signs of a heat pump failing?
Common signs include inadequate heating or cooling, short cycling, unusual noises, frost on outdoor coils, and higher energy bills. These cues help decide whether to DIY or call a pro.
Unusual noises, poor heating, frost on coils, and high energy use mean you should check further or call a pro.
Is it safe to run a heat pump after coil cleaning?
Yes, after cleaning and ensuring panels are secure, you can re-start the unit. Avoid running the system if you detect leaks or smells of coolant.
Yes, if everything is dry and back in place; avoid if you detect leaks.
When should refrigerant issues prompt a professional call?
If you suspect a refrigerant leak or need charging, contact a licensed HVAC technician promptly. Handling refrigerant without certification is hazardous and illegal in many areas.
Call a licensed pro if you suspect a refrigerant leak or need a charge.
Watch Video
Key Takeaways
- Start with safety and a clear diagnosis
- Tackle basic fixes: filters, coils, and thermostat
- Do not handle refrigerant; hire a pro for leaks
- Document findings for faster service
- Establish a yearly maintenance routine