Repair Heat at Home: Step-by-Step DIY Guide
A practical, safety-focused guide to repair heat at home, with essential tools, step-by-step instructions, and troubleshooting for common heating problems.

You will learn how to diagnose common heating problems and safely restore heat in a home. This guide covers checking thermostats, inspecting electrical connections, and evaluating the furnace or boiler. Gather safety gear, a basic toolkit, and a multimeter, then follow the step-by-step process to prevent further damage.
Understanding Repair Heat
Repair heat is the process of diagnosing and fixing issues that prevent your home from producing reliable warmth. This guide focuses on residential heating systems, including furnaces, boilers, heat pumps, and combo units. The goal is to restore safe, efficient heat with practical steps you can perform in a typical home. According to Home Repair Guide, the majority of heating problems come from a handful of accessible causes: thermostat faults, dirty filters, blower motor clogging, or ignition sequence issues. By understanding how heat is generated—fuel source (gas, oil, electricity), heat exchanger, and distribution network (ductwork or radiators)—you can pinpoint where a fault originates and plan a safe repair heat workflow. In practice, many fixes are straightforward and inexpensive if addressed early. This section maps the typical failure modes you’re likely to encounter, how to verify symptoms, and how to decide whether a repair is within a homeowner’s skill set or requires a professional. Keep in mind that working with gas, electricity, or high-temperature components carries risk, and safety is the top priority. This approach lays the groundwork for smarter, safer repair heat work in any season.
Safety First When Working on Heating Systems
Safety should govern every step of repair heat work. Begin with a clear plan and the right PPE: safety goggles, insulated gloves, and non-slip footwear. If you smell gas, hear a hissing odor, or notice scorch marks, stop immediately and evacuate, then call the utility. For electric work, shut off the main power and, if accessible, lock out the circuit to prevent accidental energization. Do not bypass safety devices or operate a furnace with the panels removed. A carbon monoxide detector should be present on every floor of a home with combustion heat, and you should ensure it is functioning before attempting any internal checks. If you’re unsure about a step, don’t improvise—consult the manual or a professional. The goal is to limit exposure to hazardous conditions while you assess the problem. This safety-first mindset aligns with best practices from Home Repair Guide and reputable HVAC resources in 2026.
Common Causes of Heat Problems and How to Diagnose Them
Based on Home Repair Guide analysis, thermostat faults and restricted airflow top the list of frequent culprits. Start by confirming the thermostat is calling for heat correctly, and that it has fresh batteries if it’s analog or digital. Next, inspect the air filter; a dirty filter reduces airflow and can cause the system to overheat or shut down. If you have a gas furnace or boiler, listen for the ignition sequence and check for a steady flame; a weak or intermittent flame indicates gas supply issues or a faulty igniter. For electric systems, test control boards, relays, and blower motors for continuity using a multimeter. Finally, examine ductwork for obvious leaks or disconnected sections, as air loss drastically reduces perceived warmth. Identifying the root cause early can save time and prevent unnecessary component replacements.
Prep and Planning: Tools, Materials, and Workspace Setup
Before you touch any equipment, set up a clean, well-lit workspace and gather the essentials listed in the Tools & Materials block. Clear the area around the furnace or boiler, shut power off at the main panel, and confirm there is adequate ventilation. Review the equipment manuals for your model and note any safety warnings or warranty implications. Create a simple, stepwise plan for testing each subsystem: controls, power, air distribution, and combustion (if applicable). Document your observations as you go so you can track what you changed and why. This preparation helps reduce trial-and-error time and supports a safer, more effective repair heat process, especially when working with gas-fired or high-voltage components.
Quick-Start Repair Flow for Common Issues (Overview)
If you’re facing a no-heat symptom, begin with the low-risk checks: thermostat, air filter, and blower accessibility. If heat is present but inconsistent, focus on airflow, duct integrity, and heat exchanger condition. When ignition or gas delivery is involved, apply heightened caution and consider expert help sooner rather than later. Remember, not every problem requires a full replacement—often, cleaning or reseating connectors resolves root causes. This section provides a high-level flow, guiding you through the decision points to determine if you can safely complete a repair heat task yourself or if a professional is warranted. Maintaining a written plan helps you stay organized and reduces the chance of overlooking critical steps.
Maintenance to Prevent Future Failures
Regular maintenance is the best defense against future heat problems. Schedule seasonal inspections, replace or clean filters every one to three months depending on use and filter type, and keep coils and condensers clean to sustain efficiency. A well-maintained system heats more evenly and runs longer between major service visits. Consider upgrading a failing old thermostat to a programmable or smart model to improve energy management and responsiveness. As you implement these practices, you’ll notice fewer interruptions, lower energy waste, and more consistent comfort year-round. The Home Repair Guide team emphasizes that proactive maintenance is cheaper and less disruptive than emergency repairs, especially for climate-controlled spaces where consistent heat matters most.
Troubleshooting Edge Cases and When to Call a Pro
If you encounter persistent heat loss after performing basic checks, or if the system displays unusual noises, error codes, or cycling patterns, it’s time to involve a professional. Gas leaks, carbon monoxide risks, and high-voltage electrical issues can be dangerous and require licensed technicians. For homeowners who still want to pursue DIY steps, narrow down the issue by gathering model information, photographing components, and noting exact symptoms before contacting support. In many cases, a technician can diagnose remotely or provide a targeted on-site visit, saving time and reducing the chance of misdiagnosis. The goal is to restore safe, reliable heat while avoiding risky experiments that could worsen the problem. The Home Repair Guide team stands by a safety-first approach when heat problems become complex.
Cost Considerations and Budgeting for Repair Heat
Repair heat projects vary in scope and cost, influenced by the system type, parts needed, and labor rates. In many homes, initial diagnostic fees are modest, while parts like igniters, flame sensors, or controllers can push the cost higher. If the issue stems from airflow or a dirty coil, the price tag may stay within a few hundred dollars. More extensive repairs or component replacements, especially on older units or complex systems, can rise into the low thousands. For homeowners, it’s wise to obtain multiple estimates, review warranty coverage, and plan for preventive maintenance to reduce the probability of future breakdowns. The Home Repair Guide analysis suggests that staying proactive with maintenance yields tangible long-term savings through improved efficiency and fewer emergency calls.
Tools & Materials
- Digital multimeter(for checking electrical circuits and thermostats)
- Non-contact voltage tester(verify live wires safely)
- Screwdriver set (Phillips and flat)(include #2 Phillips; 3-inch blades)
- Nut drivers or adjustable wrench(for fittings and duct nuts)
- Safety gloves(ANSI-rated)
- Safety glasses(eye protection)
- Flashlight or headlamp(for dark panels)
- Carbon monoxide detector(test before starting combustion systems)
- Gas detector (optional for gas systems)(useful if you suspect leaks; call a pro for actual leaks)
- Wire nuts and electrical tape(for safe wiring connections)
- Replacement thermostat (optional)(only if existing thermostat is faulty)
- Rags and leak-catching containers(keep workspace clean and dry)
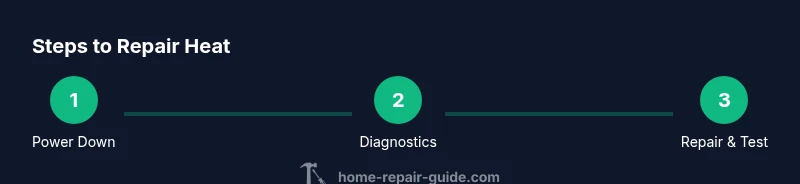
Steps
Estimated time: 60-90 minutes
- 1
Power down and secure the area
Turn off the main power to the heating unit and close the gas valve if you can do so safely. Allow components to cool and verify there is no live voltage before touching any wires. Use lockout procedures if available to prevent accidental re-energization.
Tip: Never work on energized controls; double-check with the voltage tester before touching wires. - 2
Verify thermostat operation
Inspect thermostat wiring and battery condition, and confirm it is calling for heat when set to a higher target. If the thermostat is old or unresponsive, consider replacing it before deeper repairs. Record any temperature readings and setpoints for reference.
Tip: A loose thermostat wire is a common culprit; reseat and tighten terminals securely. - 3
Inspect air filtration and blower access
Remove and inspect the air filter; replace if dirty or clogged. Check the blower motor for obstructions or abnormal noise and ensure it spins freely. Clean around the blower housing to improve airflow.
Tip: Restrictive airflow is a frequent hidden cause of heat cycling and poor warmth. - 4
Check gas supply and ignition (for gas systems)
Ensure the gas valve is open and there’s steady gas supply. If ignition is intermittent, test the igniter/ignition control for proper operation and replace if worn. Do not attempt to adjust gas pressures yourself.
Tip: If you smell gas, evacuate and call the utility immediately. - 5
Test electrical connections and fuses
With power off, inspect fuses, breakers, and control boards for signs of damage or loose connections. Use the multimeter to verify voltage levels on controls and relays. Re-seat connectors and replace damaged components as needed.
Tip: A loose connector can cause intermittent heat; reseat all visible connections firmly. - 6
Restart and validate heat output
Restore power and set the thermostat to heat. Observe the system’s ignition, burn pattern, and air temperature coming from vents for a few minutes to confirm consistent operation. If heat is still inconsistent, log symptoms and proceed with professional support.
Tip: Document any error codes or unusual sounds to share with a technician.
FAQ
What should I do first if my heat stops working?
Start with safety checks: power off, gas valve closed if applicable, and test the thermostat and filter. If heat remains absent after these steps, document symptoms and consider seeking professional help for a safe diagnosis.
If heat stops, begin with safety checks, verify the thermostat and filter, and if heat still won’t come on, contact a professional.
Is it safe to repair heat yourself?
DIY repairs are feasible for non-hazardous components like thermostats and filters. For gas, high voltage, or combustion-related issues, hire a licensed professional to avoid serious risk.
DIY is okay for simple parts, but gas and electrical hazards require a pro.
What tools do I need for basic repairs?
You’ll typically need a multimeter, screwdriver set, voltage tester, wire nuts, safety gear, and a flashlight. Having a basic HVAC toolkit helps you perform routine checks more efficiently.
Essential tools include a multimeter, screwdrivers, a tester, and safety gear.
When should I call a professional?
Call a pro if you detect a gas leak, persistent ignition problems, electrical hazards, or unusual noises or codes after basic checks. Some repairs require licensed expertise to ensure safety and compliance.
Call a pro if there’s a gas smell, risky wiring, or persistent ignition issues.
How can I improve efficiency after repair?
Replace clogged filters, schedule seasonal tune-ups, and consider upgrading to a programmable thermostat to optimize energy use and reduce future strain on the system.
After repairs, keep up with maintenance and use a programmable thermostat to boost efficiency.
Watch Video
Key Takeaways
- Shut off power before inspecting any heat system.
- Check thermostat and air filter early in the diagnosis.
- Use the correct safety gear for all steps.
- Consult a pro for gas or electrical hazards.
- Regular maintenance prevents most common heat failures.