Dallas Air Conditioning Repair: A Homeowner’s Step-by-Step Guide
Learn reliable, step-by-step Dallas air conditioning repair guidance for homeowners. Safety, maintenance, common problems, and when to call a pro—from Home Repair Guide.

By the end of this guide, you’ll be able to diagnose common Dallas AC issues, perform safe basic maintenance, and decide when to call a pro. You’ll learn to check thermostat accuracy, inspect electrical connections, test the capacitor, inspect condensate drainage, and assess airflow. A practical triage checklist helps you act quickly during peak heat.
Why Dallas-Specific HVAC Maintenance Matters
The Dallas climate delivers long, hot summers and high humidity, which stress air conditioning systems more than milder climates. Regular maintenance tailored to this environment can extend equipment life, improve energy efficiency, and reduce the chance of sudden failures during July heat waves. Homeowners in the Dallas area should prioritize a proactive care plan that includes routine filter changes, coil cleaning, and seasonal checkups. By addressing issues early, you minimize the risk of refrigerant leaks or compressor stress that can drive repair costs higher. According to Home Repair Guide, a disciplined maintenance routine helps systems run more reliably when you need cooling most.
Common Symptoms of Dallas-Area AC Problems
Look for signs that your system is struggling to keep up: longer runtimes, uneven cooling between rooms, unexpected thermostat readings, excess noise, and visible frost on the evaporator coil or refrigerant lines. In Dallas, high outdoor temperatures can mask problems until peak demand. If your unit cycles on and off frequently, blows warm air, or shows a noticeable drop in airflow, schedule a diagnostic visit. Track energy usage spikes as a secondary indicator, since a failing compressor or dirty coils can raise electricity costs quickly.
Safety First: When to DIY and When to Call a Pro
Electrical work and refrigerant handling carry real hazards. If you’re not trained, avoid opening sealed components or handling refrigerants. Simple tasks like replacing a dirty filter or clearing debris from the outdoor unit are safe if you follow power-down procedures. Always use PPE—gloves, eye protection, and non-conductive tools. If you smell burning, hear buzzing, or notice refrigerant oil smells, shut off power and contact a licensed HVAC technician promptly.
Practical Quick Checks You Can Do Before Calling a Technician
Start with the basics: verify the thermostat is set correctly, replace the air filter, and inspect the outdoor unit for debris or blocked airflow. Check for ice on the evaporator coil and listen for unusual noises from the fan motor. If the unit is blowing warm air after basic maintenance, run a quick condensate drain check and ensure the condensate line isn’t clogged. These checks help you provide precise information to the technician, saving time and money.
Energy Efficiency and Cost Considerations in Dallas
Efficient operation is especially important in hot, humid climates like Dallas. A well-maintained system runs cooler with less energy, and tiny issues can cause big energy waste over a hot summer. Consider upgrading to a programmable thermostat or a smart thermostat that better matches your daily schedule. Sealing air leaks and adding proper insulation in ducts can dramatically improve comfort without loading the compressor more heavily. Budget-conscious homeowners should compare seasonal maintenance costs against potential, more expensive repairs caused by neglect.
Seasonal Maintenance Schedule for a Dallas AC
Create a simple calendar that aligns with Texas seasons. Spring should include coil cleaning, filter replacement, and a system performance check. Summer focuses on airflow, refrigerant line inspection, and electrical safety. Fall is for reviewing duct sealing and thermostat calibration, while winter emphasizes condensate line checks to prevent freezing. Maintain a service log and note any patterns of performance decline to catch issues early.
Tools & Materials
- Safety gear (gloves, goggles, mask)(Protect hands and eyes during inspection)
- Voltage tester / non-contact tester(Verify power before touching wires)
- Screwdrivers (Phillips and flat-head)(Access panels and electrical covers)
- Multimeter or capacitor tester(Check electrical components and start capacitor)
- Fin comb or soft brush(Clear debris from condenser coils)
- Garden hose with spray nozzle(Rinse outdoor unit from top to bottom)
- Shop rags and spray cleaner(Clean indoor components and coils)
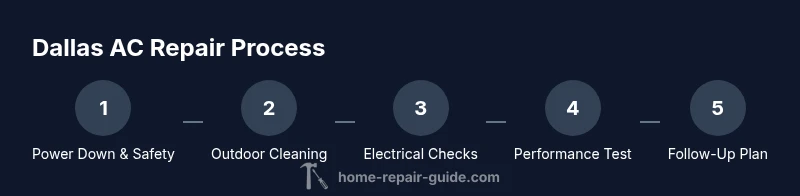
Steps
Estimated time: 60-90 minutes
- 1
Power down and verify safety
Shut off power at the service disconnect and the breaker. Use a non-contact tester to confirm no voltage is present before touching any wires or panels. This step prevents shock and protects sensitive components.
Tip: Always assume circuits can energize unexpectedly; test twice after turning off power. - 2
Inspect and clean the outdoor condenser
Clear debris around the unit and gently brush the fins with a soft brush or fin comb. Remove leaves, grass, and dirt that restrict airflow. Recheck clearance after cleaning to ensure adequate circulation.
Tip: Do not use high-pressure water directly on fins; start at the top and work downward. - 3
Check the thermostat and air filter
Test thermostat accuracy by comparing room temperature with the thermostat setting. Replace the air filter if it’s dirty or blocked. A clean filter improves airflow and cooling efficiency.
Tip: Record thermostat readings to monitor drift over time. - 4
Inspect electrical connections and capacitors
Look for loose or burnt wires and corrosion on contact points. If you have a capacitor tester, check for bulging or leakage; replace only with the exact equivalent part. Do not touch a live capacitor.
Tip: Discharge capacitors safely before handling with proper tools. - 5
Test cooling performance and safety checks
Run the system for 10-15 minutes and monitor temperature drop and airflow. Listen for unusual noises and check for ice on the evaporator coil. If cooling performance remains poor, the issue may require refrigerant work or professional service.
Tip: Do not attempt to vent refrigerant or repair sealed systems. - 6
Document results and plan next steps
Create a brief report of findings, actions taken, and any parts replaced. Decide whether to continue DIY debugging or schedule a professional service. Schedule follow-up checks to verify stability.
Tip: Keep a maintenance log for season-to-season tracking.
FAQ
What are the most common signs that my Dallas AC needs repair?
Look for longer runtimes, uneven cooling, weak airflow, and unusual noises. Thermostat misreads and ice on the evaporator are also red flags. Addressing these early can prevent larger failures.
Common signs include longer runtimes, uneven cooling, and strange noises. If you notice ice on the coils or thermostat errors, schedule a diagnostic.
Can I fix refrigerant leaks myself?
No. Handling refrigerants requires licensed HVAC technicians and proper recovery equipment. DIY attempts can be dangerous and illegal in many areas.
No. Refrigerant leaks require a licensed professional with proper recovery equipment.
How often should I schedule professional maintenance?
Aim for an annual professional inspection, ideally in spring, to ensure peak-season readiness and catch wear before it causes failure.
Schedule professional maintenance once a year, preferably in spring.
What DIY tasks are safe for homeowners?
Replacing air filters, cleaning condenser fins, clearing debris around the outdoor unit, and testing thermostat accuracy are generally safe when power is off.
Safe DIY tasks include changing filters, cleaning the exterior unit, and checking the thermostat when power is off.
What should I do if the outdoor unit is blocked by debris?
Remove debris with the power off, ensure several inches of clearance around the unit, and recheck airflow. If debris recurs, consider a landscape cleanup near the unit.
Shut off power, clear the debris, and maintain proper clearance around the unit.
Why is my Dallas AC running but not cooling?
Common causes include refrigerant issues, a faulty compressor, dirty coils, or a malfunctioning thermostat. A professional diagnosis is often needed when cooling fails.
If it's running but not cooling, it could be refrigerant or compressor issues, or dirty coils—often best handled by a pro.
Watch Video
Key Takeaways
- Safe power-down is non-negotiable before inspection
- Regular maintenance saves energy and reduces breakdown risk
- DIY fixes are limited to simple tasks; refrigerant work requires a pro
- Maintain a simple maintenance log for tracking
- Know when to call a licensed technician to prevent costly damage