AC Repair in Houston TX: A Practical Home Guide
Learn safe, practical steps for ac repair houston texas, including common issues, DIY troubleshooting, cost ranges, and when to call a licensed HVAC pro from Home Repair Guide.

Goal: identify common AC issues, safely assess and perform basic repairs, and know when to call a licensed HVAC technician in Houston, Texas. This guide covers essential tools, local safety considerations, and cost ranges for ac repair houston texas, plus practical steps and cautions for homeowners and renters today online.
Why AC reliability matters in Houston's climate
According to Home Repair Guide, the humid, hot climate of Houston places extra stress on air conditioning systems. Frequent heat waves, high humidity, and urban dust mean more frequent cycling, potential coil buildup, and compressor strain. Homeowners dealing with ac repair houston texas should prioritize regular maintenance to prevent costly failures during peak summer. Humidity accelerates corrosion and can clog condensate lines, leading to unexpected shutdowns. A proactive approach—from filter changes to coil cleaning—extends system life and keeps energy costs in check. The Home Repair Guide team’s analysis notes that simple maintenance often prevents the most expensive repairs, especially in dense urban settings where outdoor units are close to landscaping and debris.
How air conditioning systems work: key components and what to know
An air conditioner has several core parts that work together to produce cooling:
- Thermostat: senses room temperature and signals the system to run or stop.
- Outdoor condenser unit: rejects heat from the refrigerant to the outdoors.
- Indoor evaporator coil: absorbs heat from the home air.
- Ductwork and blower: distributes cooled air throughout the house.
- Refrigerant lines: circulate refrigerant between indoor and outdoor units.
- Electrical controls and capacitors: power the system and start components.
Understanding these parts helps you pinpoint where problems may arise and what a technician may inspect during ac repair houston texas.
Common failure modes you’re likely to see in Houston homes
Houston homes often face issues tied to climate, aging equipment, and maintenance gaps. Common failure modes include:
- Dirty or clogged filters reducing airflow and cooling efficiency.
- Debris buildup on the outdoor condenser restricting heat rejection.
- Thermostat calibration problems causing inconsistent cooling.
- Refrigerant leaks or low refrigerant levels reducing cooling capacity.
- Clogged condensate drains leading to water backups or mold growth.
- Electrical issues such as blown fuses or worn capacitors.
Identifying these early can save energy and prevent unexpected outages during hot summers.
Safety first: DIY vs. hiring a pro in Texas
Work on air conditioning systems involves electrical components and, in many cases, refrigerants. In Texas, handling refrigerants requires EPA certification, and many repairs should be performed by licensed HVAC professionals. For DIY tasks, always de-energize the system at the breaker and disconnect, wear safety gear, and avoid high-voltage components. When in doubt, consult the Home Repair Guide for a risk assessment and local regulations guidance.
Practical, code-aware troubleshooting steps homeowners can perform
If you’re comfortable with basic tasks, start with these checks before scheduling professional service:
- Verify the thermostat settings and ensure it is calling for cooling.
- Replace the air filter and inspect for restricted airflow.
- Clear leaves and debris from the outdoor unit; ensure several inches of clearance on all sides.
- Check the indoor blower and registers for obstructions or closed dampers.
- Inspect the condensate drain for clogs and pour a small amount of water to test flow.
Remember: if the system is not running, emitting unusual noises, or if you suspect refrigerant issues, contact a licensed pro rather than attempting more advanced repairs.
Budgeting and cost expectations for ac repair houston texas
Costs for ac repair houston texas vary by issue, system type, and access. For many households, routine maintenance and minor fixes fall within a modest range, while major compressor or refrigerant work can quickly rise. Typical DIY parts may cost a small fraction of professional labor, and professional repairs can range from moderate to substantial amounts depending on scope and components involved. Budget for parts, labor, and potential service calls, and seek multiple quotes from credible HVAC pros. The Home Repair Guide analyses in 2026 emphasize planning for both preventive maintenance and contingency costs to avoid price shocks during peak season.
Authority sources
- https://www.energy.gov
- https://www.epa.gov
- https://www.osha.gov
Tools & Materials
- Digital multimeter(Test electrical components; verify outlets and fuses are live-safe.)
- Screwdrivers (Phillips and flat-head)(Common for panel screws and service access.)
- Nut driver set(Remove and reinstall hardware on electrical panels and coils.)
- Adjustable wrench(Loosen fittings on condensate lines and service connections.)
- Pliers (needle-nose and standard)(Grip small parts and assist with line work.)
- Replacement air filter(Keep airflow unobstructed and improve efficiency.)
- Safety gear (gloves and safety glasses)(Protect hands and eyes during inspections.)
- Electrical tape and wire nuts(Manage splices and secure connections.)
- Rags or towels(Clean spills and protect surfaces.)
- Service manual for your unit (or model number)(Reference specific instructions and wiring diagrams.)
Steps
Estimated time: 60-90 minutes
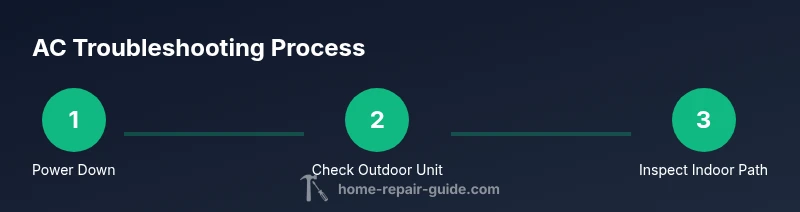
- 1
Power down and isolate the system
Turn off the thermostat and switch off the main breaker or outdoor disconnect. Use the multimeter to verify there is no voltage on accessible terminals. Wait a few minutes for capacitors to discharge before touching components.
Tip: Label circuits and take photos before disconnecting anything to simplify reassembly. - 2
Inspect outdoor condenser for debris
Look for leaves, dirt, or grass blocking airflow around the condenser and fan. Remove debris carefully and ensure at least 3-4 inches of clearance around the unit. Confirm the outdoor fan spins freely when powered on (with safety precautions).
Tip: Do not use metal tools on the fins; use a soft brush or fin comb if needed. - 3
Check indoor air quality path and filter
Remove the indoor return filter and inspect for dirt; replace if dirty or discolored. Check supply registers for obstructions and verify airflow to the furthest room. Clean or vacuum the blower area if accessible.
Tip: Keep a routine (monthly or quarterly) filter schedule to prevent clogged airflow. - 4
Test basic electrical components safely
With power off, inspect the capacitor and wiring for signs of wear or burns. If you must test, use the multimeter to confirm continuity and resistance within safe ranges. Do not touch energized terminals, and avoid re-energizing damaged components.
Tip: If you notice bulging capacitors or burned connectors, call a pro immediately. - 5
Decide on next steps and document findings
Summarize what you found, note parts needing replacement, and compare with your unit’s service history. If issues persist after these checks, schedule a professional HVAC service.
Tip: Maintain a simple log of maintenance dates and observed symptoms for future visits.
FAQ
Is it safe to DIY AC repair houston texas?
DIY tasks like filter changes or thermostat checks can be safe for simple issues. Do not handle refrigerants or high-voltage components unless you are EPA-certified and licensed. When in doubt, hire a pro.
DIY can be safe for simple tasks, but avoid refrigerants and high-voltage work. If unsure, consult a licensed HVAC technician.
When should I replace rather than repair my AC?
Consider the system’s age, repair costs, and energy efficiency. If the unit is older and multiple repairs are needed, replacement may be more economical in the long run.
If your unit is aging and repairs add up, replacement can be the smarter choice.
What maintenance can I perform to prevent issues?
Regularly change filters, clean coils, check airflow, and schedule seasonal inspections. Keeping up with maintenance reduces breakdowns and improves efficiency.
Change filters regularly and keep the outdoor unit clear of debris.
Why is my AC not cooling in Houston?
Common causes include dirty filters, restricted airflow, condenser debris, thermostat issues, or refrigerant leaks. Start with filter changes and airflow checks before calling a pro.
If it’s not cooling, check the filter and airflow first, then consider professional help for leaks.
What is the typical cost range for AC repair in Houston?
Prices vary by issue and unit, but many repairs fall within a moderate range. Serious problems, such as compressor or refrigerant work, can increase costs substantially; obtain multiple quotes.
Costs depend on the problem; get a few quotes to compare.
Do I need a permit for AC work in Texas?
Most basic repairs do not require a permit, but electrical work or refrigerant handling often requires licensing and permits. Check local codes and consult a professional when in doubt.
Permits depend on the job; electrical or refrigerant work usually needs a licensed pro.
Watch Video
Key Takeaways
- Inspect airflow and clean coils regularly.
- Know when to DIY and when to hire a licensed pro.
- Budget for parts and labor with reasonable ranges.
- Maintain a preventive schedule to extend equipment life.