AC Repair for Home: A Practical Step-by-Step Guide
Learn safe, practical steps for ac repair for home: diagnose common faults, replace filters, test electrical components, and know when to call a pro in this Home Repair Guide DIY guide.

This quick guide walks you through ac repair for home tasks safely and effectively, from diagnosing common faults to performing basic fixes and deciding when to call a professional. You'll learn filter changes, thermostat checks, coil cleaning, and how to identify refrigerant or electrical problems, with clear safety warnings and DIY-friendly steps.
Why Regular AC Maintenance Pays Off
Maintaining an air conditioner is often cheaper than frequent repairs and can keep your home cooler with less energy use. According to Home Repair Guide, a proactive maintenance routine reduces breakdowns and prolongs equipment life, which translates into lower bills and fewer emergency calls. This section explains why maintenance matters and how to approach it without specialized training. Start with the basics: keep filters clean, ensure good airflow, verify thermostat accuracy, and keep the outdoor unit free of debris. A clean filter reduces strain on the blower, improves cooling, and lowers energy costs, while clear coils let the system reject heat efficiently. Dusty surroundings, clogged fins, or ignored frost on the evaporator can raise pressure and shorten compressor life if left unchecked. A simple, regular checklist helps homeowners catch issues before they become costly repairs, and sets you up for more advanced fixes if needed.
The Home Repair Guide team emphasizes a safety-first mindset. Before you touch any component, turn off power at the breaker and verify the unit is dead with a non-contact tester. This approach minimizes the risk of electric shock, arc flash, or damaging sensitive electronics. Use a simple notebook to log dates, symptoms, and what you inspected. You’ll build a pattern over time that makes it easier to explain issues to a technician if you need professional help later.
Common DIY Fixes You Can Try Safely
Many ac problems start with simple maintenance tasks you can perform without opening sealed systems. Replacing a dirty air filter, adjusting a malfunctioning thermostat, and cleaning accessible components can restore comfort and efficiency. In this section, you’ll find practical steps, typical signs, and what not to touch when you’re unsure. For a homeowner, the most effective DIY checks revolve around airflow, cleanliness, and basic electrical safety. By following these steps, you’ll minimize energy waste and reduce the chance of a breakdown during peak season. If you notice persistent issues after these fixes, you’ll have a clear set of data to share with a pro. The goal is to improve reliability and comfort while staying within your skill set.
First, replace or clean the air filter. A clogged filter reduces airflow, causes the blower motor to work harder, and can trigger temperature swings. Next, verify thermostat settings and wiring. A miscalibrated thermostat can cause short cycling or uneven cooling. Then, inspect the outdoor condenser for debris and ensure at least 12 inches of clearance around the unit. Cleaning the condenser fins helps heat rejection and reduces strain on the compressor. Finally, check interior components you can reach safely, like duct openings, registers, and visible electrical connections, noting any discoloration, burning smells, or loose wires to report to a pro.
Safety, not speed, is the goal here. If you’re unsure about any step—especially anything involving refrigerant or high voltage—stop and call a licensed technician. The aim is to improve performance without risking injury or invalidating warranties.
What Not to Do: Safety and When to Call a Pro
DIY can address simple maintenance, but there are clear boundaries where professional help is required. Do not attempt refrigerant handling, recovery, or charging. These tasks involve pressurized gases and require licensed technicians and proper disposal practices. Never bypass safety devices or work on live electrical panels; a small mistake can cause serious injury or fire. If your system makes unusual noises (hiss, grinding), trips the breaker, or won’t start after basic checks, consult a pro. When you suspect a refrigerant leak, a pro should perform leak detection and proper recovery because improper charging or sealing can harm the environment and your system. Finally, if the coil is severely corroded, the compressor is weak, or cooling remains unsatisfactory after basic maintenance, professional evaluation is warranted to avoid further damage.
Tools, Materials, and Prep
Preparation is key to a safe, effective DIY repair. Gather essential tools and materials before you begin, and ensure your work area is dry, well-lit, and ventilated. Safety gear such as gloves and eye protection is non-negotiable when working around electrical components and metal edges. Create a simple maintenance log to track what you check and when, so you can spot trends over time. The items listed in the Tools and Materials block below cover the basics for most common checks; add or skip optional items based on your unit and comfort level. Remember: the goal is to improve reliability and comfort, not to push your limits.
Track your start time, take photos of wiring before disconnecting, and never rush through steps. If you’re uncertain about a step, pause and reassess. This approach helps prevent mistakes and keeps you safer.
Troubleshooting Flow: DIY vs. Pro Decision Tree
Use this quick decision tree to decide whether to DIY or call a pro. If the unit won’t power on, confirm power at the breaker and test for tripped fuses. If the thermostat reads correctly but the air is still warm, start with the filter and condenser coil. If you hear unusual noises, observe the location and nature of the sound before you decide to open panels. If you see ice on the evaporator coil or detect refrigerant odor, stop and call a pro. If airflow is weak after cleaning the outdoor unit, check ductwork for leaks or obstructions. When in doubt about electrical integrity or refrigerant handling, contact a licensed HVAC technician. This flow helps you act confidently and avoid risky situations.
Energy Efficiency Tips After Repair
Once your AC is cooling reliably again, focus on efficiency to reduce energy costs and extend equipment life. Replace disposable filters every 1-3 months during active cooling seasons and consider upgrading to a higher-efficiency filter if you have allergies or dust concerns. Keep the outdoor unit clear of vegetation and debris, and seal any obvious air leaks in doors or windows to minimize cooling losses. Use programmable thermostats to align cooling with occupancy, and schedule an annual professional tune-up to catch issues before they become costly repairs. By combining regular maintenance with efficient usage, you’ll improve comfort while saving money on energy bills.
Tools & Materials
- Safety gear (gloves and protective eyewear)(Wear before starting; protect hands from sharp edges and hot surfaces)
- Flat-head and Phillips screwdrivers (assorted sizes)(Used to remove access panels and components)
- Nut driver set(8-14 mm range covers most hardware on condensers)
- Digital multimeter(Test voltage, continuity, and resistance in circuits)
- Replacement air filters(Have the correct size indicated on the current filter)
- Soft brush or coil cleaning brush(Gently remove dirt from condenser fins)
- Non-caustic coil cleaner (spray)(Use as directed on the condenser coils)
- Vacuum or small shop vac(Clean dust around the blower cabinet and returns)
- Smart thermometer or HVAC infrared thermometer(Check supply and return air temperatures for performance checks)
Steps
Estimated time: 60-120 minutes
- 1
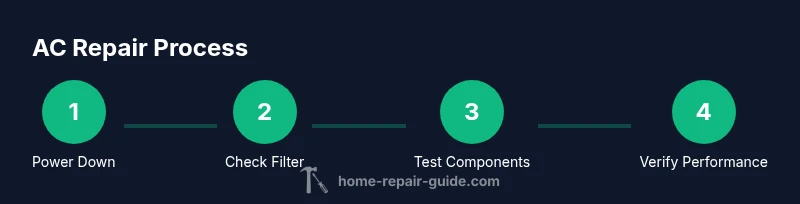
Power down and verify safety
Switch off the breaker that powers the AC unit and confirm no voltage is present with a non-contact tester. This ensures all live circuits are de-energized before you touch components.
Tip: Double-check the indoor and outdoor disconnects if your system has separate power sources. - 2
Replace or clean the air filter
Remove the old filter and replace with a new one of the same size, or rinse a reusable filter if appropriate. A clean filter improves airflow and efficiency.
Tip: Check monthly during peak season; a dirty filter can impede cooling and raise energy use. - 3
Inspect thermostat and wiring
Ensure the thermostat is set correctly, clean any front-panel dirt, and verify wiring connections are snug. A miswired or dirty thermostat can cause incorrect cooling behavior.
Tip: If you must reseat wires, take a photo first to avoid miswiring on reassembly. - 4
Clean condenser coils and clear debris
Gently remove leaves, dirt, and grass from the outdoor condenser. Use a soft brush and a gentle spray from a hose to avoid bending fins.
Tip: Never use high-pressure water that can bend fins; a fin comb can help straighten damaged fins after cleaning. - 5
Check for ice and drain issues
Inspect the evaporator coil for frost. If you see ice, turn off the system and allow it to thaw. Check the condensate drain for clogs that could trigger shutdowns.
Tip: If ice recurs, a professional should assess refrigerant flow and airflow balance. - 6
Test electrical components
With the power off, test visible fuses, contactors, and capacitor connections using a multimeter. Look for corrosion, loose connections, or burnt smells.
Tip: If you’re unsure about readings, record the measurements and consult a professional rather than guessing. - 7
Check refrigerant status and leaks
Do not attempt to recharge refrigerant. Refrigerant systems require certified handling and leak repair by licensed technicians. Look for oily residue or hissing sounds around connections as potential leak indicators.
Tip: If you suspect a leak, schedule a pro visit immediately to prevent environmental and equipment damage. - 8
Run the system and verify performance
Power the unit back on and observe airflow, temperature drop, and overall noise. Confirm that the system maintains a comfortable indoor temperature and that there are no new leaks or odors.
Tip: Note the time required to reach the set temperature to assess efficiency improvements.
FAQ
Can I safely DIY air conditioner repairs?
DIY work is viable for basic maintenance, like filters and thermostat checks. Avoid refrigerant handling and high-voltage tasks; these require licensed professionals.
Yes for simple tasks, but avoid refrigerant work and live electrical components.
What is the most common DIY fix for AC problems?
Replacing filters, cleaning coils, and confirming thermostat settings solve many issues. If these don’t help, seek professional service.
Most issues are fixed by filter changes and thermostat checks.
When should I call a professional for AC repair?
Call a pro for any refrigerant issues, persistent electrical problems, unusual noises, or if the system won’t restart after basic checks.
Call a professional for refrigerant leaks or electrical faults.
Can I recharge refrigerant myself?
No. Refrigerant handling requires licensed technicians, proper equipment, and environmental safeguards.
Refrigerant work isn’t safe or legal to do yourself.
How long does a DIY AC repair take?
Basic maintenance typically takes under two hours; more complex diagnostics may take longer, and some tasks require professional service.
Most DIY tasks finish within a couple of hours.
What safety gear should I wear?
Wear gloves and eye protection. Keep hair and clothing away from moving parts, and avoid touching live electrical components.
Always wear basic safety gear when working on your AC.
Watch Video
Key Takeaways
- Power safety first: always shut off breakers before touching equipment.
- Prioritize airflow and cleanliness to improve efficiency.
- Don’t handle refrigerant or high-voltage work yourself.
- Document issues clearly to aid diagnosis by a professional.
- Regular maintenance reduces costs and extends equipment life.