AC System Repair: A Step-by-Step Home Guide
Learn safe, step-by-step AC system repair with practical tests, common fixes, and budgeting tips. This Home Repair Guide tutorial covers essential tools, safety, and when to call a professional.

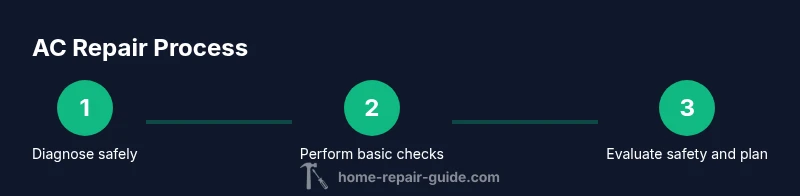
According to Home Repair Guide, you can safely diagnose and address many common AC system issues with a clear, step-by-step plan. This quick guide outlines the fundamental approach, including safety prep, basic testing, and knowing when to call a licensed technician. Gather basic tools, protective gear, and a basic meter before you start.
What is AC system repair and why it matters
AC system repair encompasses diagnosing, testing, and fixing the components that keep your home cool. It includes addressing electrical faults, blower and fan issues, clogged condensate drains, dirty coils, and faulty capacitors. While some fixes are simple, others require specialized equipment or refrigerant handling that should be done by a licensed technician. Regular attention to performance helps maintain efficiency, reduces energy bills, and prolongs equipment life. According to Home Repair Guide, taking a methodical, safety-first approach lowers risk and increases the odds of a successful repair without unnecessary downtime. Start with a clear plan, gather the right tools, and respect the limits of your skills. The goal is to restore reliable cooling while avoiding hazardous situations or accidental damage to terminals, wiring, or the refrigerant circuit. This article walks you through safe checks, common DIY tasks, budgeting considerations, and escalation guidelines.
Safety considerations and when to call a pro
Working on an AC system involves electrical components, moving parts, and refrigerants that can pose serious hazards. Before you touch anything, power must be completely shut off at the service disconnect or breaker. Wear protective eyewear and gloves, and keep children and pets away from the work area. Use a non-contact voltage tester to confirm lines are dead before handling wires. If you notice refrigerant odors, hissing sounds, or a burning smell, stop immediately and contact a licensed technician. Safety minimizes risk and helps you diagnose issues more accurately. Remember: this guide promotes safer DIY tasks and clearly outlines when professional service is necessary. The Home Repair Guide team stresses that escalation is a prudent choice in uncertain situations.
Diagnostic checklist for common AC problems
A systematic approach keeps you from chasing symptoms. Start with the air filter; a dirty filter restricts airflow and reduces cooling efficiency. Check the thermostat for correct settings and battery health. Inspect the outdoor condenser for debris buildup and ensure airflow is unobstructed. Look at electrical connections in the air handler and the outdoor unit, listening for buzzing or rattling that indicates loose parts or faulty capacitors. Check the condensate drain for blockages and clear any clogs. Document all observations before proceeding. This methodical checklist helps distinguish between a simple maintenance task and a repair that requires a professional.
Common repair tasks homeowners can perform safely
Simple maintenance tasks can deliver meaningful improvements. Replace the air filter with the correct size for your system. Gently clean the outdoor condenser fins with a soft brush or fin comb, avoiding bending the fins. Wipe down accessible surfaces and tighten loose screws on panels. Check thermostat wiring for loose connections and replace batteries if needed. If any wire is visibly damaged or discolored, stop and call a pro. These tasks usually don’t require refrigerant handling and are within many DIY skill sets when performed with care.
Troubleshooting refrigerant and electrical issues
Refrigerant handling is a specialized area with environmental and safety hazards. Never attempt to recover or seal leaks yourself; refrigerant work must be performed by licensed technicians. Electrical issues, such as a blown capacitor or a worn contactor, can often be addressed by testing with a multimeter while ensuring power is off. If the compressor won’t start or if you hear excessive noise after an electrical fix, stop and consult a pro. The goal is to identify whether the fault lies in a simple component or a deeper refrigerant/sealed system problem that requires professional service.
Cost awareness, budgeting, and value
Repair costs for AC systems vary widely based on the issue, parts required, and local labor rates. While this guide cannot provide exact figures, it helps you distinguish between inexpensive fixes (like a filter or thermostat replacement) and major repairs (such as compressor or coil replacement). Plan for contingencies and consider preventive maintenance as a cost-saving strategy over time. The Home Repair Guide approach emphasizes transparency in budgeting and prioritizing safety when deciding between DIY repairs and professional service.
Maintenance habits to prevent future failures
Proactive maintenance extends equipment life and lowers the chance of unexpected breakdowns. Schedule seasonal inspections, replace filters every 1–3 months during peak use, and keep coils clean. Ensure proper refrigerant charge and airflow by keeping vents unobstructed. A simple routine, documented in a maintenance log, helps you spot trends and plan service windows before heat waves hit. Regular checks also support energy efficiency and comfort in your home. The Home Repair Guide team recommends a simple, repeatable maintenance routine for every season.
References and learning resources
For deeper understanding, consult authoritative sources on heating and cooling. Energy efficiency pages from the U.S. Department of Energy offer guidance on safe operation and energy-saving practices. The Environmental Protection Agency provides information about refrigerants and safe handling. These resources complement this guide and help you make informed decisions about AC system repair and maintenance. © Home Repair Guide
Tools & Materials
- Safety glasses(ANSI-rated protective eye protection)
- Insulated gloves(Heat-resistant, insulated for electrical work)
- Screwdriver set (Phillips and flathead)(Assorted sizes)
- Multimeter / volt tester(For voltage and continuity checks)
- Non-contact voltage tester(Quickly verify power is off)
- Replacement air filter (correct size)(Check system’s filter size label)
- Fin comb or soft brush(Clean condenser fins gently)
- Cordless drill or driver(If used for panel removal)
- Shop rags and spray bottle(Clean components and dust)
Steps
Estimated time: 2-3 hours
- 1
Shut off power and secure area
Locate the service disconnect near the outdoor unit and switch it to the Off position. Confirm there is no voltage with a multimeter or non-contact tester before touching any wires. Post a warning sign to remind others not to restore power while you work.
Tip: Always verify power is off at both the indoor and outdoor disconnects before starting. - 2
Inspect and replace the air filter
Remove the existing filter and check for excessive dirt or damage. Replace with a filter of the correct size and airflow rating. Refit the filter housing securely to maintain proper airflow.
Tip: A clean filter improves efficiency and reduces strain on the blower motor. - 3
Check thermostat settings and battery
Verify thermostat is set to cool and that the target temperature makes sense for your comfort. If the thermostat uses batteries, replace them and reprogram any schedules. A faulty thermostat can mimic more serious system issues.
Tip: If you recently relocated or changed batteries, re-check after a few minutes of operation. - 4
Inspect electrical connections at the units
Remove access panels and inspect visible wiring for loose terminals, corrosion, or damaged insulation. Secure loose connections with the correct screwdriver, and avoid touching contacts when power is on. Do a final visual check for melted wires or signs of overheating.
Tip: Only tighten to manufacturer-specified torque; over-tightening can damage terminal crimp points. - 5
Check condensate drain and trap
Locate the condensate drain line and ensure it’s clear. If you see a clog, clear it using a wet/dry vacuum or insert a flexible brush carefully. A blocked drain can cause water damage and affect humidity control.
Tip: Never pour caustic cleaners into the drain; use a mild cleaning approach and ensure the trap is dry. - 6
Assess refrigerant and sealed components
Do not attempt to recover or seal refrigerant leaks yourself. If you suspect a refrigerant issue, schedule a licensed technician. Also look for obvious signs of oil staining or oily residue around connections, which can indicate leaks.
Tip: Refrigerant work requires certification and proper equipment to avoid environmental harm. - 7
Test capacitors and contactors (if safe)
With power off, test capacitors and contactors using a multimeter per manufacturer specs. Replace any showing signs of bulging, corrosion, or abnormal readings. Do not discharge capacitors with a bare hand or metal tool; use a proper discharge procedure.
Tip: If you’re unsure about capacitor testing, skip to professional service and avoid shock risk. - 8
Restore power and test operation
Close access panels, restore power at the disconnects, and run the system for 10–15 minutes. Listen for unusual noises and watch for abnormal icing or frost. If the system cools normally and cycles correctly, the basic issue is resolved; otherwise, plan next steps with a pro.
Tip: Keep a simple log of symptoms and actions taken to share with a technician if needed.
FAQ
What tasks are safe for a DIY AC system repair?
Safe DIY tasks include filter replacement, thermostat checks, cleaning accessible components, and tightening loose panels. Avoid refrigerant handling and high-voltage work unless you are trained. Always power down and use protective gear.
Safe DIY tasks are filter changes, thermostat checks, and cleaning accessible parts after powering down. Avoid refrigerant work and high-voltage tasks unless trained.
Is it safe to work on electrical components of an air conditioner?
Electrical work should be done with power fully disconnected and, ideally, by someone with electrical training. Use insulated tools and verify zero voltage at all times before touching wires.
Power must be off and tools insulated before touching any wiring. If unsure, call a licensed professional.
When should I call a professional for AC repair?
Call a professional if you suspect refrigerant leaks, persistent electrical faults, unusual noises, or the unit fails to cool after basic maintenance. Complex diagnostics require specialized equipment and knowledge.
If you suspect refrigerant leaks or electrical faults, or if it won’t cool after basic checks, contact a pro.
How can I estimate repair costs for an AC system?
Costs vary by issue, components needed, and labor. This guide outlines relative expense categories and emphasizes balancing DIY effort with safety and system longevity.
Costs depend on the issue and parts; this guide helps you plan and decide when to DIY or hire a pro.
What maintenance helps prevent future AC failures?
Regular filter changes, coil cleaning, and seasonal inspections reduce stress on the system and extend life. Keep a simple maintenance routine and address issues early.
Change filters regularly, clean coils, and schedule seasonal checks to prevent breakdowns.
Watch Video
Key Takeaways
- Shut off power before touching electrical components.
- Start with simple DIY tasks (filters, thermostat, cleanliness).
- Know when to escalate to a licensed HVAC tech.
- Document symptoms and actions to inform professionals.