Repair a C Units: DIY Guide for Homeowners
Learn to safely repair a c units at home with a clear, step-by-step approach. Diagnose common AC issues, use proper tools, and know when to call a pro, from Home Repair Guide.

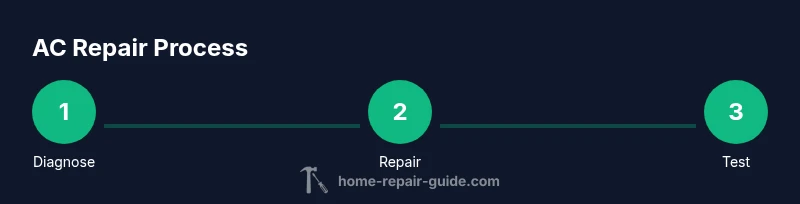
You will learn to safely diagnose and repair a c units at home, focusing on common AC issues, essential tools, and a step-by-step approach. This guide emphasizes safety, practical fixes, and when to hire a professional. By following the process, homeowners can restore airflow and comfort without unnecessary risk.
Understanding AC basics and safety
Air conditioners are intricate systems with several core components: the thermostat, indoor blower, evaporator coil, outdoor condenser, and refrigerant path. When you set out to repair a c units, the safest starting point is to power down at the breaker and use a lockout tagout if available. The Home Repair Guide team emphasizes safety first: never work on live electrical parts or exposed refrigerant lines. Start with low-risk tasks like replacing a dirty air filter and cleaning the outdoor condenser. These quick maintenance steps can resolve many comfort issues and prevent unnecessary repairs. Remember to document each inspection for future reference and to help a contractor if you must escalate.
Common faults and how they manifest
Most DIY fixes address airflow and control signals rather than refrigerant handling. If cooling is weak, check the air filter, condenser fins, and ductwork for clogs. If the system runs nonstop or cycles irregularly, thermostat calibration or wiring integrity could be the culprit. Unusual noises or buzzing often indicate loose components or failing capacitors; ice buildup on the evaporator coil signals airflow problems. Leaks near the indoor unit or condensate line can hint at drainage blockages or refrigerant concerns—note that refrigerant work requires licensed technicians. Home Repair Guide analysis shows that many homeowners successfully address these symptoms with basic maintenance, provided they avoid risky tasks.
Tools and materials you’ll need: essential checklist
Before you begin, assemble a basic toolkit and a short supplies list. A digital multimeter helps test voltage and continuity; a non-contact tester reduces exposure to live circuits. You’ll want a screwdriver set (Phillips and flathead) and a nut driver for fasteners. Replacement air filters, a coil-cleaning spray, and a soft brush for fins are useful for on-site cleaning. Safety gear—gloves and ANSI-rated safety goggles—protect you from sharp edges and refrigerant residue. If you’ll service the outdoor unit, have a scissor lift or sturdy ladder and a cleaning cloth for fin surfaces. Always consult your unit’s manual for part compatibility and avoid using tools that don’t fit a component. The Home Repair Guide recommendation is to gather the right tools to save time and reduce risk.
Diagnostic workflow: symptoms to fixes
A logical diagnostic flow helps you separate easy fixes from complex problems. Start by powering down and verifying the thermostat settings. Check the indoor air filter and replace if dirty. Inspect the outdoor condenser for debris and ensure the fan spins freely. Look for ice on the evaporator coil; if present, turn off the system and investigate airflow blockages. Test the thermostat wiring and ensure all connections are tight. If you hear buzzing from the control board or a failed capacitor, consider professional replacement—refrigerant handling and high-voltage work should not be attempted without training. Record findings as you go to track progress and prepare for future maintenance.
Safety and when to stop
If you encounter high voltage, refrigerant lines, or refrigerant leakage, stop immediately and call a licensed technician. Do not attempt to recover refrigerant or replace major components without proper training and licensing. Always use proper PPE, keep children and pets away from the work area, and ensure the unit is disconnected from power before touching wiring or electronics. If you’re unsure about a procedure, step back and consult a professional; the Home Repair Guide team advises conservative, safe action when dealing with electrical or refrigerant tasks.
Maintenance to prevent future failures
Prevention is better than repair. Schedule seasonal inspections to clean coils, clear debris from around the outdoor unit, replace air filters every 1-3 months, and verify thermostat accuracy. Maintain proper airflow by keeping ductwork sealed and vents unobstructed. A simple maintenance log helps you catch trends and plan replacements before they fail. By integrating these habits, you can extend the life of your AC and reduce the risk of costly breakdowns. The Home Repair Guide approach focuses on practical, repeatable steps that homeowners can perform safely.
Tools & Materials
- Digital multimeter(Tests voltage and continuity; select a model with temperature protection)
- Non-contact voltage tester(Safer method to verify live circuits)
- Screwdriver set (Phillips and flathead)(Assorted sizes (PH0-PH3, slotted 1/8 to 1/4 in))
- Nut driver set(For fasteners on panels and electrical connectors)
- Replacement air filters(Match filter size printed on existing unit)
- Coil-cleaning spray and soft brush(For evaporator coil cleaning if accessible)
- Safety gear (gloves, ANSI goggles)(Protect hands and eyes from sharp edges and debris)
- Ladder or stable step stool(Access outdoor unit safely; use on solid, dry surfaces)
- Fin comb or soft brush(Careful fins straightening if needed)
- Replacement capacitors/contactor kit(Only if you have model-specific parts and training)
Steps
Estimated time: 60-120 minutes
- 1
Power down and secure
Switch off the main breaker and the thermostat. If accessible, lock out the disconnect near the outdoor unit to prevent accidental energizing during service. This prevents electric shock and compressor damage while you inspect components.
Tip: Always test for voltage with a non-contact tester before touching wires. - 2
Inspect indoor air path and filter
Open the air handler access panel and remove the filter. Replace with a clean filter of the correct size. A clogged filter reduces airflow and causes the evaporator to ice up, which hampers cooling performance.
Tip: Hold the filter edges and slide out gently to avoid damaging the blower housing. - 3
Check outdoor condenser and fan
Clear debris from around the outdoor unit and inspect the condenser fins. If the fan spins freely when powered, the motor is likely functioning; if it’s stiff, the bearing may be failing. Clean with a soft brush and ensure no wires are snagged.
Tip: Only spray the fins from the outside inward; avoid bending fins with heavy pressure. - 4
Test thermostat wiring and controls
Revisit thermostat wiring to ensure tight connections and correct configuration. A mis-set thermostat can cause the unit to run erratically or fail to start. After verifying, re-seat connections and test the system.
Tip: If you’re unsure about wiring, consult the manual or take a photo before adjusting. - 5
Inspect electrical connections and capacitors
Look for loose or scorched wires at the control board, contactor, and capacitor. A weak or failed capacitor often causes a slow start or short cycling. If you suspect a faulty capacitor, do not discharge it with bare hands—use the proper insulated tools.
Tip: Capacitors store dangerous charge; handle with insulated tools and proper PPE. - 6
Evaluate refrigerant service needs
Refrigerant work requires licensed technicians. If you suspect a leak or low refrigerant, do not attempt refilling yourself; this can cause environmental harm and equipment damage. Note any signs of oil residue near fittings or copper lines.
Tip: Document location and symptoms; this helps a pro diagnose quickly. - 7
Run a test cycle and observe
Restore power and set the thermostat to cool. Listen for normal compressor operation and ensure air is delivering from registers. If the system runs but doesn’t cool effectively, recheck filters and airflow, and consider scheduling professional service.
Tip: Record the cycle times and temperatures to compare after maintenance. - 8
Document findings and plan next steps
Create a simple service log noting symptoms, actions taken, parts replaced, and results. This history helps you decide whether to perform future maintenance or hire a pro for complex repairs.
Tip: Keep the log accessible near the HVAC area for quick reference.
FAQ
Is it safe to attempt AC repair at home?
Yes for basic maintenance tasks like filter changes and coil cleaning, provided you follow safety steps and avoid high-voltage or refrigerant work. If you encounter refrigerant leaks, dangerous voltages, or unfamiliar components, stop and call a licensed technician.
Basic maintenance is safe if you follow safety steps and avoid refrigerant work. Call a pro for leaks or electrical issues.
When should I replace rather than repair?
Consider replacement when the system is old, energy-inefficient, or requires frequent repairs. A professional can provide a cost-benefit assessment based on age, efficiency, and available refrigerant options.
If your unit is old or unreliable, replacement may be more cost-effective than ongoing repairs.
Do I need specialized tools for DIY AC repair?
For basic fixes, standard tools plus a multimeter and a non-contact tester suffice. More advanced tasks, especially refrigerant work or capacitor replacement, require specialized training and should be left to professionals.
Basic tools are enough for simple fixes; refrigerant work needs a pro.
How long does a typical DIY AC repair take?
A straightforward maintenance task may take 30-60 minutes, while diagnosis and minor fixes can extend to 1-2 hours depending on access and safety checks.
Most basic fixes take under an hour, with longer diagnostics taking a bit more time.
What are common signs of refrigerant leaks?
Oil residue near copper lines, hissing sounds, or a drop in cooling efficiency can indicate a refrigerant leak. If you suspect a leak, contact a licensed technician.
Look for oil around lines or reduced cooling—call a pro if you suspect a leak.
Watch Video
Key Takeaways
- Identify safe, simple maintenance tasks before escalating repairs
- Use the right tools and protective gear to minimize risk
- Document observations to guide future maintenance
- Know when to call a professional for refrigerant or high-voltage work