AC Repair Trane: A Step-by-Step Home Guide
Learn to diagnose and safely repair common Trane AC problems with practical, step-by-step guidance. This Home Repair Guide tutorial covers essential tools, safety, maintenance, and when to call a pro for reliable comfort.

This guide helps homeowners diagnose and repair common issues on a Trane AC system, focusing on safe, practical steps, essential tools, and clear when-to-call-a-professional guidance. You'll learn to assess symptoms, check electrical components, inspect filters and outdoor coils, and perform basic maintenance to improve reliability. Follow the steps in this article to reduce downtime and extend your system's life.
Understanding the Trane air conditioning system and why it fails
Trane systems are a reliable cornerstone of many homes, combining a high-efficiency outdoor condensing unit with an indoor air handler or furnace. At the heart of most residential setups is a refrigerant loop, driven by a compressor and controlled by a thermostat. When something goes wrong, you often notice a symptom before you know the cause: insufficient cooling, strange noises, short cycling, or leaks. In this section, we explain how a typical Trane configuration works and why problems arise. According to Home Repair Guide, understanding the common components—compressor, condenser coil, evaporator coil, blower motor, capacitor, relay, and thermostat—helps you locate issues quickly and safely. A well-maintained Trane system not only cools more effectively but also lasts longer and uses energy more efficiently. The home environment (ambient temperature, humidity, air flow) and the system's age interact with component wear. If you’re new to HVAC, start with safety basics: always disconnect power at the breaker and use a non-contact tester to confirm there’s no voltage before touching wires. This mindset prevents shocks and accidental start-ups that can injure you or damage equipment. According to Home Repair Guide, proactive maintenance now saves headaches later.
Diagnosing symptoms and root causes in a Trane system
Common symptoms—air not cooling as expected, cycles on and off rapidly, or loud rattling sounds—often point to a few root causes. A dirty filter or blocked return duct reduces airflow, making the compressor work harder and triggering short cycling. A failing capacitor or relay can prevent the outdoor unit from starting, causing a brief hum and then silence. Leaking refrigerant silently degrades cooling performance and can cause coils to frost over; do not attempt to add refrigerant yourself. In all cases, start with the basics: verify thermostat settings, check for tripped breakers, and view outdoor unit for visible damage. The Home Repair Guide team notes that pattern recognition—linking symptom clusters to likely components—speeds up diagnosis and reduces unnecessary parts replacement. Keep a simple log of symptoms, sounds, and when they occur to help a technician if you need professional help later.
Safety-first: preparing for any Trane repair task
Safety should guide every DIY repair plan. Disconnect power to the system at the main breaker, then lock it out if possible. Use a non-contact voltage tester to confirm there is no live current before touching wires. Wear protective eyewear and insulated gloves, and avoid working in wet conditions. Keep the work area clear of pets and children, and never bypass a safety switch or fuse to test operations. If you smell burnt insulation or notice melted wires, stop immediately and seek professional assistance. Home Repair Guide emphasizes that many Trane repairs involve high voltage, refrigerant handling, or pressurized components—areas where mistakes can be dangerous and costly. When in doubt, err on the side of caution and call a licensed HVAC technician.
Tools, parts, and safety gear you’ll typically need
A well-curated toolkit reduces repair time and protects you from mistakes. You’ll need a digital multimeter, a non-contact voltage tester, insulated screwdrivers, a nut driver, and a cordless drill for panel removal. Safety gear includes safety glasses and insulated gloves. For common Trane issues, carry a few replacement capacitors with the same microfarad rating as the original, a compatible contactor if applicable, wire nuts, electrical tape, and a soft brush or cloth for delicate cleaning. A vacuum cleaner helps remove debris around the outdoor unit and blower housing. If you’re unsure about exact ratings or models, consult the service data for your specific Trane unit before buying parts. The Home Repair Guide team recommends keeping spare fuses or circuit breakers matching your system’s rating on hand, and always disposing of old parts in accordance with local regulations.
Step-by-step diagnostic approach (overview)
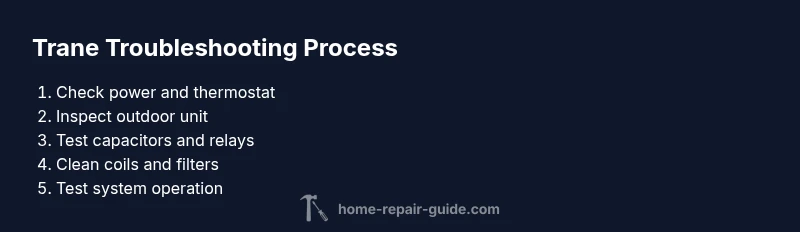
This section provides a high-level map of the diagnostic flow you’ll follow when troubleshooting a Trane AC. Start with safety, then verify basic electrical power and thermostat operation. Inspect the outdoor unit for obstructions, debris, and visible damage to the coil and fan. Test capacitors and relays with a multimeter, and inspect contactors for pitting or wear. Check air filtration and ductwork for blockages that impede airflow. Finally, reassemble with careful wiring, restore power, and observe the system through a complete cycle. If the unit still won’t start, or if you detect refrigerant issues, contact a licensed technician. The goal is to identify the likely cause and decide whether a simple part swap or a full replacement is warranted.
Cleaning and preventive maintenance for better performance
Regular maintenance improves efficiency and extends the life of a Trane system. Clean or replace filters every 1-3 months during peak use, depending on household factors. Use a soft brush to remove dust from blower blades and internal housing, and gently clean the outdoor condenser coils with a spray bottle of water and coil cleaner. Clear vegetation and debris from the outdoor unit’s vicinity to maximize airflow. Schedule seasonal checks for refrigerant levels, electrical connections, and thermostat functionality. Home Repair Guide suggests documenting maintenance tasks in a calendar to track wear patterns and plan replacements before failure occurs.
When to call a professional and what to expect
Some tasks should always be handled by licensed HVAC technicians: refrigerant handling, electrical work beyond basic inspection, and diagnosing compressor failures that may involve significant pressure systems. If you notice persistent short cycling, ice formation on coils, a burning smell, or if your unit is more than a decade old, arrange a professional inspection. Expect a diagnostic visit to include system pressure checks, electrical testing, and a written estimate for repairs or replacement. The Home Repair Guide team notes that reputable technicians will explain options, show findings, and provide safety assurances before proceeding. Having your maintenance records ready can speed up the process and improve parts compatibility.
Energy efficiency considerations and long-term care
A well-maintained Trane AC not only cools more effectively but also uses less energy. Small choices—like keeping filters clean, sealing ducts, and opening vents in unused rooms—can yield meaningful efficiency gains. Consider upgrading to a high-efficiency model if your current system is aging, as newer Trane units often include better SEER ratings and smarter thermostats. The Home Repair Guide analysis highlights that proactive maintenance and timely part replacements preserve efficiency and prevent expensive emergency repairs. Pair your repair plan with a simple maintenance schedule to protect your investment over time.
Common DIY mistakes to avoid with Trane systems
A common pitfall is bypassing safety features to test the system, which can cause electric shock or equipment damage. Avoid mixing refrigerants or attempting to recharge a sealed system without proper certification; this is illegal in many regions and dangerous. Don’t guess about capacitor or contactor values—use the exact ratings from your service data. Misidentifying wires or leaving panels loose can create fire hazards. If you sense refrigerant leaks, do not seal or patch them; leaking refrigerant requires professional remediation. Following a structured, careful plan protects you, your home, and your Trane unit.
Final considerations: planning for the season ahead
Preparing ahead saves you time, money, and frustration when the heat waves hit. Build a simple seasonal maintenance checklist, keep essential parts in your toolkit, and schedule annual inspections. Mark down warning signs like unusual noises, reduced cooling, or increased energy bills so you can address issues early. As you plan, remember that reliability comes from a mix of proper installation, routine maintenance, and knowing when to bring in a pro. The Home Repair Guide team encourages homeowners to stay proactive and informed, ensuring a comfortable and efficient home year after year.
Tools & Materials
- Multimeter(Digital model with current/voltage and microfarad testing capability)
- Non-contact voltage tester(Verify power-off status before touching wires)
- Insulated screwdriver set(Phillips and flathead, insulated for safety)
- Nut drivers and socket wrench(For panel screws and disconnects)
- Electrical tape and wire nuts(Secure connections and label wires)
- Soft brush and cloth(Gentle cleaning of blower and coils)
- Vacuum with brush attachment(Remove debris around outdoor unit and blower housing)
- Coil cleaner and water spray bottle(Outdoor coil cleaning; use non-corrosive cleaner)
- Replacement capacitor (same rating)(Carry spares for common Trane configurations)
- Replacement contactor (if applicable)(Only if your model requires it and you can identify ratings)
- Replacement fuses/cuse brakes(Match amperage and type; non-standard fuses can cause damage)
- Service data/manual for your Trane model(Model-specific diagrams and ratings)
Steps
Estimated time: 90-150 minutes
- 1
Power down and verify safety
Shut off the main breaker for the AC unit, then use a non-contact tester to confirm no live voltage on outdoor and indoor disconnects. This prevents electric shock and accidental compressor startup while you work.
Tip: Label the switches and take a quick photo before you start. - 2
Inspect the outdoor unit
Clear debris, leaves, and grass from the condenser area. Visually inspect the fan and motor for damage or wobble. A blocked coil reduces efficiency and can cause overheating.
Tip: Use a light brush to remove surface dust without bending fins. - 3
Check the air filtration and duct access
Inspect the return filter and ductwork for blockages. A clogged filter reduces airflow and forces the system to work harder, leading to higher energy use and potential coil freezing.
Tip: Replace disposable filters and note any recurring dust issues in your home. - 4
Test capacitors and relays
With the power still disconnected, discharge capacitors safely and test with a multimeter for proper microfarad reading and resistance. Replace any weak or swollen capacitors and inspect relays for pitting or burning.
Tip: Always replace paired components if one shows wear. - 5
Inspect contactors and wiring
Open the contactor connections and check for signs of corrosion or burned wires. Tighten screws and replace any damaged wiring or terminal blocks as needed.
Tip: Take a photo of wiring before disconnecting to ensure accurate reassembly. - 6
Check refrigerant lines (visual inspection only)
Look for oil residues indicating leaks near line insulation. Do not open or attempt to recover refrigerant; DIY work on sealed systems should be avoided and left to licensed techs.
Tip: If you see oil or frost on lines, plan for a professional leak search. - 7
Clean coils and reassemble
Carefully clean the outdoor condenser coil and indoor blower area. Reassemble panels, restore power, and run through a full cycle to observe performance and cycling behavior.
Tip: Document each step to track parts and wear signs over time.
FAQ
Can I legally recharge refrigerant in a residential Trane unit by myself?
Recharging refrigerant is hazardous and typically illegal without proper certification. It should be performed only by a licensed HVAC professional with approved recovery equipment.
Recharging refrigerant requires credentials and proper equipment; it's not a do-it-yourself task in most places.
What are the most common signs of capacitor failure on a Trane AC?
Common signs include the unit failing to start, a clicking sound, short cycling, or warm air despite power to the system. A weak capacitor may show visible swelling or leakage.
If your unit won’t start or cycles oddly, a capacitor could be the culprit. A professional can confirm with testing.
When should I replace instead of repair my Trane system?
If failures are frequent, spare parts are scarce or expensive, or the system is older and less energy-efficient, replacement may be more cost-effective in the long run.
If repairs keep piling up and efficiency is dropping, it may be time to replace.
Do I need to evacuate refrigerant before DIY work?
Yes. Refrigerant work requires certified technicians and specialized equipment. DIY attempts can be dangerous and illegal.
Refrigerant work is not for DIY; it requires a licensed pro.
What basic tools should I have to start diagnosing a Trane system?
A digital multimeter, non-contact voltage tester, insulated screwdrivers, and a few spare fuses are good starting points for safe diagnostics.
Start with a multimeter and a tester to safely diagnose basic issues.
How can I tell if it’s worth repairing an old Trane unit?
Evaluate the age, repair frequency, and energy efficiency. If maintenance costs approach replacement costs, upgrading to a newer model is often wise.
If repairs keep piling up and efficiency is down, think about replacement.
Watch Video
Key Takeaways
- Identify probable causes from symptoms before parts swapping.
- Power safety is non-negotiable for all repairs.
- Capacitors and contactors are common failure points in Trane units.
- Maintain filters and airflow to improve efficiency.
- Know when to call a pro and what to expect in a service visit.