AC Condenser Repair: A Step-by-Step Home DIY Guide
Learn safe, practical methods for diagnosing and cleaning your outdoor AC condenser. This Home Repair Guide tutorial covers tools, steps, safety, and when to hire a pro for refrigerant or major electrical work.

This guide helps you safely diagnose and clean an outdoor AC condenser, inspect electrical connections, and determine when professional service is needed. You’ll learn essential safety practices, the right tools, and a clear sequence of actions to improve efficiency without risking refrigerant handling or electrical hazards.
Understanding AC Condenser Repair: What It Is and Why It Matters
The air-conditioning condenser is the outdoor unit that ejects heat from your home. When it functions poorly, you’ll notice reduced cooling, higher energy bills, or unusual sounds. According to Home Repair Guide, proper condenser maintenance is a practical way for many homeowners to extend unit life and keep energy use in check. In this guide you’ll learn why the condenser matters, common failure modes, and safe, conservative approaches to basic maintenance that avoid unsafe repairs or refrigerant handling.
Safety First: Power Down, PPE, and Hazards
Any condenser work should start with safety. Power must be off at the breaker and the disconnect near the outdoor unit should be opened and verified. Wear eye protection and non-slip gloves, and keep children and pets away from the work area. Home Repair Guide analysis shows that most DIY mistakes stem from underestimating electrical hazards or skipping step-by-step checks, so pause if anything feels uncertain.
Tools, Materials, and Workspace Preparation
Gather the following essentials before you begin: safety glasses, gloves, a soft brush, a coil-cleaning spray designed for condensers, a low-pressure garden hose, a screwdriver set, a non-contact voltage tester, and a flashlight. Keep the outdoor unit clear of debris and ensure you have a stable workspace. If you encounter damaged fins or a bent coil, consider professional repair rather than forcing a fix.
Diagnosing Common Outdoor Condenser Problems
Start by inspecting the outdoor unit for loose debris, leaves, and dirt that impede airflow. A dirty coil reduces efficiency and can cause the compressor to work harder. Listen for odd fan noises and check that the condenser fan spins freely without rubbing. Look for signs of moisture or oil around electrical connections, which can indicate a problem that requires professional attention. Home Repair Guide’s research emphasizes that addressing airflow and obvious obstructions yields tangible performance gains and reduces energy waste.
Maintenance vs. Major Repair: What You Can Do Safely
Many condenser issues are solvable with cleaning and tightening connections, but refrigerant leaks, compressor faults, and refrigerant handling require licensed technicians. If you detect a refrigerant smell, oily residue on lines, or a persistent leak, stop work and call a pro. For minor maintenance, clean coils, trim nearby vegetation, replace or wash the air filter, and schedule seasonal checks to keep the system running efficiently.
Maintenance Schedule and Long-Term Care
Create a simple calendar for seasonal checks: clean coils in spring and fall, replace filters every 1–3 months depending on use, and keep the area around the outdoor unit free of plants, grass, and clutter. Clean coils are less prone to overheating and can extend the life of the condenser and compressor. Regular maintenance helps you avoid sudden breakdowns and keeps energy costs down.
Troubleshooting Quick Reference
If the unit isn’t cooling well, start with airflow checks, coil cleanliness, and verifying electrical connections. If you notice warm air coming from the supply, verify that the thermostat is set correctly and that there are no airflow blockages inside the house. When in doubt about electrical safety or refrigerant, consult a licensed HVAC technician.
Tools & Materials
- Safety glasses(ANSI Z87.1 compliant eyewear.)
- Work gloves(Non-slip, cut-resistant if possible.)
- Soft brush or coil brush(For gentle coil cleaning.)
- Coil-cleaning spray(Use a product rated for condenser coils.)
- Low-pressure garden hose(Avoid high pressure to prevent fins damage.)
- Screwdrivers (Phillips and flathead)(For opening panels safely.)
- Non-contact voltage tester(Verify power is off before touching wires.)
- Flashlight(For shaded areas behind the unit.)
Steps
Estimated time: 1 hour 15 minutes
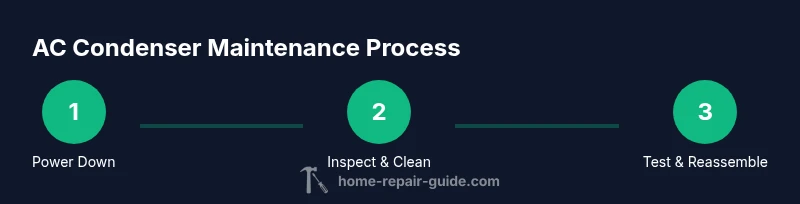
- 1
Power down and verify no power
Turn off the outdoor unit at the home’s breaker panel and use a non-contact tester to confirm there is no voltage at the disconnect. This prevents electrical shock while you inspect the unit and access components.
Tip: Double-check the main breaker and the outdoor disconnect switch. - 2
Remove the outer cover and inspect for debris
Carefully remove the condenser’s access panel to inspect for leaves, dirt, and other debris blocking airflow. Remove loose debris by hand and use a brush to dislodge stubborn particles.
Tip: Do not pry with metal tools that could bend fins. - 3
Clean the condenser coils gently
Spray the coils with a coil-cleaning spray following the product directions. Rinse lightly with a low-pressure hose from the inside of the coil outward to avoid forcing debris into the system.
Tip: Keep water away from electrical components and fan motor. - 4
Check the condenser fins and fan
Inspect the fins for bending and straighten with a fin comb if needed. Ensure the condenser fan blade spins freely without rubbing and that there are no visible cracks or damage.
Tip: If the fan is visibly damaged, arrange professional repair rather than DIY fixes. - 5
Inspect electrical connections and the contactor
Look for loose wires, scorch marks, or melted insulation near the power wires and the contactor in the disconnect box. Do not loosen live connections; only visually inspect and address obvious issues with power removed.
Tip: If you’re unsure about wiring, stop and call a pro. - 6
Reassemble, restore power, and test
Replace the cover, restore power, and run the system for 5–10 minutes to observe airflow and fan operation. Listen for unusual noises and check for warm air or short cycling.
Tip: Take photos of any existing wiring before reassembling for reference. - 7
Evaluate the need for professional service
If the unit still underperforms after inspection and cleaning, or you notice refrigerant smells, oily residue, or odd noises, contact a licensed HVAC technician for a detailed evaluation.
Tip: Do not attempt refrigerant handling on your own.
FAQ
Can I repair an AC condenser myself?
You can perform safe, basic maintenance like cleaning coils and clearing debris. Refrigerant handling or major electrical problems require a licensed HVAC technician.
DIY work is okay for cleaning, but refrigerant and major electrical issues should be handled by a pro.
Is cleaning the condenser coil safe for most homeowners?
Yes, as long as you power down, use gentle tools, and avoid high-pressure water near electrical components.
Coil cleaning is safe if you follow safety steps and avoid hitting electrical parts with water.
What tools do I need for condenser maintenance?
A soft brush, coil-cleaning spray, low-pressure hose, screwdrivers, a voltage tester, and safety gear are enough for basic maintenance.
You’ll need a soft brush, coil spray, a gentle hose, and basic tools to start.
How can I tell if there’s a refrigerant leak?
Look for oily residue on lines, hissing sounds, frost on lines, or a drop in cooling performance. If you suspect a leak, call a pro.
Oil on lines or hissing noises often indicates a leak; call a technician to confirm.
How often should I perform condenser maintenance?
Aim for a seasonal check—spring and fall—and replace filters as recommended by the manufacturer.
Do a quick check each season and replace filters regularly.
Watch Video
Key Takeaways
- Power down and verify safety before any inspection.
- Clean coils and remove debris to restore efficiency.
- Do not handle refrigerant or perform major electrical work yourself.
- Schedule seasonal maintenance to extend condenser life.
- The Home Repair Guide team recommends following these steps and consulting a licensed pro when in doubt.