Scratch Repair Car: A Practical Step-by-Step Guide
Learn to repair car scratches safely with practical, DIY-friendly steps. Assess depth, choose the right method, and finish with protective wax to keep your finish looking great.

Goal: repair car scratches safely using DIY methods or professional help when needed. This guide helps you assess depth, choose the right repair path (clear-coat touch-up, paint touch-up, or a pro repair), and perform the fix with confidence. Gather rubbing compound, color-matched paint, clear coat, masking tape, microfiber cloths, gloves, and car soap. According to Home Repair Guide, proper prep prevents costly mistakes.
Understanding Scratch Depth and Repair Options
Scratch depth is the key to choosing a repair approach. In automotive finishes, most scratches sit in the clear coat, while deeper gouges may penetrate the paint or primer. The Home Repair Guide team emphasizes starting with a careful assessment of depth, location, and color disruption. If a scratch only dulls the clear coat, you can often restore gloss with a targeted polish and a protective sealant. If the color layer is damaged, you’ll need a color-matched touch-up and possibly a thin clear-coat layer to rebuild the gloss. Deep scratches that expose metal or primer usually require professional repair or a paint-and-clear-coat job for lasting durability.
Assessing Scratch Depth, Location, and Color Match
To determine depth, gently run your fingernail across the scratch. If your nail catches, the damage likely penetrates the paint layer; if not, it’s probably a clear-coat defect. Check multiple points on the panel to see if the scratch changes color or feels rough. A color-disruption signal suggests the base color is exposed and will require color-matched paint. Location matters too: scratches near edges or corners may require more attention to masking and alignment when finishing.
Prep Work: Cleaning, Masking, and Surface Conditioning
Begin by washing the area with a car-safe soap to remove dirt that could cause scratches during repair. Rinse, dry with a microfiber cloth, and inspect for contaminants. Tape off surrounding panels with masking tape to define the work area. If the surface feels rough after washing, lightly use a clay bar or polishing cloth to refine the finish before applying any repair products.
DIY Methods for Light/Clear Coat Scratches
For light marks that only affect the clear coat, start with a fine-grade rubbing compound. Apply a small amount on a microfiber pad and buff with slow, circular motions for 30-60 seconds. Wipe away residue and assess. If the gloss returns, you’re done; follow with a dedicated polish and wax. If not, move to more advanced techniques or consider professional help.
DIY Methods for Deeper Paint Scratches (With Caution)
When color is missing, apply a thin layer of color-matched touch-up paint using a fine brush. Apply in very light coats, allowing each coat to dry before adding the next (typically 15-30 minutes depending on product). After color matches, apply a clear coat and allow to cure fully per product instructions. Do not overbuild paint; sanding and polishing mistakes are hard to reverse.
Selecting Paint and Materials: Matching Color Codes Safely
Color matching starts with finding the vehicle’s paint code, usually on the door jamb or under the hood. Compare the code against the manufacturer chart and choose a paint type (base coat, enamel, or lacquer) compatible with your vehicle. Test color on an inconspicuous area and adjust with a tint if necessary. Use a tiny brush to apply the paint in ultra-thin layers to avoid pooling. Always work in a dust-free environment.
Application, Drying, and Finishing: Layering, Buffing, and Protecting
Patience is essential. After applying the color and clear coats, allow sufficient drying time per product instructions. Lightly buff the area with a clean microfiber to blend edges. Finish with a wax or sealant to protect the repaired area from UV and environmental damage. Inspect under different lighting to confirm a uniform finish.
Troubleshooting Common Mistakes and Maintenance
Common mistakes include rushing the paint between coats, skipping masking, and using an abrasive that’s too aggressive. If you see pigment mismatch or orange-peel texture, you may need to recoat with thinner layers or consult a professional. Regular maintenance with wax helps preserve the repair and resale value.
Tools & Materials
- Car wash soap(pH-balanced, non-wax formula)
- Microfiber wash mitt(for safe cleaning)
- Masking tape(3M painter's tape or equivalent)
- Rubbing compound(fine grade, non-abrasive for clear coat)
- Polishing compound(restores gloss after compounding)
- Color-matched touch-up paint(for color scratches)
- Fine brush or applicator(for precision paint application)
- Clear coat(optional layer after paint match)
- Gloves(nitrile or latex)
- Safety glasses(eye protection)
- Dry microfiber cloths(for wiping and finishing)
- Wax or sealant(UV protection after repair)
Steps
Estimated time: 60-120 minutes
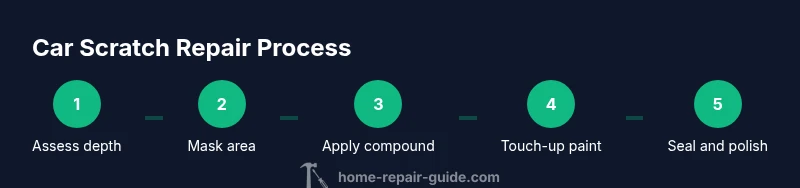
- 1
Assess scratch depth and repair path
Evaluate depth by fingernail test and note color disruption. Decide if you’ll use clear-coat polish, color-match touch-up, or a professional repair for deep gouges.
Tip: If depth is uncertain, start with the least invasive method to avoid unnecessary material build-up. - 2
Wash and dry the area
Clean the area thoroughly to remove dirt that could cause further scratches. Dry with a microfiber cloth and inspect for remaining contaminants.
Tip: Work in shade to prevent quick drying and uneven results. - 3
Mask surrounding panels
Apply masking tape to define the repair area and protect adjacent paint from overspray or compound transfer.
Tip: Press tape down firmly to prevent edge lifting during polishing. - 4
Buff clear-coat scratches with rubbing compound
Apply a small amount on a microfiber pad and buff in circular motions for 30-60 seconds. Wipe clean and reassess.
Tip: Use light pressure and consistent motion to avoid creating new scratches. - 5
Apply color-matched touch-up paint (if needed)
Apply in ultra-thin coats, allowing 15-30 minutes between layers. Build to match color without pooling.
Tip: Less is more; multiple thin layers look better than one thick layer. - 6
Apply clear coat and cure
After color matches, apply a thin clear coat over the repaired area and let cure per product instructions.
Tip: Avoid touching the finish during curing to prevent fingerprints or dust adhesion. - 7
Buff and blend edges
Gently buff with a clean cloth to blend edges with surrounding paint; remove any halos or edges.
Tip: Don’t over-buff; you can dull surrounding clear if you press too hard. - 8
Protect with wax/sealant
Finish with a wax or sealant to seal UV exposure and restore gloss, extending durability.
Tip: Re-wax every 3-4 months for best protection.
FAQ
Is it worth trying DIY scratch repair on my car?
DIY repair can be cost-effective for minor scratches if you have the right tools and follow steps carefully. For uncertain depths or large areas, professional services may offer better durability.
DIY repair can save money for small scratches, but for deep or complex damage, professional help is often safer.
How can I tell if a scratch goes through the clear coat or the paint?
If a fingernail catches, the scratch may penetrate the paint. No catch usually indicates clear-coat damage. Always test at multiple spots and check for color disruption.
If your nail catches, it may be paint; otherwise, it might be the clear coat.
What products work best for DIY scratch repair?
A fine rubbing compound, a polishing compound, and color-matched touch-up paint (when needed) are common. Finish with a clear coat and wax for protection.
Use rubbing compound, polish, and touch-up paint when needed, then seal with clear coat and wax.
How long does a scratch repair take?
Expect 60 to 120 minutes for a typical light to mid-depth scratch, plus extra time for multiple coats or curing delays.
Most DIY repairs take about an hour or two, depending on depth and coats.
Can I skip masking and still fix the scratch?
Masking helps prevent overspray and edge damage. Skipping it increases the risk of damaging adjacent paint and creating swirl marks.
Masking is important to protect nearby areas and keep the repair clean.
What should I do if the color doesn’t match after repair?
If color is off, avoid additional layers that could worsen the mismatch. Seek a professional color match or panel repaint for best results.
If color doesn’t match, don’t overcoat. Consider a professional repaint for best results.
Watch Video
Key Takeaways
- Assess depth before choosing a repair path.
- Mask and prep the area to prevent collateral damage.
- Thin coats and proper curing prevent color mismatch.
- Finish with wax to protect the repair.
- Seek professional help for deep or uncertain damages.