Can You Fix a Keyed Car? A Practical Home Repair Guide
Discover practical steps to assess and repair a keyed car scratch at home, plus safety tips and cost estimates from Home Repair Guide for homeowners.

You can address minor keyed-car scratches at home with a guided DIY process: assess the damage, clean, remove oxidation, apply touch-up paint, and seal. For deep gouges or dents, consult a pro. Gather materials, work in a shaded area, and document the damage for insurance and records.
Understanding keyed car damage and what you can expect
Keyed car damage ranges from superficial surface scratches to deep gouges that expose primer or bare metal. If you’re asking can you fix if someone keys your car, the answer depends on scratch depth, paint color complexity, and your DIY comfort level. According to Home Repair Guide, most homeowners can start with a careful assessment and basic polishing to improve appearance, but not all damage will be seamless. The most important first step is to manage expectations: a shallow scratch is usually reversible with polishing and touch-up work; a deep scratch may require repainting a panel and blending into adjacent areas to avoid color mismatches. Throughout this process, you’ll learn how to document the damage for insurance or possible police reports, a useful step even if you ultimately hire a professional for the repair.
Assessing the damage and prep work
Before you pick up tools, take a clear look at the damage under good lighting. Determine whether the scratch is superficial (only the clear coat) or penetrates color and primer. If the metal is exposed, moisture can speed corrosion, so work promptly but carefully. The Home Repair Guide analysis shows that the decision to DIY or hire a pro hinges on depth, panel location, and color complexity. Begin with a thorough wash to remove grit, then dry with a clean microfiber cloth. Wear safety gear as needed, and mask surrounding areas to protect them during touch-up. If the area is large or involves complex curves, it may be wiser to consult a professional for a precise color match and blending.
DIY vs pro: deciding your approach
DIY repairs work best for small, shallow scratches with a straightforward color match. If the scratch is wide, metallic, or covers multiple layers of paint, the color blending becomes tricky, and mistakes are hard to hide. The Home Repair Guide team recommends evaluating the risk of visible repair lines versus the cost and time of a professional job. If the damage is on a high-visibility panel or you’re uncomfortable with paint application, saving time and frustration by hiring a body shop or mobile technician is a sensible choice. Insurance considerations also factor in, especially if vandalism coverage is applicable to your policy. Always test your materials on an inconspicuous spot first to gauge color and texture compatibility.
Quick reference workflow for minor scratches
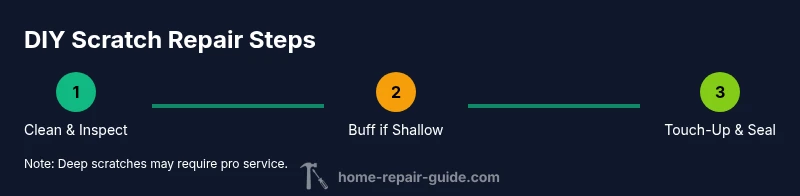
For most homeowners handling a minor scratch, a structured workflow helps you stay organized and reduce repeat trips to the store. Start with cleaning the area and inspecting the scratch depth, then move to gentle buffing for shallow marks. If color is slightly off, apply a thin layer of color-matched touch-up paint in multiple light coats, allowing each coat to dry before the next. Finish with a clear coat and a final polish to restore gloss and provide protection from the elements. This high-level approach minimizes risk while giving you a tangible improvement in appearance, and it leaves room for escalation if the scratch proves more stubborn than expected.
Tools & Materials
- Microfiber cleaning cloth(For gentle cleaning and buffing)
- Car wash soap and water(Mild soap; avoid household cleaners)
- Rubbing compound or polishing compound(For shallow scratches and dullness)
- Automotive touch-up paint (color-matched)(Match your car color code; test on inconspicuous area)
- Clear coat (small bottle)(Seal the touch-up and restore gloss)
- Fine brush or applicator(Precise paint application)
- Painter's tape(Mask surrounding areas)
- Fine-grit sandpaper (2000-3000 grit)(Lightly smooth edges for color blending)
- Masking gloves(Protect skin during chemical use)
- Isopropyl alcohol(Prep surface and remove oils)
- Safety goggles(Eye protection during sanding and polishing)
Steps
Estimated time: 2-5 hours
- 1
Prepare workspace and inspect
Park in shade, lay down a clean cloth to protect the panel, and gather all materials. Remove loose debris and rinse the area with mild soap and water. Dry thoroughly before starting to avoid trapped moisture that can affect adhesion.
Tip: Take photos before you start for insurance records. - 2
Clean and dry the scratched area
Wash around the scratch to remove wax, oils, and dirt. Wipe with isopropyl alcohol to decontaminate the surface. This ensures color and texture stay true during repair.
Tip: Use a fresh microfiber cloth for the final wipe to avoid reintroducing residues. - 3
Assess depth and color match
Check if the scratch is only in the clear coat or if it penetrates the color layer. Confirm the color code from the door jamb sticker and test color on a hidden area. If color is significantly off, plan for targeted touch-up rather than full panel repaint.
Tip: If you’re unsure, err on the side of conservative, thin layers. - 4
Buff shallow scratches
Apply a small amount of rubbing compound to a foam pad and gently buff the scratched area in a circular motion. Check often so you don’t overheat the surface or create haze.
Tip: Keep the pad cool and use light pressure to avoid removing too much paint. - 5
Apply color-matched touch-up paint
Using the fine brush, apply a thin coat of color-matched paint directly into the scratch. Allow each coat to dry fully before applying the next. Build up slowly until the layer is level with the surrounding paint.
Tip: Apply in several ultra-thin coats rather than one thick layer. - 6
Seal with clear coat and polish
Once the color is dry, apply a clear coat in thin layers. After curing, buff gently with a polishing compound to restore gloss and blend edges with the surrounding paint.
Tip: Let the finish cure fully in a dust-free environment before washing the car.
FAQ
Can I fix a deep scratch myself?
Deep scratches that expose primer or metal are hard to blend and may remain visible. DIY attempts can worsen match quality. In many cases, professional repainting yields a cleaner, longer-lasting result.
Deep scratches often need a professional repaint for the best result.
Is color-matching paint crucial for a good repair?
Yes. A precise color match minimizes noticeable difference after repair. Use the car’s color code and test on an inconspicuous area before committing.
Color matching is essential for a seamless repair.
When should I avoid DIY and get a pro?
If the scratch is wide, there’s metal showing, or you lack proper tools and ventilation, consider a pro to ensure color accuracy and proper bonding.
If it’s severe or tricky, hire a professional.
Will insurance cover keyed car damage?
Some policies cover vandalism damage. Check your deductible and policy terms, and contact your insurer for a claim if applicable.
Check with your insurer about vandalism coverage.
How long does a DIY repair last?
Longevity varies with technique and exposure. A careful touch-up can last months to a year, but sun and weather affect durability.
Results can last months to a year with proper care.
Watch Video
Key Takeaways
- Assess damage before acting.
- Color match is critical for a seamless repair.
- Deep scratches may require a professional paint job.
- Document the damage for insurance and records.
- Seal and protect after repair with a clear coat.