Repair Pool Liner: A Practical DIY Patch Guide
Learn how to repair a vinyl pool liner with patches and adhesives, extend its life, and avoid full replacement. Step-by-step guidance, tools, tips, and safety notes for homeowners and renters.

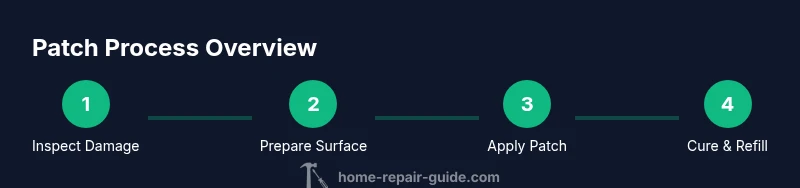
You can repair a vinyl pool liner with a patch kit designed for pool vinyl. Immediate patching slows leaks and extends life. Start by draining and drying the area, cut a patch with extra margin, apply adhesive, press the patch firmly, and allow curing before refilling. For large tears or worn seams, replacement may be necessary.
Why repair pool liner matters
A damaged vinyl pool liner is a common problem; learning how to repair pool liner safely is essential. According to Home Repair Guide, timely, properly executed repairs can extend the liner's life and delay the cost of full replacement. The most frequent issues are punctures from toys or sharp objects, seam separations, and wrinkles that trap water or debris. Understanding the type of damage helps you choose the right fix and avoid unnecessary replacement. This guide focuses on practical, affordable repair strategies you can perform yourself, plus when it's wiser to replace the liner entirely.
Types of damage you can repair
Vinyl pool liners commonly suffer punctures, tears, seam separations, and edge wear. Punctures are usually small and can be sealed with a vinyl repair patch; tears may require a larger patch or patch along the seam; seam separations may need reinforcing patches or resealing with compatible adhesive. Wrinkles and sags often occur when the liner is stressed or improperly installed, and they can make leaks worse if left unchecked. Knowing the damage type helps you select the correct patch size, adhesive, and technique to restore watertight integrity.
Patch materials and compatibility
Choose a patch kit designed specifically for vinyl liners and pool-use adhesives. Look for patches that are slightly larger than the damaged area and compatible with your liner color and thickness. Some kits include self-adhesive patches; others require a liquid or brush-on adhesive. Always read the product instructions for cure times and surface prep. Keep in mind that patches work best for small to mid-sized punctures and isolated tears, while larger or multiple tears may necessitate a liner replacement.
Safety, prep, and surface readiness
Safety comes first: wear gloves and eye protection when handling chemicals and adhesives. Drain the area around the damage enough to work comfortably, but avoid fully collapsing the water level if you’re patching near the waterline. Clean the surface with isopropyl alcohol and a clean rag until it’s completely dry. Remove any sharp debris or rough edges around the damaged area to prevent new punctures. Mark the patch area to ensure precise placement, and ensure the surrounding surface is flat to avoid air pockets.
Patch technique: applying patches (patch-in)
Patch application should be deliberate and clean. Cut a patch larger than the damaged area, round the corners to prevent peeling, and apply the adhesive evenly to the patch and the liner surface. Press the patch firmly, starting from the center and working outward to push out air bubbles. Use a brayer or clean roller to ensure full contact and remove trapped air. Allow the patch to cure per the manufacturer’s recommended time, typically several hours. Recheck the area for air pockets or misalignment after the initial cure.
Wrinkles, bulges, and large tears
Wrinkles may indicate tension near the patch; you may need to smooth the liner by releasing water behind the wrinkle and re-pressing the patch. For large tears or worn seams, a patch along the length of the seam or a wider reinforcement may be necessary. If the patch cannot cover the tear with overlap enough to secure a watertight seal, consider replacing that section of the liner or consulting a professional for a seam repair. Always cure times before refilling the pool to avoid compromised adhesion.
Maintenance tips to extend liner life
Maintain proper chemical balance to reduce liner degradation, avoid sharp objects near the pool perimeter, and inspect the liner monthly for signs of wear. Keep pool toys and tools from corners and edges where punctures commonly occur. Store patch kits and adhesives in a cool, dry place away from children and pets. Regular brushing and cleaning around the liner can prevent buildup that leads to accelerated wear.
AUTHORITY SOURCES
For reliable guidance on pool safety, maintenance, and best practices, consult reputable sources: • https://www.cdc.gov • https://www.epa.gov • https://www.osha.gov
Tools & Materials
- Vinyl pool liner patch kit(Patch material, adhesive, and backing patch designed for vinyl liners; choose patches slightly larger than the damaged area)
- Utility knife(Sharp blade for trimming patches and excess material)
- Scissors(For precise patch sizing and trimming corners)
- Isopropyl alcohol (70% or higher)(Cleans and dries the patch area; ensure surfaces are dry before patching)
- Clean rags(Use multiple clean towels to dry and wipe the surface as you work)
- Measuring tape(To measure puncture or tear, ensuring patch has proper overlap (1-2 inches))
- Gloves(Protect hands from chemicals and adhesive fumes)
- Pressure roller or brayer(Helps remove air bubbles for a tight seal)
- Marker or chalk(Marks patch outline or alignment)
Steps
Estimated time: 60-180 minutes
- 1
Assess damage and gather materials
Inspect the damaged area to determine patch size and type of repair needed. Gather all tools and materials before starting to minimize interruptions.
Tip: Double-check patch size against the damage to avoid undersizing. - 2
Drain and dry the patch area
Partially drain around the damage if necessary to expose a dry, stable surface. Wipe with isopropyl alcohol and allow to air-dry completely.
Tip: A dry surface ensures better adhesion and patch longevity. - 3
Clean and prep surface
Wipe the area with alcohol and a clean rag, removing any dirt, algae, or oils. Lightly rough up the surface with a soft pad if the patch kit recommends it.
Tip: Roughening the surface can improve patch adhesion. - 4
Cut the patch with proper overlap
Trace or cut a patch 1-2 inches larger than the damaged area, rounding corners to prevent peeling.
Tip: Avoid sharp corners which can peel over time. - 5
Apply adhesive and place patch
Apply a thin, even layer of adhesive to both the patch and the liner area per patch kit instructions. Press patch from center outward to push out air pockets.
Tip: Work slowly to prevent air gaps that lead to leaks. - 6
Cure and test
Allow the adhesive to cure for the recommended time before refilling. After curing, refill gradually and check for leaks.
Tip: Do not rush curing; premature exposure to water reduces patch lifespan.
FAQ
Can I patch a pool liner without draining water?
Some patches allow repair with the water level in the pool, but most patches require a dry surface. Check your patch kit instructions and choose a method that matches the product.
Patch options vary; many patches require a dry surface, so plan to drain around the patch area if allowed.
What patch kit works best for vinyl liners?
Look for a vinyl-specific kit with a durable adhesive and backing patch. Ensure compatibility with your liner's thickness and color, and follow curing times precisely.
Choose a vinyl liner patch kit with clear instructions and proper curing times.
How long does a patch take to cure?
Cure time varies by product but typically ranges from a few hours to 24 hours. Always follow the manufacturer’s recommended cure period.
Most patches cure within hours; check the label for exact times.
Will a patch fix all leaks or only small punctures?
Patches are most effective for small punctures and minor tears near the patch area. Large tears or worn seams may require liner replacement.
Patching helps with small issues; big damage might need liner replacement.
Is patching safe around pool chemicals and chlorine?
Yes, but avoid skin contact with adhesive fumes; work in well-ventilated areas and rinse skin after handling chemicals and adhesives.
Patch materials are chemical-safe when used as directed; wear gloves and wash up afterwards.
When should I replace the liner entirely?
If the liner has multiple large tears, widespread wear, or structural seam failures, replacement is more cost-effective and safer than multiple patches.
If damage is extensive, replacement may be wiser than patching repeatedly.
Watch Video
Key Takeaways
- Patch small punctures promptly to slow leaks
- Use vinyl-specific patch kits with proper adhesive
- Ensure a clean, dry surface before patching
- Allow full cure time before refilling the pool
- Replace liner if damage is extensive or near seams