Repair a Pool: Safe, Step-by-Step Guide for Beginners
Learn how to repair a pool safely with a practical, step-by-step approach. This guide covers common issues, essential tools, safety tips, and durable options for homeowners.

Goal: Learn how to repair a pool safely and effectively. You will identify common pool issues, gather the right tools, and follow a clear, step-by-step process to patch cracks, seal leaks, and restore proper water balance. This guide covers vinyl and plaster pools, safety warnings, and maintenance tips to extend life and reduce future repairs.
Understanding common pool repair issues
Repairing a pool begins with understanding the most frequent failure modes. The plaster or gunite shell can crack from ground movement, heavy foot traffic, or seasonal freezes. Vinyl liners tear at stress points, around steps, or where the liner has stretched. Tile grout can crumble, leaving open joints that invite algae and water leakage. Leaks around skimmers, return fittings, and light niches are also common, especially when seals age or are damaged. In addition to surface damage, water chemistry plays a crucial role: imbalanced pH or total alkalinity can accelerate corrosion and plaster degradation. Before you patch anything, observe water clarity, color, and the feel of the pool surfaces after brushing. According to Home Repair Guide, effective repairs begin with a structured assessment: document every crack and patch location, inspect the deck for damp areas, and trace suspected leaks to their source. This initial triage helps you decide whether a repair is cosmetic or structural, and whether it can be completed with a patch, sealant, or a full component replacement. Finally, identify your pool type—vinyl, plaster/gunite, or tile—so you choose the correct products and tools.
Safety first: planning your repair session
Pool repairs involve electricity, chlorine, and heavy materials. Start by powering down all electrical equipment near the work zone and locking out the switch if possible. Use GFCI outlets for any extension cables and wear non-slip shoes, safety glasses, and durable gloves. Keep children and pets away from the work area, and drain only as required by the repair plan to minimize deck slipping. Work during cooler parts of the day to reduce chemical volatility and heat stress. Have a buddy nearby in case you need a hand or an emergency. By planning the session, you reduce risk and improve the accuracy of your repairs, a principle echoed in Home Repair Guide's practical guidance.
Tools and materials essentials
Having the right tools and materials at hand saves time and reduces mistakes. Choose products based on your pool type (vinyl, plaster, or tile). Keep a clean workspace and pre-cut patches before you begin. Stock up on safety equipment and cleaning rags to manage spills. A basic kit includes patch materials, sealants, trowels, scrapers, a utility knife, a caulking gun, a squeeze bottle for chemical mixes, a pool brush, and a bucket for mixing. For vinyl liners, carry a dedicated vinyl patch kit; for plaster, a cement-based patch, epoxy resins, and a trowel; for tile, tile grout and replacement tiles. If your repair involves electrical components, ensure you have a non-contact voltage tester and the correct replacement parts.
Common repair strategies by pool type
Vinyl liner patches and seam repairs: remove damaged patch, cut a patch to fit, apply vinyl adhesive, press, and let cure. Plaster or gunite cracks: clean the crack, widen slightly with a chisel, inject epoxy or patch with cement-based grout, trowel smooth, and allow cure. Tile repair: remove damaged grout and tile, clean joint, apply grout or replacement tile, seal after set. Leaks around fittings: tighten connections, replace gaskets, apply sealant around threads. After any repair, pressure test for leaks by filling the pool to a safe level or using a dye test to trace leaks.
Aftercare: testing, balancing water, and long-term maintenance
After repairing, you should let patches cure fully, then refill pool to the proper level and re-balance chemical levels. Use test strips to check pH, alkalinity, calcium hardness, and chlorine. It may take 24-72 hours for chemistries to stabilize; adjust as needed following manufacturer guidance. Run the filtration system continuously for 24-48 hours after major repairs to flush the lines and ensure even distribution of chemicals. Consider using a pool cover to reduce debris and limit sun-initiated chemical breakdown.
Authority sources and safety resources
For further guidance, consult authoritative sources:
- https://www.epa.gov/safewater/pools-hot-tubs-spas
- https://www.cdc.gov/healthywater/swimming/index.html
- https://www.osha.gov
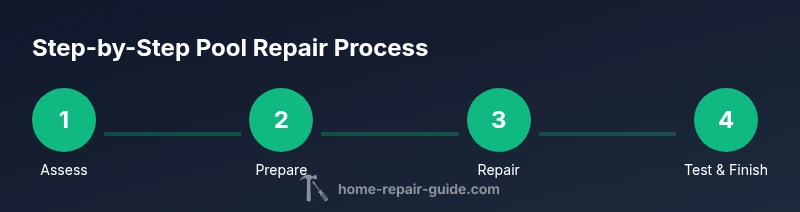
The Home Repair Guide analysis shows that following official safety and water-quality guidelines helps reduce risk and improve long-term results. The Home Repair Guide team emphasizes a structured approach: inspect, prepare, repair, then test. The Home Repair Guide's conclusion is that careful planning and quality materials yield durable repairs and safer pools.
Tools & Materials
- Safety goggles(Keep moisture away from lenses)
- Rubber gloves(Nitrile recommended)
- Non-slip footwear(Essential on wet surfaces)
- Vinyl patch kit(For vinyl liner repairs)
- Silicone sealant (marine-grade)(Apply to seams and fittings)
- Epoxy patch or cement-based patch(Select by pool type)
- Caulk gun(Optional but helpful)
- Non-contact voltage tester(Use if working near electrical lines)
Steps
Estimated time: 2-5 hours
- 1
Power down and secure the work area
Begin by turning off the pool pump and all nearby electrical equipment. Lock out the breaker if possible and verify there is no live power at the outlets near the pool.
Tip: Use a non-contact voltage tester to confirm safety before touching wires. - 2
Inspect surface and identify the repair need
Brush and visually inspect plaster, vinyl, and tile areas. Note cracks, tears, and leaky fittings to guide material selection.
Tip: Document each defect with photos for reference. - 3
Prepare patch material suitable for pool type
Mix patch compound or prepare vinyl adhesive as per product instructions. Clean the area and roughen surfaces to improve adhesion.
Tip: Follow manufacturer guidelines for cure times and temperatures. - 4
Apply patch or sealant to the defect
Press the patch or sealant into the crack or tear, ensuring full coverage. Smooth edges to blend with the surrounding surface.
Tip: Wipe away excess material before it skins over. - 5
Allow curing and test for leaks
Let the patch cure completely according to the product. Refill the pool or re-pressurize lines and watch for signs of seepage.
Tip: Use a dye test to confirm leak sources if needed. - 6
Rebalance water chemistry and restart filtration
Balance pH, alkalinity, calcium hardness, and chlorine after repairs. Run the filter continuously for 24–48 hours to stabilize.
Tip: Check chemistry again after 24 hours and adjust as necessary. - 7
Final inspection and coverage
Inspect patched areas one final time and apply a protective cover if possible. Ensure all gear is cleaned and stored for next use.
Tip: Keep a maintenance log for future repairs.
FAQ
Do I need to drain my pool before repairing a crack?
Not always. Small surface cracks on vinyl or plaster can often be repaired with the pool still partially filled, but large cracks or structural damage may require partial draining or professional assessment.
In many cases you can repair without draining, but if you see large cracks, consult a pro.
Can I repair a pool liner myself, or should I hire a pro?
DIY liner repair is possible for minor tears with a vinyl patch kit, but large or underlying liner damage usually benefits from professional replacement to ensure a watertight seal.
Small tears can be DIY, but big damage needs a pro.
What safety gear is essential during pool repairs?
Wear safety goggles, chemical-resistant gloves, and non-slip footwear. Keep children away and ensure adequate ventilation when working with sealants nearby chemicals.
Goggles, gloves, and non-slip shoes are essential for safety.
How long do pool repairs typically last?
Lifespan depends on the repair and pool type. Properly cured patches and correct water balance can last months to several years with regular maintenance.
Durability varies, but good patches with proper balance last longer.
Is it safe to swim after patching a crack?
If the patch has fully cured and water chemistry is balanced, swimming is usually safe. Avoid swimming until materials are fully set and the patch has cured per instructions.
Wait for full cure and proper balance before swimming.
What maintenance steps prevent future leaks?
Regularly inspect seals and fittings, balance chemicals, and perform routine cleaning and filtration. Address small issues promptly to prevent escalation.
Keep up maintenance to catch leaks early.
Watch Video
Key Takeaways
- Assess issues before buying repair patches.
- Use the right patch material for your pool type.
- Cure patches fully before refilling.
- Balance water chemistry to prevent future damage.