Pool Pump Repair: Step-by-Step Home Guide 2026
Learn to diagnose and repair a pool pump safely. This Home Repair Guide tutorial covers common failures, essential tools, clear steps, and maintenance tips for reliable pool circulation.

Pool pump repair helps restore proper circulation, quiet operation, and energy efficiency by diagnosing common failures and safely replacing worn parts. You'll learn to identify symptoms, select the right tools, and follow a safe, step-by-step repair workflow. This guide emphasizes testing, priming, and preventive maintenance. According to Home Repair Guide, proactive maintenance reduces downtime and costly service calls.
Why pool pump repair matters
A pool pump is the heart of your pool's circulation system. When it runs smoothly, you enjoy clean water, efficient energy use, and longer equipment life. A small problem, if ignored, can escalate into costly repairs or unsafe water conditions. According to Home Repair Guide, proactive maintenance reduces unexpected breakdowns and extends the life of pool equipment. By understanding how a pump works and recognizing early warning signs, homeowners and renters can perform safe, effective fixes rather than waiting for service calls. This section explains the pump’s basic function, typical failure modes, and a mindful, methodical approach to diagnosing issues.
A standard pool pump includes a motor, impeller, volute, and seals. The motor powers the impeller to move water through the filtration system. Issues can arise from electrical faults, worn bearings, clogged impellers, or degraded seals. Recognizing these symptoms early helps you plan the repair, protect your pool and pool equipment, and avoid unnecessary replacements. Home Repair Guide emphasizes a systematic approach: verify power, inspect the housing and strainer, and test components before swapping parts.
Common pool pump problems and what they mean
Pumps show a handful of tell-tale symptoms that map to specific failures. A motor that hums but won’t start often points to a capacitor or wiring issue. Reduced water flow can indicate a clogged impeller, a dirty skimmer basket, or clogged suction lines. A noisy bearing or motor may signal worn bearings or degraded lubrication. A visible leak around the seals suggests seals or gaskets that need replacement. The challenge is to differentiate simple maintenance tasks from components requiring professional help. Home Repair Guide emphasizes a methodical approach: verify power, inspect the strainer and lid, check for air leaks, then test electrical components. By documenting symptoms and correlating them with possible causes, you can target the repair without replacing parts blindly. Home Repair Guide analysis shows that most pump failures are linked to clogs, worn seals, or loose electrical connections.
Safety first: precautions before you start
Working on a pool pump involves electricity and water, so safety must come first. Always turn off the power at the breaker and lock out the circuit if possible. Wear protective gear: rubber gloves, safety glasses, and non-slip shoes. Work in a dry area, keep tools organized, and keep children and pets away from the workspace. If you must touch electrical components, use insulated tools and test for voltage before touching any terminals. These precautions align with general electrical safety guidelines from OSHA and energy-saving best practices. If you’re uncomfortable with electrical work, call a licensed electrician or pool technician. This stage reduces the risk of shock, sparks, or water damage during repairs.
Tools, parts, and where to source replacements
Having the right tools and spare parts on hand makes pool pump repair smoother and safer. Essential tools include a multimeter for voltage checks, a screwdriver set (flathead and Phillips), adjustable wrench or channel-lock pliers, and a PVC pipe cutter for line work. Stock spare parts such as a replacement impeller, O-ring, and a motor run capacitor; silicone-based lubricant helps seal surfaces without attracting debris. When ordering parts, match the model family and pump housing type rather than a specific SKU. Replacements are commonly available through local pool supply stores or reputable online retailers. If your pump uses a seal kit, have the correct size on hand to avoid misfits. Keep extra clamps, Teflon tape, and a bucket for catching fluids.
Step-by-step troubleshooting and repair workflow
A disciplined workflow helps you stay safe and avoid unnecessary part swaps. Start by turning off power, then verify de-energized status. Next, inspect the strainer basket and lid for debris or cracks. Check the impeller by removing the pump housing cover and looking for blockages or damage. If you suspect a faulty capacitor or loose wiring, test electrical connections and replace or tighten as needed. Inspect seals and bearings for wear, and replace if there are signs of leakage or excessive play. Reassemble, prime the pump to remove air, and run briefly to check for leaks, noise, or loss of prime. Document steps and outcomes for future maintenance. If you encounter a fault beyond basic fixes, consider seeking professional help. The overall goal is to restore proper flow, quiet operation, and energy efficiency.
Maintenance tips to prevent future pump failures
Preventive maintenance is cheaper than reactive repairs. Schedule seasonal checks to clean baskets, inspect gaskets, and ensure good electrical connections. Keep the suction lines clear of debris and monitor flow rates to detect gradual declines early. Regularly lubricate O-rings and seals with an appropriate silicone lubricant, and replace worn parts before they fail. Use a timer to optimize pump run times for energy efficiency. Finally, maintain a simple log of maintenance activities and replacements—Home Repair Guide analysis shows that a little record-keeping pays off by reducing downtime and surprise outages.
Authority sources
- OSHA: https://www.osha.gov
- U.S. Department of Energy (Energy Efficiency): https://www.energy.gov
- Environmental Protection Agency (EPA): https://www.epa.gov
Authority sources
- OSHA: https://www.osha.gov
- Energy.gov: https://www.energy.gov
- EPA: https://www.epa.gov
Tools & Materials
- multimeter(Check voltage and continuity at motor terminals)
- screwdriver set (flathead & Phillips)(Remove pump housing screws)
- channel-lock pliers(Grip hoses and fittings safely)
- adjustable wrench(Loosen/tighten fittings and clamps)
- PVC pipe cutter(Useful for trimming lines if needed)
- replacement impeller(Only if impeller is clogged or damaged)
- O-ring kit(Replace worn o-rings to prevent leaks)
- motor run capacitor(Only if capacitor shows signs of failure)
- silicone lubricant(Lubricate seals/gaskets without attracting debris)
- bucket(Catch fluids and hold small parts)
- non-conductive gloves(Prevents shocks and protects hands)
- safety goggles(Eye protection during work)
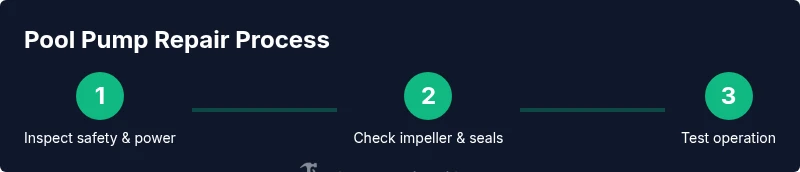
Steps
Estimated time: 60-120 minutes
- 1
Power down and disconnect the pump
Turn off the pool circuit at the breaker and unplug the pump to prevent shock. Confirm no stored charge remains in the capacitor by waiting a few minutes before touching wiring.
Tip: Use a non-contact voltage tester to verify de-energized state. - 2
Open the strainer cover and inspect for debris
Remove the lid, clear debris, and examine the gasket for damage or wear. A cracked or mis-seated gasket can cause air leaks and loss of prime.
Tip: Take a photo of gasket orientation before removal so it goes back correctly. - 3
Check for air leaks and prime the pump
Inspect suction lines for cracks or loose connections. Ensure the pump is fully flooded with water; prime if necessary to remove air pockets that prevent proper priming.
Tip: Keep a small amount of water in the bucket to help priming if your model requires it. - 4
Test electrical connections and capacitor
With power still off, inspect motor wiring for loose connections and test the capacitor with a meter or swap with a known-good unit if available.
Tip: If you replace the capacitor, discharge it first and discharge any residual charge before handling. - 5
Inspect the impeller for clogs or damage
Access the impeller housing and look for debris, cracks, or worn blades. Clean gently or replace if damage is present.
Tip: Do not force the impeller; use proper tools to avoid damaging the rotor. - 6
Inspect seals and bearings
Check the mechanical seal and O-rings for signs of leakage or wear. If bearings show play or noise, plan for bearing/seal replacement.
Tip: Replace seals and O-rings in pairs to ensure even sealing. - 7
Reassemble, prime, and test performance
Reattach the housing, re-prime the system, and restore power. Observe flow, listen for unusual noises, and check for leaks.
Tip: Document the steps and outcomes, including parts replaced. - 8
Document the repair and schedule maintenance
Create a quick record of the issue, parts replaced, and the date. Set a reminder for routine maintenance to prevent future failures.
Tip: Attach a maintenance label to the pump housing with date and next check.
FAQ
What are the most common pool pump failures?
No-start conditions, low water flow, unusual noises, and leaks around seals are the most frequent issues. Inspect the impeller, seals, and motor for wear, and verify electrical connections.
Most common issues are no-start, low flow, noisy operation, and leaks around seals.
When should I replace an impeller?
Replace the impeller if it is cracked, severely corroded, or blocked with debris that cannot be cleaned. A damaged impeller reduces flow and can injure the motor.
Replace the impeller if damaged or blocked and you can't clean it.
Can I fix a pool pump myself?
Basic fixes like cleaning the strainer, replacing O-rings, and resealing are doable for many homeowners. For electrical faults, uncertain wiring, or refrigerant-free repair, seek a licensed professional.
You can handle simple fixes, but large electrical issues are best left to a pro.
How long does pool pump repair take?
Repair time varies with the fault and skill level. Simple fixes may take under an hour; more complex issues can require a couple of hours.
Duration varies; simpler fixes are quick, more complex ones take longer.
Do I need to drain the pool to repair the pump?
Most repairs can be done without draining the pool. Some tasks may require partial draining or shifting of components, depending on your setup.
Usually no drain is required; some jobs may need partial draining.
Watch Video
Key Takeaways
- Diagnose before replacing parts for targeted fixes
- Prioritize safety when dealing with electricity near water
- Keep a repair log for future maintenance
- Prime the pump after every repair to prevent air traps
- Choose generic replacement parts to avoid SKU confusion