Washing Machine Drain Pump Repair: A Step-by-Step Guide
Learn how to diagnose, repair, or replace a washing machine drain pump with a practical, safety-first approach. This guide covers symptoms, tools, steps, testing, and maintenance to keep your washer draining properly.

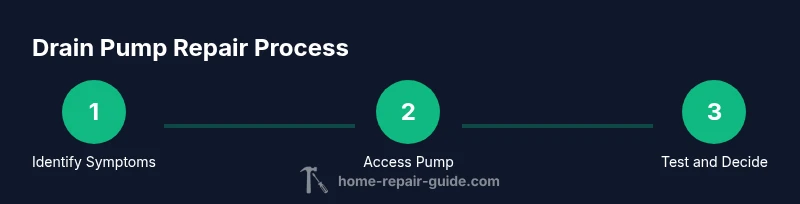
Repairing a washing machine drain pump restores proper draining and prevents standing water. This guide explains when to repair vs replace, how to access the pump safely, common failure modes, and a clear, step-by-step process to get your machine back to full operation. Expect roughly 60–90 minutes and basic hand tools.
Understanding the drain pump system in a washing machine
A typical washing machine uses a small electric motor to drive an impeller that pushes water from the tub into the drain hose. In front-load models, the pump sits at the bottom behind a service panel; in some top-load machines, it is beneath the access panel near the motor. Understanding where the pump sits helps you plan safe repairs and minimizes unnecessary disassembly. Common reasons for drain pump failure include a clogged impeller caused by coins or buttons, a burned-out motor from overheating, or a worn seal allowing leaks. When the pump or its housing leaks, you may notice water on the floor or damp panels near the front kick plate. If the tub empties slowly or not at all after a cycle, the pump is a prime suspect. The Home Repair Guide team emphasizes that identifying the exact symptom helps you decide whether to repair or replace, saving time and cost.
Common drain pump failure symptoms
Common signs of a failing drain pump include water remaining in the tub after the drain phase, a loud buzzing or grinding sound during draining, or a burning smell near the pump housing. You might also observe a pump that won’t start when the washer attempts to drain, or an obvious leak around the seals. A clogged inlet screen or impeller can mimic motor failure, so you should check for debris before replacing components. If your washer displays error codes related to draining, inspect the pump wiring and control connections. Remember: not every drainage issue is the pump, but persistent draining problems with these symptoms point to a pump problem that deserves testing.
Safety first: unplug, power off, and avoid water hazards
Before touching any internal components, unplug the washer and shut off the household water supply. Avoid working on live electrical parts; if you must handle wiring, do so with dry hands and while standing on a dry surface. Water behind a front panel or under the machine can surprise you, so place towels and a shallow container to catch drips. If you’re unsure about electrical safety, stop and consult a professional. The Home Repair Guide team notes that prioritizing safety reduces the risk of shock and damage to your unit, especially if you’re dealing with older models where wiring insulation may be worn.
Tools and parts you’ll typically need
To perform a drain pump repair or replacement, you’ll generally need a mix of hand tools and a compatible pump part. A small bucket, towels, and a flashlight help with cleanup and visibility. A flat-head and Phillips screwdriver, needle-nose pliers, and a multimeter (for electrical testing) are common essentials. Have a replacement drain pump that matches your washer model on hand, and consider a spare hose clamp in case clamps are corroded or brittle. Always refer to your model’s manual for exact part numbers and torque specs.
Accessing the drain pump (front-load vs top-load)
Access methods vary by washer design. Front-load models typically require removing a service panel or bottom kick plate to reach the drain pump located at the base of the cabinet. Top-load machines may have easier access via the rear panel or a top cover. Start by unplugging the unit, then remove the panel screws and carefully set the panel aside. Once exposed, label each hose and wire connector before disconnecting anything. Access helps you assess hose condition, clamp tightness, and the pump’s mounting points without disturbing other components more than necessary.
Removing and inspecting the drain pump
With access gained, disconnect the drain hose, inlet hose, and electrical connections attached to the pump. Remove mounting screws or clamps and gently pull the pump away from its housing. Inspect the impeller for blockages; look for cracks in the housing or a melted seal. If debris is present, clear it carefully and recheck the impeller turns freely by hand. If the impeller or motor shows visible damage, replacement is typically the safer option rather than attempting a repair.
Testing the pump and diagnosing electrical issues
After removal, test the pump’s electrical circuit using a multimeter for continuity between the power terminals. If there is no continuity, the motor winding is damaged and the pump should be replaced. If continuity is present but the pump won’t run, you may have a short in the wiring or a faulty switch in the control board. Recheck all connectors for corrosion or loose pins. Perform a leak test after reassembly to confirm seals are intact and there are no fresh drips.
Repair vs replacement: decisions and costs
Repairing a small impeller or resealing a pump is possible in some cases, but many modern pumps are integrated assemblies that aren’t economical to repair. Replacement parts must be compatible with your exact washer model, and improper installation can lead to leaks or electrical hazards. On balance, replacing the pump of a failing unit often yields better reliability and a longer service life. The Home Repair Guide analysis shows that choosing original or OEM-compatible parts minimizes performance issues and warranty concerns.
Maintenance to prevent future drain pump problems
Prevent clogs by checking pockets, zippers, and small hardware before washing clothes. Periodically inspect hoses for cracks and ensure clamps are tight. Clean the pump inlet filter or screen if your model includes one. Run a maintenance cycle with a small amount of vinegar or washing machine cleaner every few months to reduce mineral buildup, but always follow manufacturer guidelines. Regular checks can extend pump life and reduce unexpected breakdowns.
Tools & Materials
- Flat-head screwdriver(Assorted sizes; magnetized tips help)
- Phillips screwdriver(Crucial for panel and pump screws)
- Needle-nose pliers(For hose clamps and connectors)
- Bucket or shallow pan(To catch residual water)
- Towels or rags(Contain spills and keep area dry)
- Flashlight or headlamp(Improve visibility behind panels)
- Multimeter(For continuity checks)
- Replacement drain pump (compatible with model)(Only if testing confirms failure)
- Gloves and safety glasses(Personal protection)
- Owner’s manual or model-specific guide(Locate exact parts and wiring)
Steps
Estimated time: 60-120 minutes
- 1
Power down and secure area
Unplug the washer and shut off the household water supply. Move the machine slightly if needed to access the service panel, keeping children and pets away. Ensure the area is dry and safe before proceeding.
Tip: Use a helper to maneuver the machine and prevent tipping. - 2
Access the drain pump
Remove the service panel or bottom kick plate according to your model. Confirm you have a clear view of the pump and its hoses before disconnecting anything.
Tip: Take a photo of hose/connector positions before removal. - 3
Disconnect electrical connections
Carefully unplug the power and disconnect the pump’s electrical connectors. If any wires are difficult to reach, use insulated tools and avoid pulling on wires.
Tip: Label connectors for accurate reassembly. - 4
Detach hoses and remove mounting
Loosen hose clamps and disconnect the drain and any supply hoses from the pump. Remove the mounting screws or brackets and carefully extract the pump from its housing.
Tip: Keep the bucket ready for any remaining water. - 5
Inspect the pump
Examine the impeller for debris, cracks, or rubbing against the housing. Check seals for leaks and verify the body is intact. Clean debris if found.
Tip: A clogged impeller is a common cause of drainage failure. - 6
Test electrical continuity
With the pump removed, set the multimeter to continuity and check the motor terminals. No continuity indicates a failed winding; replacement is recommended.
Tip: If you’re unsure, consult the manual or a professional. - 7
Decide on repair vs replacement
Assess whether a minor seal fix is feasible or if a full pump replacement is warranted. Consider model compatibility, warranty, and total cost.
Tip: Replacing a failed pump usually yields longer life than a patch.” - 8
Reinstall and test
Install a new or repaired pump, reconnect hoses and wiring, and reattach the panel. Restore water supply and run a test drain cycle to verify proper operation.
Tip: Run a short test cycle first to confirm no leaks. - 9
Final check and cleanup
Check for leaks around all hose connections and ensure the tub drains fully. Clean up tools and store away spare parts for future maintenance.
Tip: Document any model-specific quirks for next time.
FAQ
What are common signs that a washing machine drain pump is failing?
Common signs include water remaining in the tub after draining, unusual noises during drain, and visible leaks around the pump area. If you notice error codes related to draining, inspect the pump and related wiring. Always verify there isn’t a clogged filter first.
Look for water left in the tub after draining, odd noises, or visible leaks around the pump. If you see draining errors, inspect the pump and wiring, but start by checking for clogs.
Can I repair a drain pump or do I need to replace it?
Many modern drain pumps are designed as assemblies; minor seal repairs are possible in some cases, but replacement is often the safer and more reliable option. Always match the replacement pump to your washer model and follow torque specs.
Some pumps can be repaired, but most times replacement is safer and longer lasting. Be sure to choose a model that fits your washer.
Is it safe to attempt drain pump repair without professional help?
DIY repair is possible if you follow basic safety steps: unplug, power off, and drain water first. If you encounter complex wiring or uncertain parts, consult a professional to avoid electric shock or further damage.
DIY can be safe if you unplug and drain the machine first. If you see complicated wiring, get a pro.
Where is the drain pump located in a top-loading washing machine?
In top-loading models, the drain pump is typically found behind the rear panel or beneath the machine’s top cover, depending on the model. You may need to remove corresponding panels to access it.
Generally behind the rear panel or under the top cover, depending on your model.
How long does a drain pump repair take on average?
A typical drain pump repair or replacement can take about 60 to 120 minutes, depending on access and the need for part replacement. More complex models may require additional time.
Most repairs run about one to two hours, depending on access and parts.
Will a clogged drain pump cause leaks elsewhere?
A clogged pump can cause water to back up and leak from pump seals or hoses, but leaks can also originate from hose clamps or plumbing connections. Inspect all connections when diagnosing leaks.
Clogs can lead to leaks from the pump area, but always check all hoses and clamps too.
Watch Video
Key Takeaways
- Identify symptoms before disassembly to save time.
- Always unplug the unit and shut water off first.
- Use model-specific parts to ensure compatibility.
- Test thoroughly after reassembly for leaks and proper draining.
- Perform regular maintenance to extend pump life.