Leaking Swimming Pools Repair: DIY Leak Fix Guide
Learn to identify, locate, and repair leaks in residential pools with a practical, step-by-step approach. Includes safety tips, maintenance strategies, and when to call a professional.

Learn how to identify and repair leaks in a residential pool. This quick guide covers common leak sources, basic diagnosis, and DIY fixes you can safely perform. It also outlines when to escalate to a licensed professional to protect your pool, save water, and maintain structural integrity. From inspecting plumbing fittings to testing for dye leaks and monitoring water loss, you’ll gain a practical framework to reduce wasted water and prevent further damage.
What causes leaks in residential pools
According to Home Repair Guide, leaks in pools are commonly caused by worn plumbing connections, cracked liners, tired seals, or deck movement that stresses fittings. Vinyl liners may develop pinhole leaks where anchors or steps contact the liner. Concrete or gunite pools can crack from ground shifting, freeze-thaw cycles, or poor curing. In plaster pools, chipped areas around returns or skimmers create leak paths. Inspecting equipment pads for damp spots is essential. Seasonal changes, improper winterization, and heavy usage can also contribute to new or recurrent leaks. Understanding these sources helps you prioritize fixes and plan a repair strategy that minimizes downtime and disruption to your swimming season.
Note how environmental factors around the pool area—shade, drainage, and soil moisture—can influence leak behavior. A moisture trend along the deck or around coping often points to deck-related movement or adjacent plumbing. When the pool is plastered or tiled, small surface cracks may be the first sign of a deeper issue. Early detection saves water and reduces chemical losses, making every repair more cost-effective and less invasive in the long run.
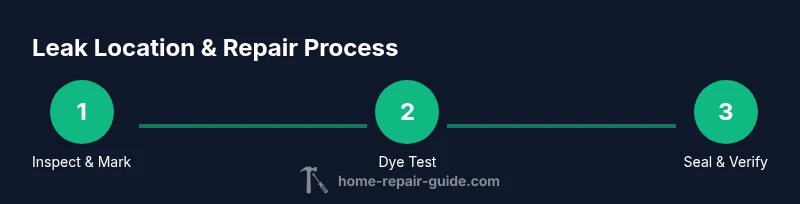
How to locate a pool leak (step-by-step diagnostic approach)
Begin with a visual survey. Look for damp soil around the pool, wet patches on the deck, loose tiles, or areas where the pool surface appears plucked or cracked. Next, compare water loss to evaporation by marking the water level and measuring drop over 24 to 48 hours under stable weather conditions. If loss seems excessive, perform targeted dye tests around skimmers, returns, lights, and fittings. Add a small amount of non-toxic dye near suspect joints and observe dye migration. If dye remains stagnant, the leak is less likely to be there. Consider testing the equipment pad for dampness and listening for leaking pump seals. According to Home Repair Guide analysis, leaks are most commonly found near fittings and around deck-level components, but don’t overlook buried pipes or valve leaks. Keep detailed notes or a simple sketch to track suspected zones and test results.
Tip: Take photos from multiple angles as you inspect. A photo record helps when you discuss options with a professional and serves as a reference for future maintenance.
DIY repair approaches for common leak types
DIY repairs can address many small issues, but larger structural leaks or entrenched plumbing problems often require professional help. For vinyl liners, patch kits, vinyl cement, and patches can seal small punctures. In plaster or gunite pools, epoxy or hydraulic cement can fix hairline cracks, while new plaster may require resealing or patching. For concrete cracks larger than a hairline, consult a pro to assess structural integrity. Leaking fittings around skimmers, return lines, lights, and pumps are often resolved by tightening connections, replacing O-rings, or applying silicone sealant rated for swimming pools. When dealing with PVC piping, use proper solvent cement and primer, and consider replacing damaged sections to avoid recurring leaks. Always test the repair with a dye test or a controlled water level test to verify the fix before refilling the pool. The approach you choose depends on pool type, surface material, and the suspected leak source.
DIY is most effective for accessible, non-structural leaks. For significant surface or structural damage, or if the leak involves buried lines, a licensed pool contractor should perform the repair to ensure long-term durability and safety.
Safety considerations and when to call a professional
Working around pools involves chemical handling, electricity, and heavy lifting. Always turn off pool equipment before inspecting or patching, and wear appropriate PPE including gloves and eye protection. Never mix chemicals during a repair, and ensure the area is dry and well-ventilated when applying sealants. If you encounter a suspected buried pipe, a gas line nearby, or signs of significant structural damage, contact a licensed professional. Electrical safety is paramount; if there are any signs of arcing, damaged cords, or faulty lights, stop work and call a qualified electrician. Complex pressure testing of plumbing lines or large-scale liner replacement should be performed by pros who have the right tools and insurance. Safety and proper technique protect you, your family, and your investment.
Post-repair verification and maintenance
After completing repairs, refill the pool to the normal operating level and recheck for leaks over 24 to 48 hours. Monitor water level at the same time of day to control for evaporation variability, and re-run dye tests if you notice continuing loss. Keep a maintenance log that records locations repaired, materials used, and dates of testing. Regularly inspect seals, joints, and fittings as part of your seasonal maintenance routine, especially after heavy use or extreme weather. Consistent checks help you catch small issues before they become major leaks and extend the life of pool surfaces and equipment.
Preventing future leaks with proactive maintenance
Prevention is easier than major repairs. Maintain balanced water chemistry to protect seals and liners, winterize correctly in cold climates, and promptly address minor cracks before they widen. Inspect deck joints for movement that could stress pool walls, and reseal expansion joints as needed. Keep fittings clean and tightened to manufacturer specifications, and replace worn O-rings and gaskets at recommended intervals. A routine inspection schedule—seasonal checks, after major weather events, and before heavy pool use—reduces unexpected leaks and extends equipment life. By combining regular maintenance with quick action at the first sign of trouble, you’ll enjoy a safer, more efficient pool year after year.
Quick reference checklist
- Identify probable leak zones via visual inspection and water level tracking.
- Perform targeted dye tests around fittings and drains.
- Patch vinyl or plaster leaks with approved patch materials.
- Seal or replace leaking fittings and damaged plumbing.
- Refill, test, and monitor water loss for 24–48 hours.
- Document results and schedule preventive maintenance.
Conclusion
Leaking swimming pools repair combines careful diagnosis, appropriate repairs, and proactive maintenance. By focusing on common leak sources, validating repairs with tests, and maintaining water chemistry, you can minimize water waste and extend pool life. The strategies outlined here give homeowners and renters a practical framework to address leaks safely and effectively, whether you’re fixing a patchable vinyl liner or coordinating with a professional for structural repairs.
Tools & Materials
- Leak-detection dye kit(Includes dye tablets and a dye test kit for identifying leaks around fittings)
- Pool test kit (pH, chlorine, total alkalinity)(Essential for ensuring water balance before/after repairs)
- Silicone sealant suitable for pools(Waterproof, flexible sealant for fittings and small gaps)
- Vinyl patch kit (for liners)(Patch material with adhesive compatible with vinyl surfaces)
- Epoxy or hydraulic cement (for plaster/concrete)(Use for hairline cracks and small surface defects)
- PVC cement and primer(For repairing or sealing PVC plumbing joints)
- Safety gear (goggles, gloves, non-slip shoes)(Protect eyes, skin, and footing when working around water)
- Calibrated water-level indicator(Accurately track water loss over time)
- Pipe wrench or adjustable wrench(Loosen/tighten fittings without damaging threads)
- Shutter/dye tester and flashlight(Assist with dark corners and hard-to-see areas)
Steps
Estimated time: Total time: 6-8 hours
- 1
Inspect for obvious leaks
Perform a visual scan of the pool shell, deck, and equipment area to identify damp spots, cracks, or staining. Note suspicious zones and take photos for reference.
Tip: Document moisture signs with timestamps to track progression. - 2
Mark and measure water loss
Mark the water line at a fixed point and monitor the drop over 24 to 48 hours under consistent weather. Compare to evaporation expectations for your climate.
Tip: Use a marker and a clear ruler to record changes precisely. - 3
Check fittings and equipment
Inspect skimmers, returns, lights, and pump seals for wear or loosening. Tighten connections by hand first, then with tools as needed.
Tip: Shut off pumps when testing fittings to prevent pressure surprises. - 4
Perform dye test at suspect spots
Introduce dye near suspected joints and observe dye movement. If dye stays put, the leak is unlikely there; if it migrates, you’ve found the path.
Tip: Run dye test with clear water to avoid dilution effects. - 5
Pressure test plumbing lines
Isolate sections with valves and carefully apply low pressure to verify line integrity. Do not exceed recommended pressure for your system.
Tip: If you’re not confident, skip to a professional to avoid pipe damage. - 6
Repair liner or surface leaks
For vinyl liners, apply a patch kit per product instructions. For plaster/concrete, use epoxy or hydraulic cement to seal cracks.
Tip: Ensure the surface is completely dry before patching. - 7
Seal leaking fittings
Replace worn O-rings, reseal unions, and apply pool-safe sealant where needed. Recheck with dye test after curing.
Tip: Hand-tighten fittings first; avoid overtightening that may crack components. - 8
Refill and re‑test
Refill to normal level and re-test for leaks over 24–48 hours. Log measurements and results for future reference.
Tip: Keep a running diary of test results and maintenance actions. - 9
Document results and maintenance
Record leak location, repair method, materials used, and future maintenance plan. Schedule preventive checks before peak season.
Tip: Save receipts and warranties for future service decisions.
FAQ
What are the most common causes of pool leaks?
The most frequent sources are worn fittings, liner damage, cracks in plaster or concrete, and faulty plumbing joints. Regular inspection helps catch these early.
Common causes include worn fittings, liner damage, or cracks in plaster or concrete.
Can I fix a pool leak myself?
Some leaks are suitable for DIY fixes, such as patching vinyl liners or sealing small fittings. Larger structural leaks or buried pipes typically require a professional.
Yes, small leaks can be fixed DIY, but major leaks usually require a pro.
How do I tell if the leak is in the plumbing or the surface?
Track water loss, inspect fittings, and perform a dye test around suspected joints. If dye moves toward a joint, the leak is likely there; if not, it may be in the surface.
Check water loss and test suspected joints with dye to locate the leak.
What safety precautions should I take?
Turn off electrical equipment, wear PPE, and avoid mixing chemicals during repairs. If you see damaged electrical lines, stop and call a professional.
Turn off electrical equipment and wear safety gear; call a pro if you see hazards.
When should I call a professional?
If the leak persists after patching, involves buried pipes, or shows signs of structural damage, contact a licensed pool contractor to avoid further harm.
Call a professional if leaks persist after DIY fixes or involve structural or buried components.
Are there quick fixes I should avoid?
Avoid unapproved sealants or temporary patches that may fail under pressure. Do not attempt to seal electrical components or pressurize lines without proper training.
Avoid unapproved patches or pressurizing lines without proper training.
Watch Video
Key Takeaways
- Identify leak sources quickly to minimize water loss.
- Test repairs thoroughly with dye or level tracking.
- Document fixes and maintenance for long-term pool health.
- Know when to call a professional for complex or unsafe repairs.