Liner Repair Pool: A Practical DIY Guide
Learn to inspect, patch, and maintain vinyl pool liners with practical DIY steps. Get safe, effective methods to extend liner life and know when to call a pro.

According to Home Repair Guide, you will learn to inspect a vinyl pool liner for tears, choose a patching method, and complete a durable liner repair. Essential supplies include a vinyl patch kit, vinyl cement or seam sealant, sharp scissors, cleaning supplies, and basic safety gear. Always drain and power down nearby equipment before work.
What is a pool liner and why repair matters
A vinyl pool liner is the flexible barrier that holds back water, defines your pool’s shape, and keeps debris out. Over time, liners endure sun exposure, chemical reactions, and physical wear from toys, skimmers, and careless brushing. Small punctures, abrasions, or seam separations can escalate into bigger leaks if left unchecked. That’s why addressing liner damage promptly is essential for pool performance, water balance, and safety. According to Home Repair Guide, a well-executed repair using the right patch kit can extend the liner's life by months to years, depending on location and material quality. Before you dive into a repair, confirm water level and chemistry are stabilized, and gather your patching supplies. If your liner shows widespread cracking or multiple tears, replacing the liner may be more cost-efficient in the long run. In that case, consult a licensed pro to assess structural integrity and potential water balance impacts. While DIY repairs are feasible for small issues, larger damage deserves careful planning and patience.
Types of pool liners and vulnerabilities
Pool liners are typically vinyl and used in both above-ground and in-ground pools. The material’s flexibility makes patches possible, but the location of the damage matters: tears near folds, seams, or skimmer openings can be harder to mend. UV exposure and chemical balance influence lifespan. Home Repair Guide analysis shows that limiting sun exposure with a shaded area and maintaining stable pH and sanitizer levels can slow deterioration. Patch methods vary by liner type and tear size, so always match your repair approach to the specific liner in use.
Inspecting a liner for damage
Thorough inspection is the first step. Start at high-traffic zones and seams, then check under ladders, steps, and return fittings. Look for: small pinholes, stretching or wrinkling, edge lifting, and air pockets behind patches. Use a bright light and feel for soft spots that indicate thinning. Keep a repair log noting location, size, and observed conditions. Early detection makes repairs more reliable and affordable. As you inspect, remember Home Repair Guide’s guidance: damaged areas should be cleaned, dried, and prepped in a controlled sequence to ensure patch adhesion.
DIY patching vs professional repair
Small tears on vinyl liners can often be repaired with a consumer patch kit or liquid vinyl sealant. DIY methods are cost-effective and quick, provided the tear is manageable and clean. Larger tears, puckering near seams, or widespread thinning may require professional judgment and a full liner replacement. The decision hinges on tear size, location, and the overall condition of the liner. If you’re unsure, a consultation with a pool technician can prevent a failed repair and water balance issues.
Tools, materials, and patch options (overview)
Patch options range from simple self-adhesive vinyl patches to solvent-based cement patches and seam sealants. The patch should extend well beyond the damaged area with rounded corners to prevent edge lifting. Surface prep is critical: clean the area with mild soap and water, then wipe with isopropyl alcohol before patching. Patch size should exceed the tear by at least one inch on all sides for a durable seal. For patches at seams, specialist kits or professional patching may be required to ensure a watertight seal.
Preventive maintenance to extend liner life
Proactive maintenance, including regular cleaning, careful brushing to avoid edge damage, and maintaining correct chemical balance, reduces the risk of future tears. Using a pool cover when the pool is not in use minimizes UV exposure. Inspecting the liner every season helps catch minor issues before they escalate. Keeping a repair log helps you track wear patterns and plan replacements before leaks become costly.
Safety considerations near pools
Always power down nearby pumps and equipment before working on the liner. Wear safety gloves and eye protection when handling solvents, adhesives, and patch materials. Work in a well-ventilated area and avoid mixing chemicals during repair. If your patch requires lifting water levels, do so gradually to avoid sudden pressure changes. If you’re uncomfortable with any step, pause and seek professional help to avoid personal injury or water damage.
When to replace the liner
If multiple tears appear, edges are stretched, or the vinyl shows extensive thinning beyond repair, replacement is often more cost-effective than patching. Replacing a liner can restore pool aesthetics, water balance, and structural integrity. In such cases, plan for professional installation and schedule a time for water balancing after the liner is in place. A well-planned replacement minimizes downtime and keeps maintenance costs predictable.
Tools & Materials
- Vinyl patch kit (patches, cement/sealant)(Choose a kit compatible with your liner type)
- Sharp scissors or utility knife(For clean patch cuts)
- Cleaning supplies (mild soap, towels)(Surface prep and debris removal)
- Isopropyl alcohol or surface cleaner(De-grease patch area)
- Marker or chalk for outlining patch(Trace patch shape)
- Measuring tape(Accurate patch sizing)
- Gloves and eye protection(Safety gear)
- Rubber roller or smooth—flat object(Smoother patches, remove air)
- Replacement patch vinyl sheet(On-hand for future tears)
- Patch surface sander or fine-grit sandpaper(Roughens surface for adhesion)
Steps
Estimated time: 6-24 hours
- 1
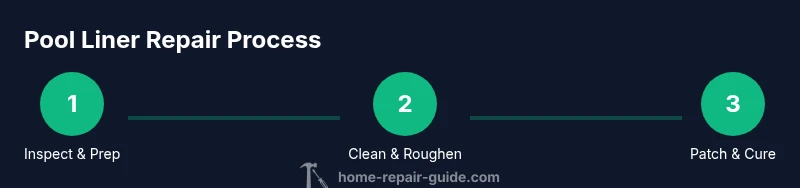
Prepare the area
Turn off pumps and close valves that could spray water on the repair zone. If possible, drain the patch area so you can work on a dry surface; a damp patch reduces adhesive performance. Clear the area of toys and debris to avoid puncturing the patch during application.
Tip: Ensure good lighting and ventilation; safety first. - 2
Clean and dry the surface
Wipe the repair zone with mild soap and water, then wipe with isopropyl alcohol to remove oils. Let the surface air dry completely; a damp patch can weaken adhesion.
Tip: Use a lint-free cloth to avoid fibers under the patch. - 3
Roughen the patch area
Lightly roughen a small portion of the liner around the tear with fine-grit sandpaper to improve adhesive bonding. Clean off any dust after roughening.
Tip: Don't over-sand; damage to the liner can worsen the tear. - 4
Cut and fit the patch
Trace and cut the patch to cover the tear with at least a 1-inch margin on all sides. Round the corners to reduce edge lifting.
Tip: Use a template to ensure symmetry and precise sizing. - 5
Apply adhesive and place patch
Spread a thin, even layer of vinyl cement or sealant on the patch and the liner around the damaged area. Position the patch and center it over the tear.
Tip: Work from the center out to push out air pockets. - 6
Smooth and seal the patch
Use a rubber roller or flat tool to smooth the patch, removing air bubbles from the center toward the edges. Seal the edges firmly with gentle, consistent pressure.
Tip: Avoid heavy pressure that could stretch the liner. - 7
Cure and recheck
Allow the patch to cure according to the adhesive instructions before refilling water. Recheck edges for any lifting after curing and avoid aggressive chemical exposure during the cure window.
Tip: Plan to return to normal use after the recommended cure time.
FAQ
Can all pool liners be repaired with patches?
Most minor tears in vinyl liners can be patched with a consumer patch kit, but large tears or damage near seams may require replacement or professional assessment.
Most small vinyl liner tears can be patched, but large tears near seams may need replacement.
Is it safe to patch a pool liner underwater?
Some kits allow underwater repair, but always follow the manufacturer’s instructions. For best results, patch when the area is dry or partially drained if your kit advises.
Some patches can be done underwater, but follow the kit instructions and patch when the area is dry if possible.
How long does a vinyl liner patch take to cure?
Cure times vary by product, but most patches need several hours to set and longer before full water exposure.
Patch cure times vary, but expect several hours to set and longer for full strength before refilling.
Can I patch multiple tears in one area?
Yes, apply a patch over each tear or use a larger patch that covers all damaged zones with adequate margins.
You can patch multiple tears, just ensure each patch has room to seal well.
When should I replace a liner rather than patch it?
If there are numerous tears, widespread thinning, or deteriorated seams, replacement may be more cost-effective and durable in the long run.
If damage is extensive, replacement is usually the wiser option.
Should I hire a professional for liner repairs?
For complex repairs, large tears, or if you’re unsure about safety, a licensed pool technician can ensure proper installation and water balance.
For complex damage, consider a professional to ensure the repair lasts.
Watch Video
Key Takeaways
- Inspect the liner early to catch damage before it grows.
- Choose patch method based on tear size and location.
- Thorough surface prep is critical for patch adhesion.
- Allow proper cure time before refilling the pool.
- Consider replacement if damage is extensive.