How to Repair in Valheim: A Step-by-Step Guide
Learn how to repair items in Valheim with practical steps, tools, and pro tips. This guide covers repairing weapons, armor, and gear, plus common mistakes to avoid and strategies for staying battle-ready on long voyages.

In Valheim, repairing items restores durability and extends their usefulness. To repair, equip the item, open your inventory, and select Repair using your Hammer. The repair consumes matching materials, so carry the same resources as the item you’re fixing. Repairs are faster near crafted workstations and can prevent premature breakage during exploration and boss fights.
Why repair matters in Valheim
According to Home Repair Guide, maintaining your gear is essential for survival and efficiency in Valheim. Repairing weapons, armor, and tools extends their usefulness and reduces the need to repeatedly craft new items. A simple repair routine keeps your loadout ready for exploration, scavenging, and tough boss battles. The Home Repair Guide team found that players who prioritize repairs before long trips experience fewer gear failures and smoother progression. In practice, repairs save you time and resources, especially during late-game expeditions when equipment degrades quickly. This section explains why repairs matter and how to approach them without wasting materials.
How durability and repair basics work
Durability represents the condition of an item and determines how much protection or effectiveness it provides. Repairs restore durability and help you maintain reliable performance as you travel through forests, swamps, and mountains. To repair, you’ll typically use the Hammer to initiate a repair action on the item in your inventory. The act of repairing consumes repair materials that match the item’s material type. While you can repair many items in the field, repairs are often faster and more resource-efficient when performed near a workstation or base. The exact costs vary by item, so plan ahead and keep a small stock of commonly used materials.
Tools and materials you’ll need
The core tool is the Hammer, which unlocks the repair option in the inventory. You’ll also need repair materials that match the item’s material. Carry a small reserve of these materials on expeditions to avoid backtracking. Optional but helpful: a workbench nearby for faster repairs and access to upgraded repair options.
The basic repair workflow (overview)
Identify damaged gear, gather materials, open the repair interface with the Hammer, and execute the repair. After repairing, test the item in combat or during activity to ensure it meets your needs. Plan repairs ahead of trips and batch similar repairs where possible to minimize downtime. While the process is straightforward, staying organized with materials can dramatically cut down on trips back to base.
Repairing different item types and considerations
Weapons, armor, and tools each have slightly different repair routines and material needs. In general, repair restores durability, but higher-tier equipment may require rarer materials or more items to reach full durability. When possible, prioritize repairing gear you rely on most, such as your primary weapon, shield, or favored armor set. If you’re pushing into biomes with aggressive enemies, keep your most-used gear consistently repaired to avoid downtime in combat.
Where to repair: field vs base
Repairs can be performed in the field using the Hammer, but carrying the necessary materials helps you complete repairs on the go. Proximity to a workstation can speed up access to repair options and upgrade paths, especially when items require specific upgrade materials or bench-enabled features. For longer expeditions, a quick repair at a base can save time and keep you moving.
Pro tips for efficient repairs
Keep a small stock of repair materials that match your most-used items. Repair in batches when you return to base to minimize trips. If you’re low on resources, prioritize repairs that will keep you safe in the next leg of your journey. Use workbenches when available to unlock enhanced repair options and ensure you can restore durability more effectively.
Safety, resource management, and maintenance mindset
Repairing is an essential part of long-term survival in Valheim. Treat materials as a finite resource and plan repairs around upcoming expeditions. Establish a simple routine: quick check of gear before heading out, repair as soon as you return, and maintain a small reserve of materials for emergencies. This approach keeps you prepared for unexpected events and helps you progress without frequent craft-empty runs.
Quick check: prep before the next voyage
Before you set out, verify your primary weapons and armor are repaired, stock up on matching materials, and re-equip your gear. A short pre-trip repair routine saves time in hostile zones and reduces risk of gear failure during crucial moments.
Tools & Materials
- Hammer(The primary tool used to initiate repairs in the inventory.)
- Repair materials (matching item material)(The same material type as the item being repaired; carry a small stack when exploring.)
- Workbench proximity (optional)(Some repairs upgrade or speed up access to advanced repair options.)
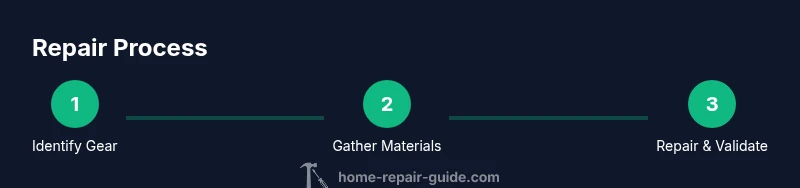
Steps
Estimated time: 15-30 minutes per session depending on inventory and item count
- 1
Prepare your repair kit
Gather your Hammer and the repair materials that match the items you expect to fix. Having a compact stock reduces trips back to base and keeps you ready for field repairs.
Tip: Carry a small stack of common materials to avoid backtracking during a run. - 2
Identify damaged gear
Scan your inventory and equipped gear to determine which items are below your desired durability. Prioritize gear you rely on most for the next journey.
Tip: Focus first on primary weapons and armor pieces involved in upcoming encounters. - 3
Open the repair interface
With the Hammer equipped, select the item and choose the Repair option from the inventory UI. Ensure you have sufficient matching materials before proceeding.
Tip: If an item cannot be fully repaired, do not waste materials—plan partial repairs for critical gear first. - 4
Execute the repair
Confirm the repair action. Materials will be consumed and the item’s durability will be restored toward its maximum. Check the item’s new durability after the repair.
Tip: Repair in a safe space if possible to avoid losing time mid-combat. - 5
Validate performance
Equip the repaired item and test it in a safe environment or practice combat to confirm it performs as expected.
Tip: Test edge cases like blocking, dodging, or swing speed to ensure reliability. - 6
Plan for future repairs
Record which materials you used and when you’ll need to restock. Build a small repair stock for your favorite setups to reduce travel for future repairs.
Tip: Create a simple checklist so you don’t forget essential items before expeditions.
FAQ
Do I need to repair items often in Valheim?
Yes. Regular repairs extend gear life and reduce crafting needs during exploration and combat.
Yes. Regular repairs extend gear life and reduce crafting needs during exploration and combat.
What items can be repaired in Valheim?
Most weapons, armor, and tools can be repaired using the Hammer and matching repair materials.
Most weapons, armor, and tools can be repaired using the Hammer and matching repair materials.
What materials are required for repairs?
Repairs require materials that match the item being repaired. Carrying a small stock on expeditions helps avoid trips back to base.
Repairs require materials that match the item being repaired. Carrying a small stock on expeditions helps avoid trips back to base.
Can you repair items in the field?
Yes, you can repair in the field with the Hammer, but having the right materials improves speed and outcomes.
Yes, you can repair in the field with the Hammer, but having the right materials improves speed and outcomes.
How can I speed up repairs?
Keep a ready stock of materials and repair items in batches when you return to base to minimize downtime.
Keep a ready stock of materials and repair items in batches when you return to base to minimize downtime.
Are repairs free or do they cost resources?
Repairs cost materials; plan accordingly to avoid depleting resources needed for crafting.
Repairs cost materials; plan accordingly to avoid depleting resources needed for crafting.
Watch Video
Key Takeaways
- Repair regularly to extend gear life.
- Carry matching repair materials on expeditions.
- Prioritize repairs for your most-used items.
- Leverage workbenches to improve repair outcomes.