How to Repair Tools in Minecraft: A Practical Guide
Learn how to repair Minecraft tools using anvil, grindstone, and Mending. This educational, step-by-step guide covers materials, XP costs, and best practices for durable tools in survival mode.

With Minecraft tools, repair is done mainly through the anvil. You can restore durability by combining a damaged tool with its matching repair material, or by merging two damaged tools of the same type. If a tool has Mending, XP orbs will gradually repair it. You can use a grindstone to remove unwanted enchantments before repair.
Understanding durability and repair in Minecraft
Durability determines how many uses a tool has left before it breaks. Every action—from mining to chopping—consumes durability, and repairing it lets you extend the tool’s life without crafting a new one. According to Home Repair Guide, developing a routine for tool repair saves material, time, and XP in the long run. The Home Repair Guide team found that players who plan repairs ahead of intense mining sessions experience fewer gear shortages and fewer frustrating downtime moments. In practice, most players start by identifying the tool that needs care, then choosing the best repair path (anvil, Mending, or grindstone) based on resources and goals. Understanding these options helps you stay productive as you explore caves and build impressive structures.
When to repair: signs your tool needs attention
Look for a visibly lower durability bar, reduced efficiency, or frequent breakage in the middle of a build. If a tool is past the halfway point, repairing it early often costs less XP than waiting until near breaking. If you rely on enchantments like Fortune or Efficiency, repairing before the enchantments degrade the tool helps maintain your mining or gathering efficiency. In short, if you notice slower mining, misshapen tool edges, or wobbling tool performance, it’s time to repair or replace parts. Regular checks prevent a sudden tool failure during critical moments like a hard cave expedition or a height-filled build.
Essential tools and materials (what you actually need)
To repair effectively, you’ll need an Anvil, possibly a Grindstone, and either repair materials (like the matching ingot) or another damaged tool of the same type for merging. If your tool has the Mending enchantment, you’ll also want a steady stream of XP orbs from mining, farming, or trading. You may optionally keep a Grindstone handy to remove enchantments when you want to rework a tool’s setup. The list below covers common essentials and their use cases:
- Anvil: The primary workstation for repairs and item merging.
- Iron ingot / Diamond / Netherite ingot: Materials used to repair respective tool tiers on the Anvil.
- Experience (XP) orbs: Needed for Mending-enabled repairs.
- Grindstone (optional): Used to remove enchantments before re-enchanting or repairing if needed.
- Crafting table (optional): In some edge cases you may prefer alternative layouts, though not required for standard repairs with an Anvil.
Note: Always tailor material choice to the tool type you’re repairing. Iron tools use iron ingots; diamond tools use diamonds; netherite tools require Netherite items when upgrading or repairing.
How to repair with an anvil: step-by-step overview
Anvil repairs involve placing the damaged tool and the repair material in the Anvil’s slots. You’ll see a cost in XP levels; if you exceed the cost cap, you’ll need to repair in smaller increments or gain more XP elsewhere. If you’re merging two damaged items, place both items in the slots—the resulting item gains durability roughly equal to the sum of the two items’ remaining durability (subject to XP costs). Always rename the repaired tool to avoid confusion with similarly colored repairs later. When repairing, keep an eye on the XP balance and try to use materials efficiently to preserve resources for future tasks.
Repairing efficiently with Mending enchantment
If your tool has Mending, any XP you collect will repair the tool automatically, gradually restoring durability. This is especially valuable for frequently used tools, and for players who accumulate XP through mining and trading. To enable Mending, you’ll need to enchant your tool by an anvil or an enchantment table and ensure you have access to XP sources. Mending reduces the need for repeated manual repairs but requires a steady XP supply and a safe stance to avoid breaking your gear when you’re low on durability.
Using Grindstone and combining enchantments (when and why to do it)
Grindstone removes all enchantments from a tool and can restore some durability when two items are combined in a particular way. It’s useful if you want to strip an unwanted enchantment or to prepare two items for a clean merge. However, Grindstone does not increase durability in the same way as anvil repairs with materials; it primarily targets enchantment management. If your goal is pure durability, favor Anvil repairs; use Grindstone when you want to remove enchantments before re-enchanting or reorganizing your tool setup.
Step-by-step scenario: repairing a diamond pickaxe (practical example)
Gather your diamond pickaxe, a few diamonds for repair material, and access to an anvil. Place the damaged pickaxe in one slot and the diamonds in the other to repair. Check the XP cost and confirm the repair. If you already have a Diamond Pickaxe with Fortune enchantment, you may prefer to merge two damaged picks to preserve the Fortune enchantment on a single tool, paying a higher XP cost but preserving enchantments and improving overall durability. Rename after repair to keep your inventory organized, then test in a safe area to confirm performance.
Common mistakes and how to avoid them
Don’t over-rely on a single repair method. Always compare costs between merging two damaged tools and repairing with materials because XP costs can escalate quickly. Avoid repairing only when you’re about to break, as the XP cost grows with each repair. Always check for enchantments before repairing and consider Mending when possible to leverage XP for long-term durability. Lastly, store repaired tools in a secure location to prevent accidental loss during explorations.
Advanced tips: prolonging tool life and XP management
Keep a consistent repair cadence by checking durability every few sessions and repairing early when feasible. Carry spare repair materials and maintain a small XP farm or routine to accumulate XP for Mending. Consider prioritizing repairs on tools used most often, such as axes for woodwork or pickaxes for mining. This approach minimizes downtime and maximizes resource use across big builds and adventures.
Quick comparison: the trade-offs between Anvil, Grindstone, and Mending
Anvil: Best for active repairs and merging tools; costs XP; can combine enchantments. Grindstone: Removes enchantments and can help reset a tool’s enchantment state, but not ideal for durability alone. Mending: Uses XP to restore durability automatically; highly efficient for long-term tool life but depends on XP access. Understanding the strengths and limitations of each method helps you choose the right path for each repair scenario.
Troubleshooting corner cases: broken or rare tools
Some tools may have rare enchantments or break more quickly under heavy use. For these, consider repairing with a selection of materials and different merging strategies to preserve valuable enchantments. If a tool is near end-of-life, it may be more economical to upgrade to a higher-tier tool rather than performing multiple repairs. Maintain backups of essential items to avoid interruptions during critical builds or exploration.
Final notes on repair strategies for Minecraft tools
Repairing tools is a foundational skill in Minecraft that pays off over long play sessions. By combining the right repair path—anvil, Mending, or Grindstone—you can keep your tools functional and your builds on track. Consistency, resource planning, and careful management of XP will help you maximize efficiency and minimize downtime as you explore, mine, and build.
Tools & Materials
- Anvil(Essential workstation for repairs and item merging.)
- Grindstone (optional)(Removes enchantments; use when you need to rework enchantments.)
- Iron ingot(Repair material for iron tools.)
- Diamond(Repair material for diamond tools.)
- Netherite ingot(Repair material for netherite tools.)
- Experience (XP) orbs(Required for Mending-enabled repairs.)
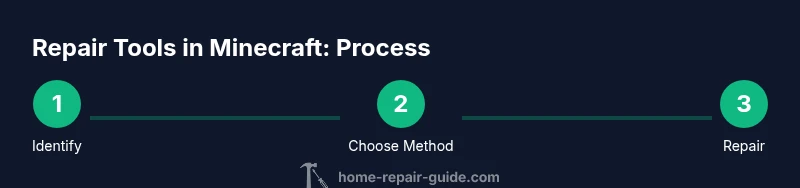
Steps
Estimated time: 20-40 minutes
- 1
Gather damaged tool and repair materials
Identify the tool that needs repair and collect the appropriate materials or another damaged tool of the same type for merging. This prepares you for a smooth repair session and minimizes wasted XP.
Tip: Check current durability bar before starting to estimate potential recovery. - 2
Open the Anvil interface
Place the damaged tool in the left slot and the repair material or second tool in the right slot. The interface will show the resulting item and the XP cost before you commit.
Tip: If the XP cost is high, consider repairing in smaller increments or using Mending. - 3
Choose repair path (material vs. merge)
Decide whether to repair with the material (restores durability) or to merge two damaged items to combine durability and enchantments. Each path has different XP costs and outcomes.
Tip: Merging two tools can preserve enchantments but may be more expensive XP-wise. - 4
Confirm repair and manage enchantments
Confirm the repair. If enchantments are present, decide whether to keep or remove them using Grindstone. Naming the repaired tool helps you keep inventory organized.
Tip: Always rename after repair to avoid confusion with other tools. - 5
Apply Mending if available
If your tool has Mending, ensure you have XP sources. XP orbs will gradually restore durability as you play. This reduces manual repair frequency.
Tip: Maintain a steady XP source to maximize Mending benefits. - 6
Test the repaired tool
Use the repaired tool in a safe area to verify performance and durability. Check for any unexpected enchantment interactions or reduced efficiency.
Tip: If performance feels off, consider another repair cycle or enchantment adjustments. - 7
Store and plan next repairs
Keep repaired tools in a dedicated chest and plan for future repairs in advance. This minimizes downtime during busy exploration or building phases.
Tip: Maintain a small stock of repair materials to avoid last-minute trips.
FAQ
What is the simplest way to repair a tool in Minecraft?
The easiest method is to use an anvil to repair the tool with the matching material, and if you have Mending, XP orbs will gradually restore durability. Merging two damaged tools can also work but may cost more XP.
The simplest fix is to repair with the matching material on an anvil, or merge two damaged items. If you enable Mending, XP will keep repairing it automatically.
Can I repair Netherite tools the same way as Diamond tools?
Netherite tools are repaired using Netherite ingots via the anvil. The process is similar to other tool tiers but requires the correct material. You can also merge two Netherite tools, subject to XP costs.
Yes, Netherite tools repair with Netherite ingots on the anvil, just like diamonds with their material; merging is also possible with the same XP caveat.
Does Mending work without XP sources?
Mending relies on XP orbs to repair items. Without XP sources, Mending won’t repair your tool, so manual repairs are still needed.
Mending needs XP to repair. Without XP sources, you’ll need to repair manually.
When should I use Grindstone versus Anvil?
Use the Anvil for repairs and merging to restore durability and combine enchantments. Use Grindstone to remove enchantments before re-enchanting or reconfiguring the tool, especially if you want to keep durability.
Choose Anvil for actual repairs; Grindstone to strip enchantments when you’re reworking the tool.
Is it better to repair or upgrade tools?
If a tool is close to breaking and XP costs are high, upgrading to a higher-tier tool may be more efficient long-term. However, repairs are cheaper upfront when you have the right materials and time.
Sometimes upgrading is more cost-effective than constant repairs, depending on XP and materials.
Can I repair gear in survival mode without cheating?
Yes. In survival, you can repair with the Anvil, merge damaged items, and use Mending if available. This is the standard, legitimate approach.
Absolutely—this is the standard survival approach using Anvil repairs and Mending if you’ve got it.
Watch Video
Key Takeaways
- Repair primarily via Anvil against matching materials or by merging two items.
- Mending leverages XP to extend tool life, reducing manual repairs.
- Grindstone is best for removing enchantments, not for durability.
- Monitor XP costs; plan repairs to avoid escalating XP penalties.
- Rename and organize repaired tools to stay efficient in play.