How to Get Out of Repair Mode iPhone: A Practical Guide
Learn safe, practical steps to exit repair mode on iPhone. This guide covers force restarts, recovery mode, and data-safe restoration to resume normal use.

If your iPhone is stuck in repair mode, you can typically exit by rebooting and following a safe sequence. This is how to get out of repair mode iphone: start with a force restart, then use Finder or iTunes to update or restore if needed. The approach begins with non-destructive steps and reserves DFU as a last resort.
What Repair Mode Means on iPhone
In common repair scenarios, devices may boot into a diagnostic or service screen after a screen replacement or battery service. This screen isn’t a standard iOS mode; it’s a state used by technicians to run checks. If you see a banner or prompt indicating repair status, your goal is to exit cleanly and return the device to normal operation. Understanding this distinction helps you avoid unnecessary restarts or data loss. Throughout this guide, we reference the phrase how to get out of repair mode iphone to keep the goal clear and practical for homeowners and DIY enthusiasts.
Key takeaway: don’t panic if the device looks like it’s in a service state. Many issues are resolved by standard reboot, update, or restore when performed carefully and with proper backups. According to Home Repair Guide, starting with safe, non-destructive steps protects your data and device health.
Common Causes Why It Sticks
Several scenarios can leave an iPhone stuck in repair mode or a repair-diagnostic screen:
- After a third-party repair, the device’s diagnostic loop may not exit automatically.
- Incomplete software relays during a screen or battery replacement can trigger the system to remain in a service state.
- A software hiccup during a forced restart can boot into a recovery-like screen that resembles repair mode.
- An aging battery or unstable power can cause the device to hesitate when returning to normal operation.
Understanding these causes helps you pick the right exit strategy without risking data loss. If you’ve seen messages about repair status after a service, you’re not alone; many devices are temporarily held in a diagnostic state until the system verifies normal operation. Home Repair Guide’s analysis suggests a systematic exit approach reduces the need for more invasive steps.
Safe, Non-Destructive Ways to Exit Repair Mode
The safest path starts with non-destructive methods and only progresses to more invasive options if the device still boots to a repair-like screen. The goal is to preserve your data while returning to a normal iPhone experience.
- Force restart the iPhone to exit a hang state.
- On iPhone 8 and later: quickly press and release Volume Up, press and release Volume Down, then press and hold the Side button until the Apple logo appears.
- If the device doesn’t respond, proceed to the next step.
- Pro tip: ensure the battery isn’t critically low; connect to a charger during the process to avoid mid-operation shutdown.
- Connect to a computer and enter Recovery/Update flow via Finder or iTunes.
- On macOS Catalina or later, open Finder; on Windows or macOS Mojave or earlier, open iTunes.
- With the iPhone connected, force restart and keep holding the button until the recovery screen prompts appear, then release.
- When prompted, choose Update to reinstall iOS without erasing your data. This preserves content while refreshing software.
- Use Update rather than Restore first.
- Update reinstalls iOS and keeps data intact if possible. If Update fails to exit repair mode, proceed to Restore as a last resort.
- Pro tip: Work with the latest macOS or iTunes version to improve compatibility and reduce error prompts.
- Restore iOS only after Update fails.
- Restore erases all data on the device, so ensure you have a backup. This action should be your last resort when non-destructive options fail.
- Before restoring, disconnect any peripherals and ensure you’ve signed out of iCloud if prompted.
- DFU mode as a final option.
- DFU (Device Firmware Update) mode provides a deeper restore path when recovery mode fails. This method can be riskier and will typically erase data.
- If you proceed, follow model-specific DFU steps carefully and let Finder/iTunes complete the restore.
- Test the boot after each step.
- After a successful update or restore, let the iPhone boot fully and verify basic functionality (touch, app launches, camera, calls).
- If any problems persist, seek professional help rather than repeatedly attempting risky steps.
Why this matters: Exiting repair mode safely minimizes data loss and reduces the risk of brick-like scenarios during reboots. The sequence above favors non-destructive options first, aligning with best practices for DIY repair or home maintenance projects.
Recovery vs DFU: Choosing the Right Exit
Recovery mode exits are generally safer and preserve data, while DFU mode is a deeper restore path used when standard recovery fails. If you can exit via Update in Finder/iTunes, that’s preferred. DFU should only be attempted if you’re comfortable with firmware-level actions and understand the potential for data loss. In most cases, a traditional update will resolve repair-mode issues without requiring a full restore.
For referential clarity, this article recommends starting with recovery-based exits and escalating only if necessary. The Home Repair Guide team emphasizes caution and backups as essential safeguards.
Backup and Data Safety Before Restoring
Before you perform any restore, ensure you have a current backup of your data. iCloud or local computer backups are both acceptable, but local backups can be faster to restore. If you have photos, contacts, and app data, confirm you’ve backed up the items you value most. If you cannot access the iPhone to back up, attempt a backup via iCloud from another device, or use a Windows/iMac backup tool to capture app data where possible. Safe backup practices reduce the risk of permanent data loss during exit procedures.
Prevention and Best Practices After Exit
- Prefer authorized repair services to minimize later issues; avoid unofficial patches or third-party repair software.
- Use genuine cables and accessories to prevent connection issues during exit attempts.
- Keep iOS up to date to reduce compatibility problems after repairs.
- Regular backups (monthly or before major repairs) prevent data loss if future issues arise.
- Monitor battery health; aging batteries can contribute to instability during software reboots.
These preventive steps help ensure that future repairs or exit attempts go smoothly and with minimal risk to your data. Home Repair Guide recommends adopting a routine backup habit and prioritizing official service when possible.
Authority sources
- This guidance references official Apple Support resources for recovery and update workflows where available, ensuring alignment with standard iPhone maintenance procedures. For safety and policy considerations, see government and university resources cited below.
- U.S. Federal Trade Commission (FTC): consumer protection and repair scams guidance, which informs best practices in selecting service providers.
- National Institute of Standards and Technology (NIST): general electronics safety and best practices for device handling during repair and maintenance.
Tools & Materials
- USB charging cable (Lightning or USB-C, model dependent)(Use a reliable, undamaged cable to ensure stable data transfer and power.)
- Mac or PC with Finder or iTunes(Finder (macOS Catalina+) or iTunes (Windows/macOS Mojave and earlier).)
- Power source(Keep the iPhone plugged in during the process to avoid shutdowns.)
- Apple ID credentials(Needed for verification during restoration or sign-in after exit.)
Steps
Estimated time: 30-90 minutes
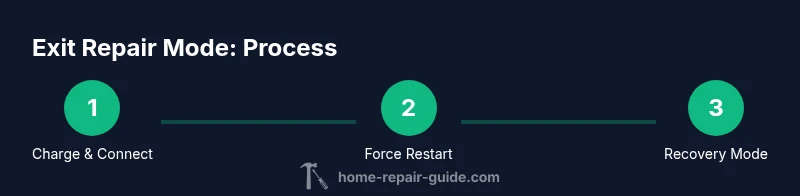
- 1
Charge and connect your iPhone to a computer
Ensure the device has sufficient battery and connect it to your computer with an appropriate cable. This establishes a stable power and data link required for the subsequent recovery steps.
Tip: Use a wall outlet power source if the computer USB port provides insufficient power. - 2
Force restart the iPhone to exit a hang state
For iPhone 8 and later, press and release Volume Up, press and release Volume Down, then press and hold the Side button until the Apple logo appears. This can exit a stuck screen without data loss.
Tip: If the screen stays unresponsive, move to Recovery mode as the next step. - 3
Enter Recovery Mode via Finder/iTunes
With the device connected, force restart and keep holding until the recovery screen appears. On macOS Finder or iTunes, you’ll be prompted to update or restore. Choose Update to reinstall iOS without erasing data.
Tip: If you see a message that your device is in Recovery Mode, avoid Restore as the first option. - 4
Update iOS using Finder/iTunes
Select Update when prompted. This reinstalls the operating system without removing data, which is the preferred path to exit repair mode.
Tip: Have a recent backup in case the process prompts you to restore later. - 5
Restore iOS if Update fails
If Update fails to exit repair mode, consider Restore. This erases all data, so ensure you have a backup before proceeding.
Tip: Only perform Restore if you’re prepared for a data restore from backup. - 6
Use DFU mode as a final option
If Recovery Mode and Restore don’t resolve the issue, DFU mode can reinstall the device firmware. This step is more advanced and will usually erase data.
Tip: Follow model-specific DFU steps precisely to avoid further issues. - 7
Test boot and confirm normal operation
Allow the device to boot normally, then verify essential features such as the home screen, apps, camera, and connectivity.
Tip: Charge the device for at least 30 minutes after the process and check for stability before using heavily.
FAQ
What is repair mode on iPhone, and is it dangerous to exit?
Repair mode isn’t a standard iOS feature; it often appears after service as a diagnostic state. Exiting safely with a non-destructive update keeps data intact. If the device won’t exit, you may need to restore, which has data-loss risk if not backed up.
Repair mode isn’t a normal iPhone feature; it’s a diagnostic state after service. Exit safely by updating first, and only restore if needed.
Can exiting repair mode cause data loss?
Data loss is possible if you perform a Restore. Updating via Finder or iTunes is designed to preserve data. Always back up before attempting major steps.
Data loss can happen with a full restore, so back up first and try an update to preserve your data.
Is DFU mode safe for my iPhone?
DFU mode is a deeper restore option used when recovery modes fail. It typically erases data and reinstalls firmware, so use it only if you’re comfortable with firmware-level procedures.
DFU is a deeper restore and can erase data, so use it only if necessary and you’re comfortable with firmware steps.
What should I do if Update doesn’t exit repair mode?
If Update doesn’t exit repair mode, proceed to Restore as a last resort, ensuring you have a current backup. If you’re unsure, contact support for guidance.
If Update fails, consider Restore after backing up, or seek help from support.
Will my apps and settings be restored after a Restore?
A Restore erases the device, but you can restore from a recent backup to recover apps and settings. Expect a re-setup of some preferences.
A restore erases data, but you can recover apps and settings from a backup afterward.
How can I prevent getting stuck in repair mode after a repair?
Choose authorized repair services, verify cable quality, and perform regular backups. Keeping iOS updated also reduces the likelihood of post-repair issues.
Always use authorized services, keep backups, and stay updated to avoid getting stuck again.
Watch Video
Key Takeaways
- Back up data before attempting exit steps.
- Start with non-destructive options (Update) before Restore.
- DFU mode is a last-resort option requiring careful steps.
- Use genuine cables and up-to-date software to minimize issues.