How to Get Out of Repair Mode: A Practical Home Guide
Learn practical steps to exit repair mode on common home appliances. This Home Repair Guide tutorial covers safe resets, diagnostics, and when to seek professional help.

You will learn how to exit repair mode on common home appliances and devices. This quick guide covers identifying repair-mode indicators, safe reset sequences, and how to clear diagnostic codes without damaging components. By following the steps, you'll know when to power cycle, consult manuals, and when to contact professional support.
Understanding Repair Mode on Home Appliances
Repair mode, sometimes called service mode or diagnostic mode, is a built-in safety and testing state that prevents normal operation while the device checks safety interlocks, sensors, and critical circuits. When a fault is detected, the appliance may automatically enter this mode to protect itself from damage and to provide technicians with meaningful diagnostic data. The Home Repair Guide team emphasizes that repair mode is not a guaranteed fix, but a signal that something in the system needs attention. In many modern machines, repair mode is triggered by a fault code or by a user-initiated test sequence in the settings menu. Common culprits include door interlock faults, overheat conditions, sensor malfunctions, or short-lived power glitches that confuse control boards. The key to a safe exit is understanding that actions taken inside repair mode should be guided by the user manual or service guide for your exact model. Pushing random buttons can reset data or mask the underlying issue, making future diagnostics harder and potentially voiding warranties. If your device is under warranty, consult the manufacturer’s support line before attempting advanced resets. Always prioritize safety: unplug before touching internal components if you must inspect wiring, and never work on live, energized equipment. According to Home Repair Guide, a calm, methodical approach reduces the risk of creating new faults while exiting repair mode.
Common Indicators That You’re in Repair Mode
Most appliances show clear signs that they have entered repair mode, though indicators vary by brand. Look for diagnostic code displays, blinking LEDs, or a digital readout that shows words like 'Service', 'Repair', 'dE', or 'SVC'. Some devices enter a specialized service menu after a button combination is pressed; others simply refuse to start until the fault is acknowledged. You may notice that normal operation is blocked by a protective interlock or that cycles run abnormally, with abnormal dithering or extended run times. The Wi-Fi or smart features may display a maintenance alert or show a maintenance icon. The presence of a fault code in the control panel is a strong hint that the device is trying to communicate an issue rather than operate normally. In any case, check the user manual for the exact meaning of codes and indicators for your model. If you don’t have the physical manual, many manufacturers host digital versions on their support sites. According to Home Repair Guide analysis, most exit paths rely on official reset steps rather than ad-hoc button pressing.
Safe, Common Exit Methods for Most Devices
Power down the appliance completely: unplug from the wall or switch off the circuit breaker, then wait 60 seconds to allow capacitors and controllers to reset. This simple power cycle often clears transient faults and resets the state machine without touching firmware. Reconnect power and observe whether the device boots normally. If a manual reset is specified in the model’s guide, perform the exact sequence: this may involve pressing and holding a combination of buttons for several seconds or navigating to a reset option in the service menu. Do not interrupt power during a reset unless the manual instructs otherwise. If codes persist after a reset, do not assume the fault is gone; record the code and proceed to the diagnostic steps in your manual. In some models, a factory reset is available, but this should be a last resort because it erases user settings. Always ensure the device is dry, and avoid prying open sealed enclosures; many safety-critical components are not user-serviceable. When in doubt, consult the official reset steps in your manual and proceed slowly to avoid creating new issues.
Device-Specific Reset Pathways (General Guidelines)
For a front-loading washing machine, exit repair mode often starts with a cold water hose check and door latch test. For a dishwasher, ensure the door latch is secure and run a test cycle with a simplified load. Refrigerators typically exit repair mode after a firmware reset and sensor recalibration; fans and compressors should resume normal cycling. Regardless of device type, document any fault codes before attempting resets; if a code indicates a refrigerant leak or compressor issue, stop and contact a professional. If you can access a service menu, follow manufacturer steps to exit it, but do not alter settings you don’t understand. When dealing with gas-fired appliances, remember that sealed systems require licensed technicians; never break seals or handle refrigerants yourself. These pathways are best approached with model-specific guidance, and Home Repair Guide recommends using the manufacturer’s steps as your primary reference. Pro tip: take a photo of any screen prompts before you start.
Diagnosing Codes and Logs Without Panic
Treat any error codes as signals rather than verdicts. Start by recording the code, the time it appeared, and the conditions during the fault (load size, power source, ambient temperature). Use the manual or online support pages to translate codes into possible causes. Some devices store more data in a hidden log; if you can access it safely, review recent entries for patterns. Avoid guessing the meaning of codes; misinterpreting a code could lead to the wrong repair path. When in doubt, contact manufacturer support or a local technician with the fault code and model number. Home Repair Guide’s approach is to verify information from official sources before acting. In many cases, the combination of a documented code and the device’s behavior provides the clearest path out of repair mode.
Safety Precautions and When to Stop
Always unplug before inspecting interior components. Wear gloves and safety glasses if you anticipate sharp edges or moving parts. Use a non-conductive tool, especially near exposed wiring, and avoid water near electrical components. If you smell burnt insulation, hear buzzing, or see arcing, stop immediately and disconnect power. For gas appliances, shut off the gas supply and call a certified technician. Do not attempt to repair refrigerant leaks yourself; toxic gases and high pressures are dangerous. If you feel uncertain about any step, pause and reach out to a professional. Safety is the priority when exiting repair mode. According to best-practice guides, the safest option is to involve a professional when there is any risk of injury or major component failure.
Planning For Future: Maintenance to Avoid Returning to Repair Mode
Create a simple maintenance schedule that aligns with your appliance’s manual, including periodic filter changes, sensor calibrations, and firmware updates if supported. Keep a log of any fault codes and the steps you took to exit repair mode, so you have a reference for future diagnostics. Replace worn components before they fail when possible, and consider extended warranties on parts with high failure rates. Regular cleaning of vents, fans, and coils can prevent overheating and keep devices running smoothly. By adopting proactive maintenance, homeowners reduce the likelihood of entering repair mode again and extend appliance life. Home Repair Guide emphasizes documenting every action so future service visits are faster and more accurate.
AUTHORITY SOURCES
To support these guidelines, consult official safety and standards resources. For consumer safety practices, visit https://www.ftc.gov and https://www.cpsc.gov. For guidelines on equipment standards and testing methods, see https://www.nist.gov and https://www.osha.gov. These sources provide general principles for safe handling, diagnostic practices, and when professional service is required. Always cross-check device-specific instructions with the manufacturer’s official support pages; this helps ensure you follow the intended exit path for your model. Home Repair Guide uses these references to help homeowners navigate repair mode exits with confidence and safety.
Tools & Materials
- Owner’s manual or model-specific reset guide(Location of reset steps and codes)
- Flathead and Phillips screwdrivers(For panel access where needed)
- Multimeter (optional)(Use if diagnosing electrical fault; follow safety precautions)
- Screw organizer or small container(Keep screws gathered when removing covers)
- Soft brush or compressed air can(Clean vents and contacts gently)
- Safety gear (gloves, eye protection)(Protect yourself during diagnostics)
Steps
Estimated time: 30-60 minutes
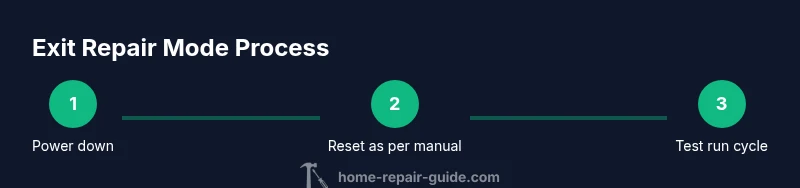
- 1
Power down and unplug
Turn off the appliance and unplug it, or switch off the circuit breaker. Wait at least 60 seconds to allow internal components to discharge and reset. This simple power cycle often clears transient faults and can reset the device to a known state.
Tip: If the cord is hard-wired, switch off at the main breaker; never rely on just the plug. - 2
Consult the manual for official exit steps
Open the model’s guide or support page and locate the repair mode exit procedure. Some brands require a specific button combination or menu navigation. If no steps are listed, proceed with a cautious reset using the general method.
Tip: Take a quick photo of the on-screen prompts before you reset so you can reference them later. - 3
Perform the prescribed reset or exit sequence
Follow the exact reset sequence provided by the manufacturer. This may involve holding a button combination for several seconds or selecting a reset option in a service menu. Do not interrupt power unless your manual states otherwise.
Tip: If you see an error code, document it before you reset so you can verify whether the issue is resolved afterward. - 4
Check for fault codes and clear them
After exiting repair mode, verify that any fault codes have cleared. If codes persist, recheck the manual and consider performing another safe reset. Do not assume the fault is resolved until the device completes a normal cycle.
Tip: Record codes and times for future reference and potential service calls. - 5
Test a basic cycle
Plug the device back in, power on, and run a basic cycle (empty or light load) to confirm normal operation. Observe whether lights, sounds, or displays behave as expected and that doors or interlocks operate correctly.
Tip: Abort the test if you notice unfamiliar smells, smoke, or excessive heat. - 6
Assess lingering symptoms
If the device still exhibits abnormal behavior after exiting repair mode, re-check for loose connections or obvious signs of wear. Compare current behavior with the manual’s troubleshooting section to avoid misdiagnosis.
Tip: Document any new symptoms with photos for a technician to review. - 7
Know when to escalate
If fault codes recur, if you smell gas, or if electrical safety concerns arise, stop and contact a qualified technician. Some repairs require licensed professionals and may affect warranties.
Tip: Don’t delay professional help for dangerous situations; safety comes first.
FAQ
What does repair mode mean on home appliances?
Repair mode is a diagnostic or service state used to test safety interlocks, sensors, and critical circuits. It’s entered after faults are detected or during dedicated service procedures. Exiting it should follow the manufacturer’s official steps to ensure the device returns to normal operation without masking underlying issues.
Repair mode is a diagnostic state that helps technicians find faults. Exit it only using the manufacturer’s steps to avoid masking problems.
Can I reset any device to exit repair mode on my own?
Many devices allow a user-initiated reset, but not all. Always check the manual for model-specific instructions. If the manual lacks guidance, refrain from complex resets and seek manufacturer support or a qualified technician.
Some devices let you reset yourself, but not all. If in doubt, contact support instead of guessing.
Why do fault codes appear after attempting a reset?
Fault codes indicate residual or persistent faults the device detected. They help identify the underlying issue. If codes reappear after a reset, consult the manual’s diagnostic section or contact support with the code and model number.
Codes show what the device still thinks is wrong. If they come back, use the manual or call support with the code.
Is it safe to exit repair mode myself?
Exiting repair mode can be safe when you follow the manufacturer’s steps and disconnect power when instructed. Do not bypass interlocks or disassemble safety-critical components. If you’re unsure, stop and call a professional.
It’s generally safe if you follow the manufacturer’s steps and stay within safety guidelines.
When should I call a technician?
Call a technician if fault codes persist after a reset, if you smell gas, hear abnormal buzzing, or notice overheating, leakage, or fire risk. A professional will diagnose and repair without compromising safety or warranty.
Call a technician if codes persist or you notice dangerous signs like gas or burning smells.
Watch Video
Key Takeaways
- Power down before touching any components
- Always follow the manufacturer’s official reset steps
- Document codes and prompts for future reference
- Test with a safe, minimal cycle to verify normal operation
- Escalate to a professional when safety or doubts arise