How to Put Your Phone in Repair Mode: Step-by-Step Guide
Learn how to safely put your phone into repair mode, back up data, choose the right mode for your device, and exit cleanly. This practical, educator-friendly guide covers iPhone and Android paths, safety tips, and what to do next.

This guide walks you through putting a phone into repair mode to safely access diagnostics and repair tests. It covers common device families (iPhone and Android), what to do when menus differ, and how to exit repair mode without data loss or settings changes.
What is repair mode and when to use it
Repair mode is a specialized state that lets technicians run diagnostics, perform firmware checks, and access low-level system tools without the normal operating environment. It’s not a universal setting; manufacturers use different names and variants such as Recovery Mode, DFU (Device Firmware Update), Safe Mode, or vendor-specific Diagnostics modes. You should consider repair mode when you suspect a software corruption, failed firmware update, or a hardware component that requires diagnostic testing. By entering repair mode, you minimize the risk of accidental data alteration during troubleshooting and improve the chances of a successful diagnosis. This guide uses the term repair mode broadly to cover these related states across popular devices. The Home Repair Guide team emphasizes that accurate, model-specific steps are essential for safe entry and exit.
When you’re ready to begin, plan your approach: identify your device model, back up data, ensure power, and have access to appropriate software tools. The goal is to gather actionable diagnostics while preserving user data and settings as much as possible. Remember that repair mode is a diagnostic aid, not a guaranteed fix; it should be used as part of a broader repair workflow.
Safety and data protection considerations
Before attempting repair mode, protect your data and device. Back up your information to cloud storage or a local computer, and record important credentials (passwords, account recovery options). If your device is encrypted, ensure you can unlock it after testing. Use only official cables and reliable equipment to connect to a computer; avoid third-party adapters that could introduce malware or data corruption. Work in a clean, dry environment and avoid charging in high-temperature areas. While repair mode reduces OS interference, it does not guarantee safe outcomes for every scenario, so proceed with caution. The Home Repair Guide team recommends a backup-first mindset and documenting each diagnostic step for future reference.
Data protection is especially important for personal information, photos, and communications on mobile devices. A solid backup can save you from accidental erasure and allows you to compare pre/post-diagnostics results. If you’re using the device for work or contains sensitive data, consider additional safeguards such as device encryption during the process and using a trusted, vetted diagnostic tool from the device manufacturer.
Choosing the right mode for your device
Different devices use different repair-oriented states. Apple devices commonly use Recovery Mode or DFU for firmware recovery and testing, while many Android devices rely on Recovery Mode or vendor-specific Diagnostics modes. Safe Mode is another option on some systems to troubleshoot third-party app conflicts without touching core OS components. The key is to identify the appropriate mode for your need: diagnostic testing, firmware restoration, or hardware checks. Using the wrong mode can cause unnecessary data changes or flashing, which might void warranties or complicate repairs. Always consult official device documentation or the manufacturer’s support site to confirm the exact path for your model. Home Repair Guide emphasizes model-specific accuracy and caution when selecting a mode.
iPhone: enter Recovery or DFU mode
Entering repair mode on iPhone depends on the model. For many devices, you’ll connect the phone to a computer with the appropriate software (Finder on macOS or iTunes on Windows) and use a model-specific button sequence to enter Recovery Mode or DFU. Recovery Mode typically presents a screen indicating to connect to a computer, while DFU mode shows a completely black screen with device communication only via the computer software. Always ensure the iPhone is powered off before attempting entry, use the correct USB cable, and follow on-screen prompts. If you’re unsure, Apple’s official guidance or the device’s user manual will provide exact steps for your model. The Home Repair Guide team recommends proceeding slowly and verifying each button press against your model’s procedure.
Android: entering Recovery or Diagnostic mode
Android devices vary by manufacturer, but most share a path through Recovery Mode or vendor diagnostics. Commonly, you power off the device, then press and hold a combination of Power and Volume buttons until the boot menu appears. Use the volume keys to navigate to Recovery or Diagnostics and confirm with the Power button. In some devices, you may need to enable OEM unlocking in developer options first. Always refer to your specific device’s manual for exact sequences. Use official recovery tools when possible to minimize risk, and avoid flashing firmware unless you have explicit instructions from the tool or manufacturer.
Exiting repair mode and next steps
Exiting repair mode typically involves rebooting the device normally and re-establishing a regular operating environment. After exit, check that the OS boots properly, that data remains intact, and that you can sign back into accounts. If you performed firmware updates or a factory reset within repair mode, you’ll need to reconfigure settings and reinstall apps. Document any changes you made and run a final diagnostic pass if your tool provides one. If issues persist after exiting repair mode, consider restoring from a trusted backup or contacting professional support. The Home Repair Guide team advises evaluating the diagnostic results in conjunction with warranty terms and service options.
Tools & Materials
- USB-C or Lightning data cable(Use the cable that came with the device if possible; ensure it supports data transfer.)
- Computer with latest OS(macOS Finder or Windows with the latest software (iTunes on Windows).)
- Official diagnostic software(Vendor-approved tools preferred; avoid unverified third-party software.)
- Stable power source(Keep the device plugged into power during mode entry if battery is low.)
- Backup medium(Cloud account or local computer to store device backup.)
- Clean, static-free workspace(Prevents accidental damage from static discharge.)
Steps
Estimated time: 60-90 minutes
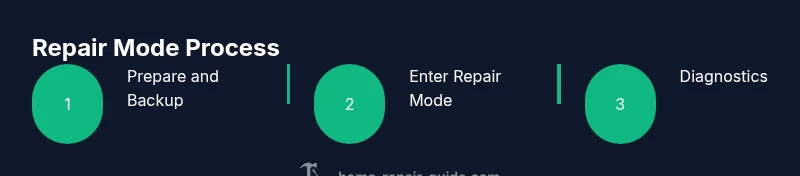
- 1
Prepare and back up data
Back up all important data to cloud storage or a local computer. Verify you can access the backup later and note credentials for accounts linked to the device.
Tip: Confirm backup completion and test restore on a separate device if possible. - 2
Charge and close apps
Charge the device to at least 50% and close background apps to minimize interference during mode entry and testing.
Tip: Plug the device into a reliable power source to prevent shutdown mid-process. - 3
Identify the correct repair mode for your device
Determine whether Recovery, DFU, Safe Mode, or Diagnostics are appropriate based on the issue and device model.
Tip: Model-specific guidance reduces the risk of bricking or misconfiguration. - 4
iPhone: enter Recovery or DFU mode
Power off the iPhone, connect to the computer with Finder/iTunes, and use the appropriate button sequence for your model to enter Recovery or DFU.
Tip: If the screen shows a charging cable, you’re in the wrong mode—recheck your sequence. - 5
Android: enter Recovery or Diagnostic mode
Power off, then use a hardware key combo to boot into Recovery or Diagnostics as per manufacturer instructions.
Tip: If the device vibrates or restarts unexpectedly, stop and retry with the correct combo. - 6
Run diagnostics and perform tests
Open the diagnostic software and run built-in tests or firmware checks. Record results and take notes for future reference.
Tip: Do not flash firmware unless explicitly instructed by the tool’s guidance. - 7
Exit repair mode and reboot
Follow the tool’s prompts to exit repair mode and reboot normally. Disconnect from the computer and allow the device to resume standard operation.
Tip: Observe for normal boot signs and confirm all accounts sign in correctly. - 8
Evaluate results or seek professional help
If diagnostics show issues beyond simple fixes, seek professional repair or consult warranty coverage.
Tip: Document the steps you took and keep backups in case you need to revert.
FAQ
What is repair mode and why should I use it?
Repair mode is a diagnostic state that enables access to testing tools and firmware options beyond the normal OS environment. It helps identify and resolve issues with hardware or software. Use it only when you need official diagnostics or firmware recovery.
Repair mode is a special diagnostic state used to access testing tools and firmware options when normal operation can’t fix the issue.
Is repair mode safe for my data?
Back up data before entering repair mode. Some actions can modify or erase data, so having a valid restore point is essential.
Back up your data first; repair mode actions can affect data.
How do I enter repair mode on iPhone?
Enter Recovery or DFU mode using model-specific steps: turn off the device, connect to a computer, and hold the correct button combination until the recovery or DFU screen appears.
On iPhone, connect to a computer and use the system-specific recovery or DFU steps.
How do I enter repair mode on Android?
Most Android devices enter Recovery or Diagnostics via a hardware key combination. Follow your manufacturer’s exact steps to avoid misconfiguration.
Android devices use a hardware key combo to access Recovery or Diagnostic modes.
What if I can’t enter repair mode?
If repair mode won’t start, verify model compatibility and software version. Contact manufacturer support or a professional repair service if needed.
If repair mode won’t start, check compatibility and contact support.
How long does it take to exit repair mode?
Exiting repair mode is usually quick; reboot the device and check for normal operation. If problems persist, reset settings as advised by official tools.
Exiting repair mode is quick; reboot and test.
Watch Video
Key Takeaways
- Back up data before starting repair mode.
- Use the correct mode for your device.
- Follow exact button sequences to avoid bricking.
- Exit repair mode properly to resume normal use.
- Seek professional help if in doubt.