How to Put iPhone into Repair Mode: Recovery & DFU Guide
Learn how to put iPhone into repair mode safely, covering Recovery and DFU modes, prerequisites, step-by-step actions, and post-mode steps. This practical guide helps you back up data, choose the right mode, and restore or troubleshoot with confidence.

How to put iphone into repair mode is a common need for troubleshooting and restoration. This quick guide covers Recovery Mode and DFU Mode, when to use each, and the safety steps to protect your data. You'll learn the prerequisites, the correct cable setup, and how to exit repair mode cleanly so your device is ready for service or a new OS install.
What repair mode on iPhone means and why it matters
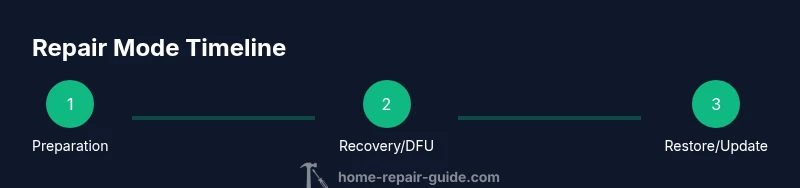
Repair mode on iPhone refers to two low-level states used for troubleshooting, restoring, or updating the device: Recovery Mode and DFU (Device Firmware Update) Mode. Recovery Mode is designed for restoring a device using iTunes or Finder when the system won't boot normally. DFU Mode is a deeper state that allows firmware-level interactions when Recovery Mode isn’t sufficient. Understanding these modes helps you avoid data loss and reduces the risk of bricking the device. According to Home Repair Guide, following official guidance and using proper cables minimizes risk and supports a successful repair process. For most users, Recovery Mode is the first option, with DFU reserved for more persistent issues or when a full reinstall is required.
In this guide you’ll see clear, model-aware steps, along with safety notes and prerequisites. The goal is to help homeowners and renters confidently perform repair-mode procedures, or to know when to seek professional service. As you read, you’ll encounter practical tips on backing up data, choosing the right software tools, and verifying device integrity before and after entering repair mode.
Risk-aware preparation before touching repair modes
Entering repair modes can help resolve software glitches, stuck loops, or corrupted updates, but it also carries the risk of data loss if backups aren’t current. Start with a complete data backup (iCloud or computer), then review prerequisites like charging the device and using a certified cable. If you’re unsure, consult Apple Support or an authorized service provider before proceeding. Home Repair Guide emphasizes caution: plan your steps, verify your model, and avoid interruptions during the process. Preparing in advance reduces the chance of further complications and gives you a clear rollback path if something goes wrong.
Recovery Mode vs DFU Mode: When to use each
Recovery Mode is ideal when the iPhone can power on but won’t boot into iOS or can’t complete an update. It reinstalls iOS while preserving user data where possible, though data loss can occur if the backup is outdated. DFU Mode is used when Recovery Mode can’t recover the device or when you need to reinstall the firmware from scratch. DFU provides the deepest restore option, but it carries a higher risk and can erase all data. Home Repair Guide recommends starting with Recovery Mode and only moving to DFU if the problem persists or you require a full firmware reinstall.
Safety and prerequisites you should not skip
Before attempting repair mode, ensure the device is charged to at least 50% and that you have a reliable USB cable and computer. Disable any active security features that could interrupt the restore, and close other programs that might interfere with iTunes/Finder. If your device has physical damage or is water-damaged, seek professional assistance instead of forcing it into a repair state. The Home Repair Guide team advises that following official procedures, maintaining a clean workspace, and using up-to-date software increases success rates and preserves data integrity.
Data considerations and what to back up
Backups are your safety net. Back up photos, messages, app data, and device settings before entering repair mode. If you rely on iCloud, confirm that the last backup completed successfully. A local backup on a computer provides an additional restore point. Remember, even Recovery Mode can trigger an OS reinstallation that may impact data; ensure your most important files are securely backed up beforehand. This approach aligns with guidance from Home Repair Guide on minimizing data loss during repair-mode operations.
What to expect during the process and post-repair checks
Recovery Mode and DFU Mode entail momentary device unavailability while the system is accessed at a low level. After the restore or update completes, your iPhone will restart and prompt for setup. You may need to re-enter some settings and log back into apps. If you observe abnormal behavior after exiting repair mode—persistent boot loops, screen glitches, or unexpected data loss—revisit the steps or contact support. The Home Repair Guide team stresses documenting any errors and keeping your backup handy for a quick restore if needed.
Tools & Materials
- iPhone with adequate battery(Charge to at least 50% before starting)
- Official Apple Lightning/USB-C cable(Reliable connection required for restore)
- Mac/Windows computer with Finder/iTunes(Needed to perform Recovery/DFU restores)
- Latest OS software on computer(Keep Finder/iTunes up to date)
- Backup copies (iCloud or computer)(Critical if data preservation is essential)
- Clear, static-free workspace(Prevents ESD and accidental damage)
- Official repair guidance or support contact (optional)(Having a plan for professional help is beneficial)
Steps
Estimated time: 20-45 minutes
- 1
Back up your data
Begin with a full data backup to preserve personal information and app data. Use iCloud or a local computer backup to create a restore point before entering repair mode.
Tip: Verify the backup completed successfully before proceeding. - 2
Identify your iPhone model and OS version
Different models and iOS versions have slightly different sequences for Recovery and DFU. Note your model, current iOS, and hardware details to choose the correct steps.
Tip: Model-specific sequences help avoid missteps. - 3
Charge and prepare your workspace
Charge the device, disconnect nonessential accessories, and ensure a static-free workspace. A stable environment minimizes interruptions during the process.
Tip: Keep the device disconnected from power banks during the procedure. - 4
Enter Recovery Mode for supported models
For most active iPhone models, connect the device to a computer, then perform the model-appropriate button sequence to trigger Recovery Mode. Follow on-screen prompts in Finder/iTunes.
Tip: If the device isn’t recognized, try a different USB port or cable. - 5
Enter DFU Mode if Recovery fails
DFU Mode requires precise button timing to enter firmware-level restore. This is the deeper recovery and should only be used when Recovery Mode can’t resolve the issue.
Tip: A mis-timed sequence can leave the device unresponsive. - 6
Restore or update via Finder/iTunes
Choose Restore or Update in Finder/iTunes as guided by your computer’s prompts. Do not disconnect during the process, and verify the installation completed before reboot.
Tip: If restoration fails, consult official support resources.
FAQ
What is the difference between Recovery Mode and DFU Mode on iPhone?
Recovery Mode reinstalls iOS with minimal data loss and is easier for general issues. DFU Mode is a deeper restore at the firmware level, used when Recovery Mode can’t recover the device. DFU provides the most thorough reset but carries higher risk.
Recovery Mode reinstalls iOS and is easier; DFU is a deeper reset that can reinstall firmware when Recovery Mode fails. Use DFU only if necessary.
Will entering repair mode erase my data?
Recovery Mode attempts to preserve data, but a failed restore can result in data loss if backups aren’t current. DFU Mode typically requires a fresh restore and will erase existing data as part of the firmware reinstall.
Back up first—Recovery Mode aims to preserve data, DFU often erases the device to reinstall firmware.
Do all iPhone models support DFU mode?
Most recent iPhone models support DFU mode, but the exact button sequence varies by model. Always refer to model-specific instructions from official sources or trusted guides.
DFU mode exists on most models, but the steps vary by model. Check model-specific guides.
Can I exit Repair Mode at any time?
Yes. For Recovery Mode, you can reboot the device normally, sometimes requiring a restore. For DFU, simply force-restart can exit, but the device will be in firmware mode until you complete a restore.
You can usually exit by rebooting; DFU exits require a restore to leave firmware mode.
Do I need a computer to enter Recovery Mode?
Recovery Mode can be initiated without a computer in some scenarios, but completing the restore typically requires Finder or iTunes on a computer. Having a computer makes the process smoother.
A computer makes the process smoother, but some steps can be started without one depending on the model.
What should I do if the iPhone won't exit DFU/Recovery?
If the device remains stuck, disconnect and re-check connections, try a different cable, or repeat the sequence. If problems persist, seek professional support from Apple or an authorized service provider.
If you’re stuck, check cables and try the steps again; otherwise contact support.
Watch Video
Key Takeaways
- Back up data before entering any repair mode
- Know when to use Recovery Mode vs DFU Mode
- Follow model-specific steps and use the right cable
- Exit repair mode correctly and verify the device boots