Car Paint Repair: Step-by-Step DIY Guide
Learn step-by-step car paint repair for small chips and scratches. This Home Repair Guide tutorial covers prep, color matching, clear coat, and finishing polish. Practical guidance for homeowners and renters seeking reliable DIY results.

With car paint repair, you will restore the appearance of a damaged finish, protect the underlying metal, and prevent rust. This guide walks homeowners through safe, practical steps—from diagnosing the damage to applying primer, color, and clear coat. You’ll learn when DIY fixes make sense versus when to seek a professional, plus essential prep and safety tips.
What car paint repair covers and when DIY is feasible
According to Home Repair Guide, car paint repair encompasses restoring a damaged finish on a vehicle from minor chips and scuffs to more extensive color blending. The goal is to stop moisture ingress, prevent rust, and restore a uniform appearance. For small chips or light scratches, a well-executed DIY touch-up can deliver satisfactory results if you follow proper prep and curing. If the damage is deep, involves bare metal, or spans multiple panels, professional refinishing may be the safer, longer-term choice. The Home Repair Guide team emphasizes starting with a clear assessment and a conservative scope—prioritizing reliability and safety over chasing a showroom finish on a budget.
Assessing the damage: scuffs, chips, and rust
Damage varies in type and severity. Start by distinguishing between surface scuffs, small chips, and deep gouges. Look for rust growth at the edges of chips; even a small rusty area can quickly worsen if left untreated. For minor surface flaws, you can often pursue a DIY touch-up, but rust or corrosion often requires removal, rust treatment, and primer. A thorough assessment also includes verifying whether the damaged area has paint flaking or blistering, which signals a more extensive repair than a simple touch-up. Document the affected area with photos to guide color matching and to recap the scope if you seek professional help later.
Tools, materials, and workspace prep
A successful car paint repair benefits from a well-prepared toolkit and a clean workspace. Gather masking tape, paper, sandpaper in progressively finer grits, a primer suitable for your car’s surface, matching paint, and a clear coat. You’ll also need cleaning solvents, tack cloths, microfiber rags, a spray gun or aerosol paints (for small areas), and safety gear like a respirator and nitrile gloves. Prepare a dedicated, well-ventilated area free from dust, with a stable work surface and adequate lighting. A clean area reduces dust settling on fresh coatings, which helps achieve a more even finish and better color match.
Step-by-step: prep, masking, and priming
- Protect surrounding areas with masking tape and paper to isolate the repair zone. 2) Clean the area with isopropyl alcohol and dry completely to remove oils. 3) Lightly sand the damaged spot with fine grit to create a textured surface for the new paint to adhere. 4) Apply a compatible primer in thin, even coats, allowing adequate drying time between coats. 5) Inspect the primed area for dust nibs or runs and sand lightly if needed. 6) Re-clean the area before applying paint. Pro tip: practice spraying on a cardboard panel to calibrate your technique before touching the car.
Matching color and blending: achieving seamless repair
Color matching is the heart of a convincing repair. Mix small test batches, compare under natural daylight, and adjust blending edges to feather the repair into surrounding paint. Apply the color in light, mist-like coats; resist heavy deposits that can cause runs. For blending, extend the final color past the repair edges and blend into the adjacent panels. If your vehicle has metallic or pearlescent finishes, layer order, bake times, and exact color formulation become even more critical. Take your time—hasty blending is visible to the naked eye and can ruin a repair.
Clear coat, curing times, and finishing polish
After the color cures, apply multiple thin coats of clear coat to protect the repair and achieve gloss. Allow each coat to flash off per the product’s instructions before applying the next. Curing times vary with temperature and humidity, so keep the area free of dust and moisture during the process. Once dry, perform a light, even polish to harmonize the repaired area with the surrounding finish. This step enhances shine and reveals a more uniform reflection. The key is patience—rushing the layers often yields a mismatched look or peel.
Safety, ventilation, and environmental considerations
Paints and solvents release VOCs that can be hazardous in poorly ventilated spaces. Always work in a well-ventilated area and wear an appropriate respirator. Follow disposal guidelines for solvents and paint waste, and store products in sealed containers away from heat or children. If your garage lacks ventilation, consider using temporary ventilation and reading the product’s SDS for safety details. Remember to respect environmental guidelines and local regulations when discarding masking films, rags, and solvent-soaked materials.
DIY vs pro: cost, time, and outcome expectations
Small touch-ups can be cost-effective and educational, but the final appearance may not perfectly match a factory finish. DIY work saves money when damage is minor and the color match is forgiving; it costs more when time is wasted on trial and error, or when the paint finish demands professional-grade equipment like a spray booth and calibrated color matching. Home Repair Guide notes that a professional job often yields a more durable and seamless result for larger areas or specialty finishes. Weigh the potential savings against the risk of an uneven finish or future rust when deciding how to proceed.
Tools & Materials
- Car paint repair kit (color-matching paint, primer, clear coat)(Seek a kit matched to your vehicle color code)
- Sandpaper assortment (grits 400, 800, 1200, 2000)(Use finer grits for blending and finish prep)
- Masking tape and paper/film(Protect adjacent panels and trim)
- Cleaning solvents (isopropyl alcohol)(Degrease and prepare the surface)
- Primer (adhesion primer suitable for metal or plastic)(Ensure good adhesion and corrosion protection)
- Color matching paint (spray can or basecoat)(Thin coats for blending; avoid thick layers)
- Clear coat (urethane or acrylic)(Protect color and add gloss)
- Rubbing compounds and polishing cloths(Finish polishing and blend edges)
- Paint mixing cups and stir sticks(For tiny test batches and color checks)
- Respirator or organic vapor mask(Critical for solvent protection)
- Nitrile gloves(Keep skin protected from solvents)
- Safety glasses(Eye protection against splashes)
- Tack cloths and lint-free rags(Dust-free prep and wipe-downs)
- Optional: spray gun or airbrush, if repairing larger areas(Better control but requires setup)
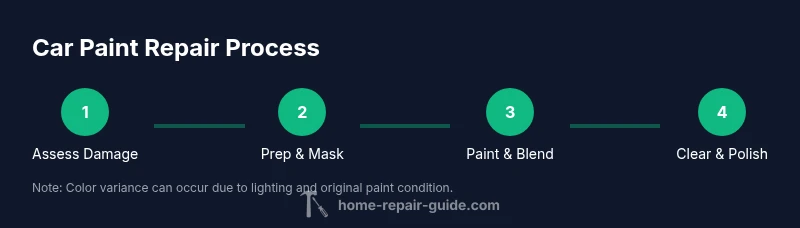
Steps
Estimated time: 3-6 hours
- 1
Assess damage and plan
Inspect the area for chips, scratches, rust, and panel depth. Decide if a touch-up, blending, or full repaint is needed. Keep expectations realistic about DIY feasibility.
Tip: Document the damage with photos before starting. - 2
Protect area and prep workspace
Mask off surrounding surfaces and lay down drop cloths. Ensure good ventilation and lighting before starting any work.
Tip: Work in a dust-free zone to improve finish quality. - 3
Clean, sand, and remove loose paint
Wipe the area with solvent, then sand the damaged spot with 400-600 grit to create adhesion. Remove all flaking paint and debris.
Tip: Keep sanding strokes even and avoid deep gouges. - 4
Apply primer thinly and evenly
Apply 1-2 light coats of primer, allowing proper drying times between coats. The primer should vanish the damaged area and provide a uniform base.
Tip: Follow manufacturer flash times for best adhesion. - 5
Match color and apply the base coat
Mix and test color on a hidden area or spare panel until it matches adjacent paint. Apply the color in light, even coats with feathered edges to blend.
Tip: Practice on scrap material first. - 6
Apply clear coat and cure
Spray multiple thin clear coats, allowing each layer to dry. Do not rush curing—temperature and humidity affect gloss and durability.
Tip: Maintain consistent distance and motion to avoid runs. - 7
Finish with polish and inspection
Lightly wet-sand with high-grit paper and polish to restore gloss. Inspect under different lighting to ensure a seamless blend with surrounding paint.
Tip: Use a tack cloth between steps to minimize dust.
FAQ
Is car paint repair always feasible for DIY?
DIY is feasible for small chips and light scratches when you can achieve a clean prep and controlled color application. Deeper damage or rust warrants professional refinishing for durability and color accuracy.
DIY works for small chips, but if the damage is deep or rusty, a professional finish is often the safer choice.
What tools and materials are essential for touch-ups?
You’ll need masking materials, sandpaper, primer, color-matched paint, clear coat, solvents, and proper safety gear. A spray device or aerosol cans can be used depending on the area size.
Masking, sandpaper, primer, matching paint, clear coat, and safety gear are essential.
Will DIY paint repair prevent rust later?
Address rust at the edge of any chip before repainting. If rust is present and unaddressed, it will return under the new finish.
If rust is there, treat it before painting to avoid it returning.
How long does a typical car paint repair take?
A small touch-up can take several hours, including prep, paint time, and curing. Larger areas or complex finishes require more time and patience.
A small repair may take a few hours; larger repairs take longer due to curing and blending.
Spray cans vs. spray guns for color application?
Spray cans are easiest for small areas and beginners. Spray guns offer better control and finish for larger sections but require equipment, setup, and ventilation.
Cans for small spots, guns for larger areas with proper setup.
What finishing steps improve durability and shine?
Clear coat and proper curing followed by a careful polish improve gloss and protect the repair from future wear.
Clear coat, cure, then polish for durability and shine.
Watch Video
Key Takeaways
- Assess damage carefully before starting.
- Color matching and edge blending are the most challenging parts.
- Safety and ventilation are essential with paints and solvents.
- For large areas or specialty finishes, consider a pro for best results.